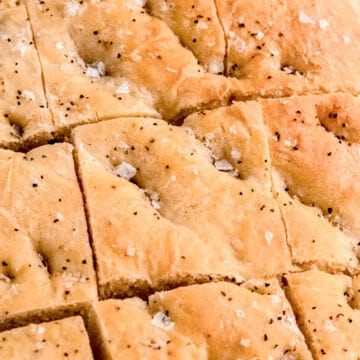
Easy Black Pepper Focaccia
Adapted from Gimme Some Oven. If you've been aching to try your hand at homemade bread but feel intimidated, this super simple recipe is an excellent place to start!
Equipment
Ingredients
- 1 ⅓ C (315 grams) Lukewarm Water between 105-115F
- 2 ½ teaspoon (17 grams)Honey or sugar
- 2 ¼ teaspoon (7 grams) Active Dry Yeast
- 3 ½ C (438 grams) AP Flour
- ¼ C (53 grams) Olive Oil plus more for drizzling; don't be shy!
- 2 ½ teaspoon (12 grams) Kosher Salt
- 1-2 tablespoon (10-20 grams) Flaky Sea Salt preferably Maldon, or to taste
- 2 teaspoon (5 grams) Black Pepper coarsely ground, divided
Instructions
- Mix yeast with lukewarm water (between 105-115F) and honey. Stir it together and wait 5-10 minutes. If your yeast is alive, you will begin to see a bubbly, foamy looking substance on the top of your mixture. It should also smell, for lack of a better word, yeasty and bread-like.NOTE: If there is no foam on the top of your mixture, DO NOT continue with the bread making process. Go out and get yourself some fresh yeast before continuing, or you'll end up with a solid brick rather than a delicious loaf.
- Add all purpose flour, olive oil, kosher salt, and ¾ teaspoon of black pepper to the mix. Set your stand mixer to knead on low speed for about 5 minutes.NOTE: The dough should begin to come off the side of the bowl easily during this process. If it is sticking to the bowl, add more flour about a tablespoon at a time.
- Cover the bowl with a clean towel and move to a warm, draft free place in your home. Allow dough to rise until doubled in size, about 60-90 minutes.
- Invert the mixing bowl and dump the risen dough into a 9 x 13 that you've drizzled with a few glugs of olive oil. Rub your hands with a bit of olive oil and shape the dough by stretching it out and pushing your fingers all the way through to the glass. When the dough is in a roughly even shape in the pan, cover it again and allow to rise a second time. It should double in size again, although this time should only take about 20 minutes. Preheat your oven to 400F during this second rise.
- When the dough has risen the second time, drizzle with several tablespoons of olive oil and sprinkle liberally with flaky salt (like Maldon) and the remaining black pepper.Pop in the preheated oven and bake until golden and cooked through, about 20-25 minutes. Remove from the oven and allow to cool for 5-10 minutes, then enjoy!
Notes
Expert Tips:
-
- Store your yeast in the freezer. Yeast is a living organism, and while it’ll stay pretty fresh in those little packets or jars, putting it on ice is an easy way to extend its shelf-life by a LOT. I’ve used frozen yeast with an expiration date over 6 months old, and it has worked beautifully. No matter how you store it, though, always make sure to proof it before adding to your dough.
-
- Temperature matters. When you’re proofing the yeast, the idea is to be Goldilocks. Too cold and the yeast is sluggish, too warm and you’ll kill it. You should be able to stick your finger in the water and feel warmth, but it shouldn’t be so warm as to make your skin turn pink.
-
- Watch the dough, not the clock. Whenever you read an approximate time window for allowing your bread to rise, remember: it’s just an approximation. Different conditions like temperature, humidity, and altitude will all affect how quickly your dough rises. I always recommend you take a “before” pic of your dough before letting it rise — this way you can compare the original to how far it’s risen.
-
- Use your hands. Seeing isn’t the only sense you can use to determine if your focaccia dough has risen enough. I like to use the middle knuckle of my index finger to poke the dough. If it pops right back (or mostly right back) into place quickly, I know it needs more time. If it stays indented, it means it has over-proofed. (If that happens, punch it down to de-gas, give it a few kneads, then start the rise again.) If it slowly pops back into place, it’s ready to go!
-
- Make some holes. To get the classic pock-marked focaccia top, make sure you press your fingers all the way through the dough until they touch the baking pan. This is your opportunity to stretch the dough into every last corner and edge, so don’t be shy.
-
- Use your oven as a proofing box. If your kitchen is cold or drafty, it can make proofing the dough take much longer. To speed up the process, you can easily make a cozy nest for it in your turned-off oven. First, make sure the oven is OFF. Second, arrange one of the racks on the bottom rung. Place a cake pan or heat-proof bowl on that bottom rung, then fill it halfway with boiling water. Pop your proofing dough pan on the middle rack, above the boiling water. Close the door, and voila! You have the perfect humidity and cozy temp for your dough to do its thing.
-
- Use a glass 9x13. When you’re first getting used to baking bread, it’s hard to know what stage your bread is at. I recommend using a glass baking pan so you can see the bottom and sides of your bread as they bake. You’re looking for an even, consistently golden brown interior. Once you’re more familiar with making bread from scratch, then you can feel free to experiment with different pans. Note that dark metal pans will tend to brown the bottoms much more quickly than glass, light metal, or ceramic-coated pans.
Nutrition
Calories: 185kcalCarbohydrates: 30gProtein: 5gFat: 5gSaturated Fat: 1gSodium: 873mgPotassium: 65mgFiber: 2gSugar: 1gVitamin A: 15IUVitamin C: 1mgCalcium: 8mgIron: 2mg
Tried this recipe?Let us know how it was!