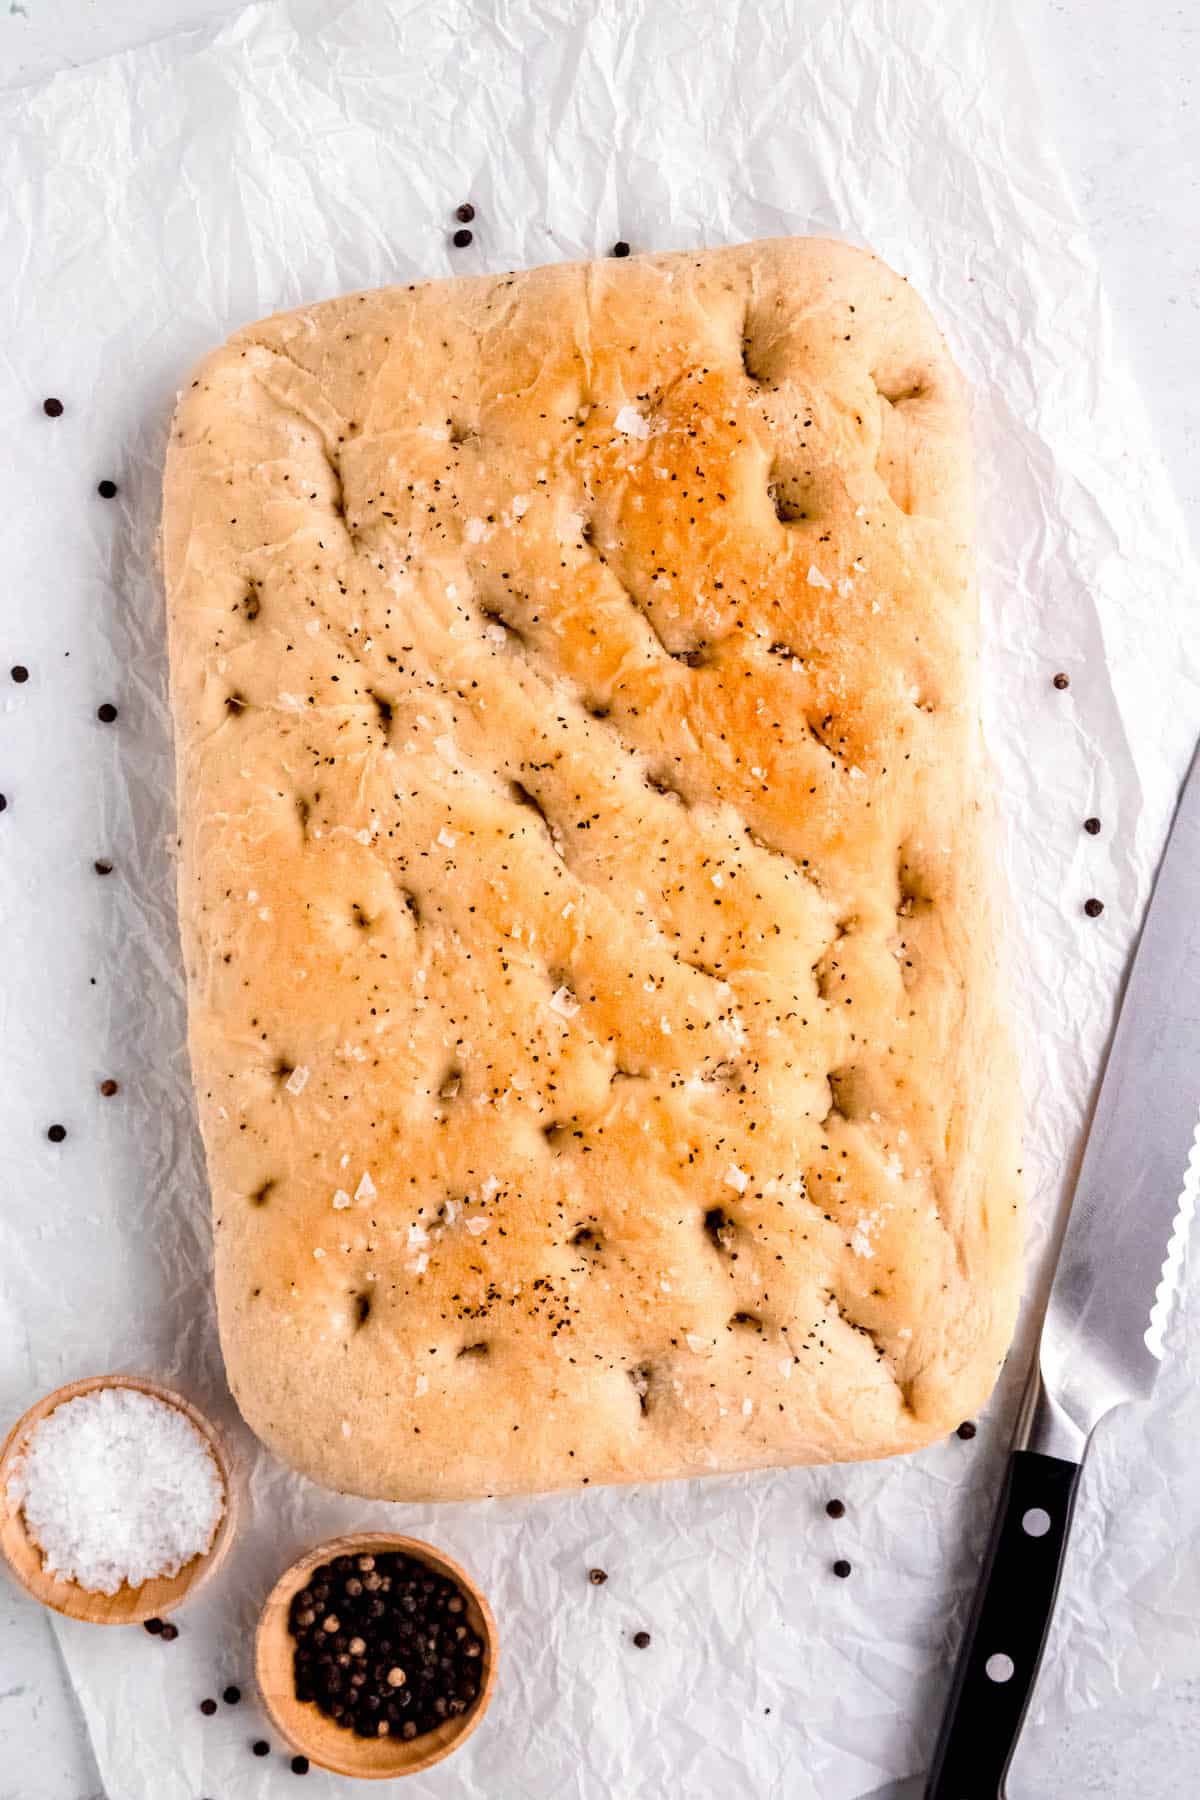
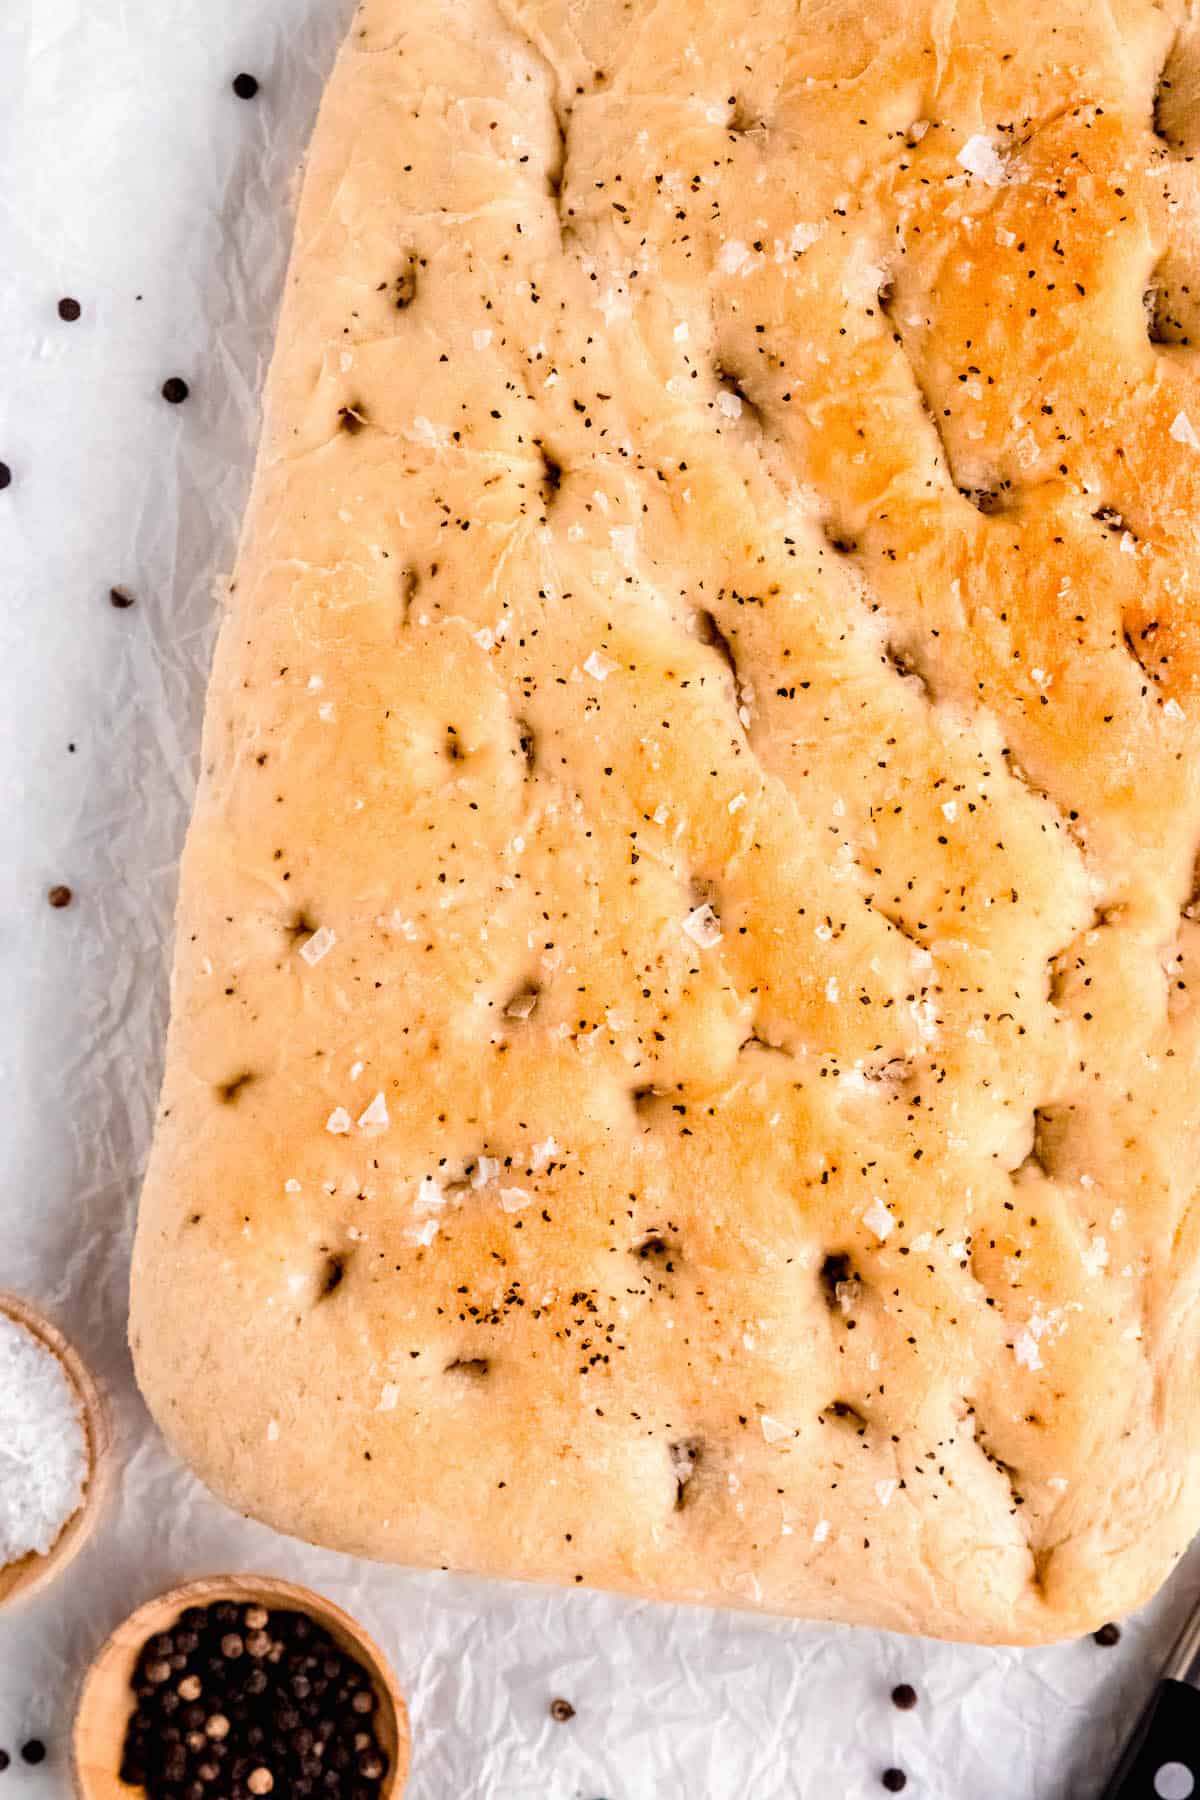
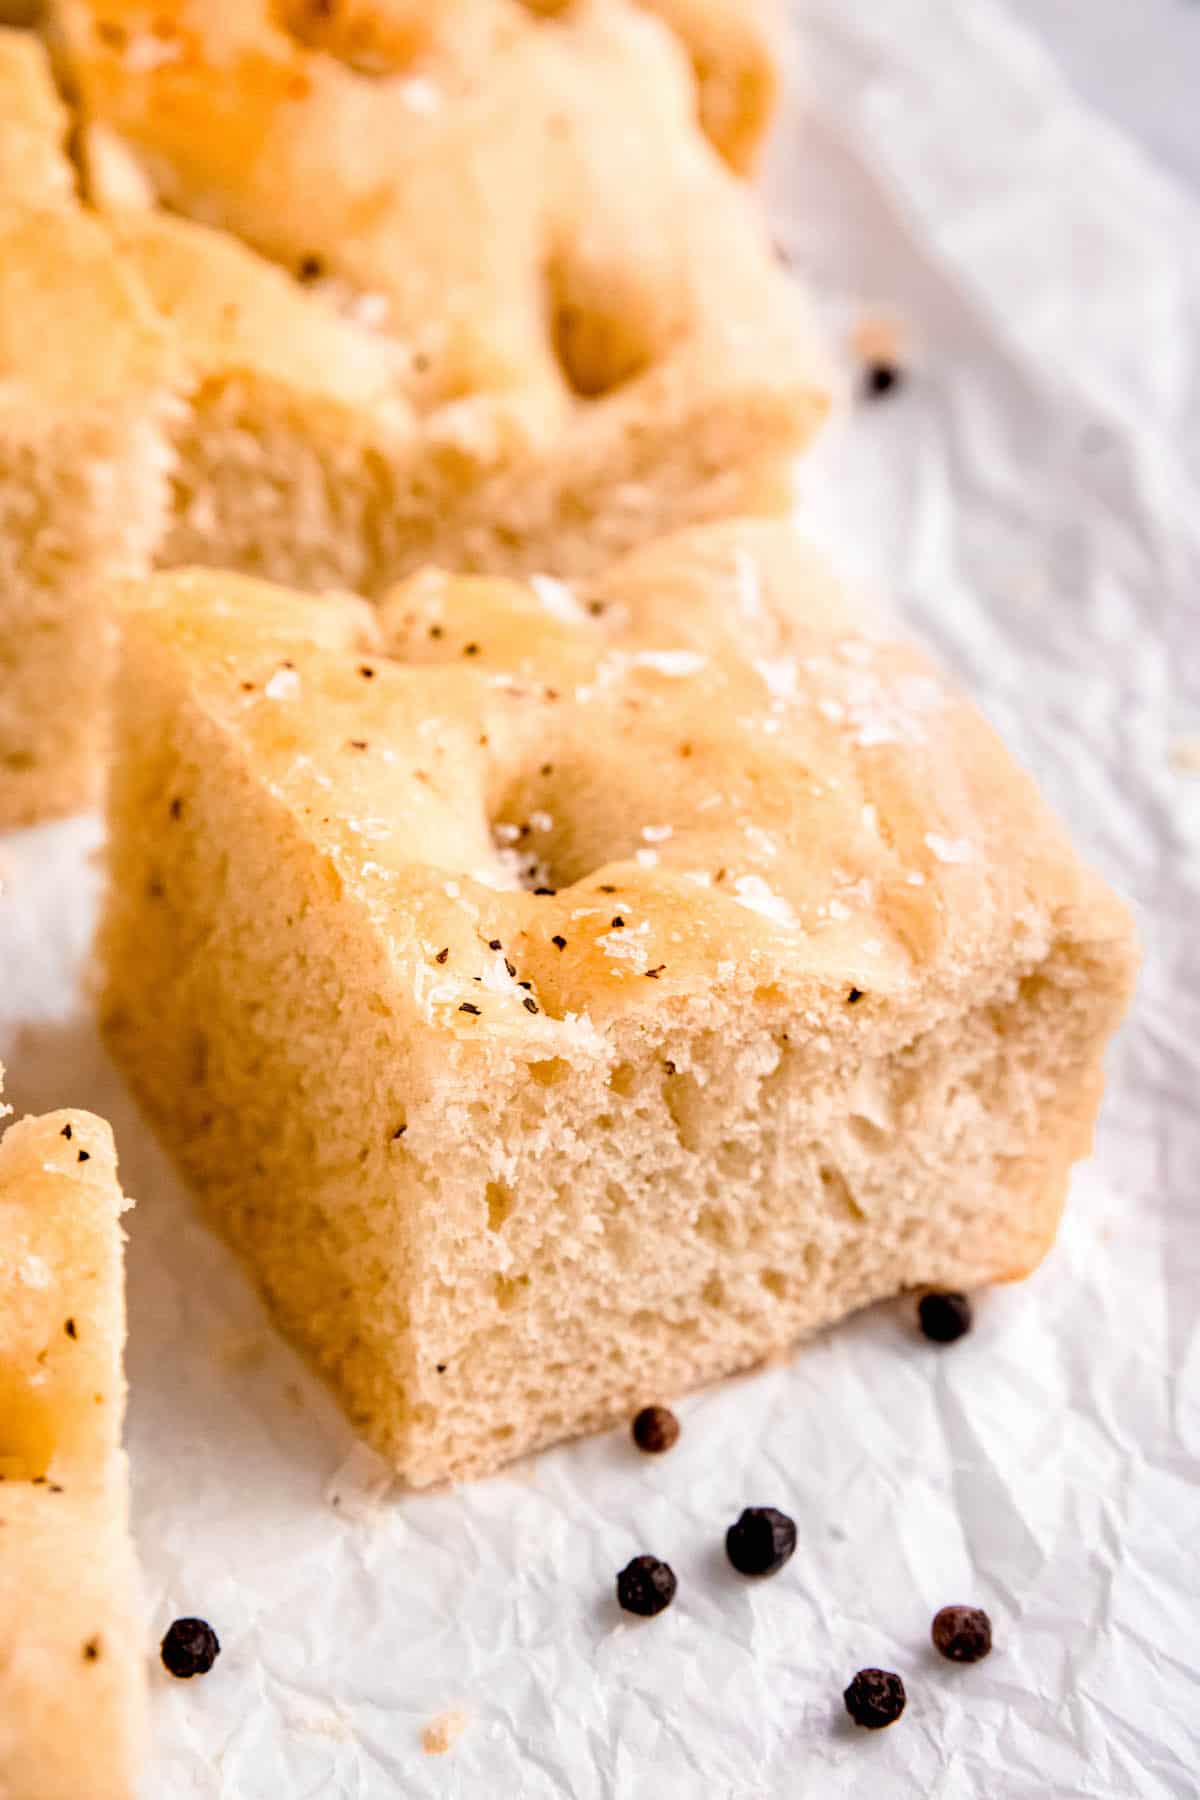
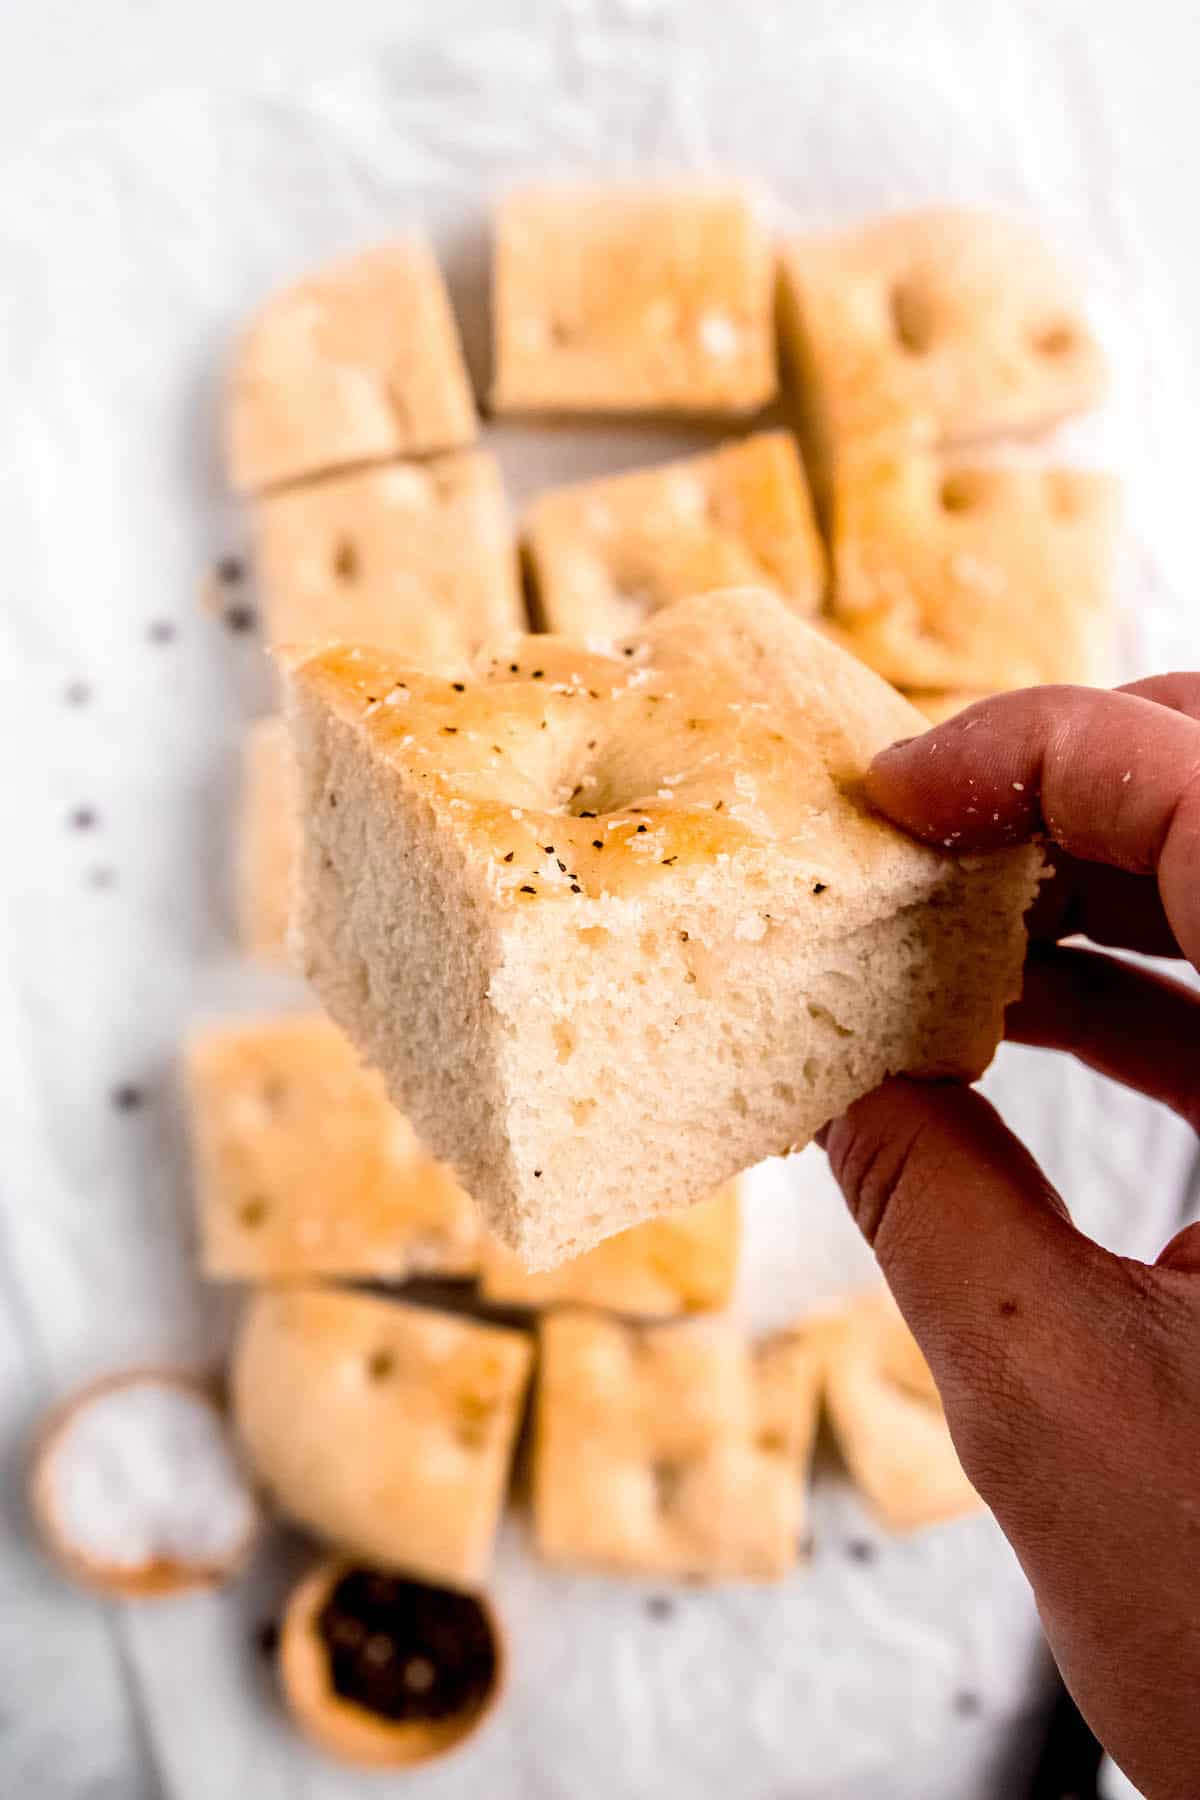
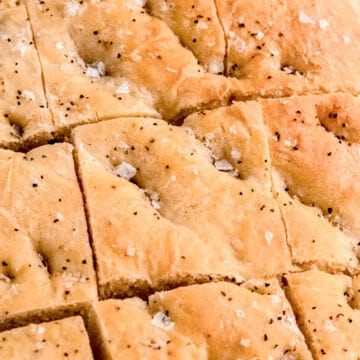
If you've been aching to try your hand at homemade bread but feel intimidated, this super simple recipe for Black Pepper Focaccia is an excellent place to start! Made with just a handful of pantry ingredients, this easy, fluffy focaccia recipe is a spot-on recreation of Panera’s famous loaf.
Some homemade bread recipes can get quite involved. In fact, the opening chapter of Tartine Bread offers a staggering 27 pages of instruction to make "Basic Country Bread." And that's without the "In Depth" analysis, which runs another 10 pages of just text!
Unless you're a dedicated kitchen nerd like me, that intensity is more than enough to send someone sprinting for the bread aisle. This easy focaccia recipe, on the other hand, is just 7 steps long and can be written in a single page of text.
If you’re new to bread-baking, this is the simple, foolproof recipe you need! In under 3 hours from when you start, your whole house will smell like a bakery and you’ll be ready to chow down on some seriously fluffy, deliciously carby goodness. Oh, and you just need 7 simple pantry staples to make it!
As a bonus, eating black pepper focaccia bread fresh from the oven is easily one of life’s greatest simple pleasures. Seriously. Do yourself a favor and make this easy bread recipe, tear off a hunk while it’s still warm and slather it in butter before gobbling it down. I promise your life will be better for it.
Jump to:
Why I Love This Black Pepper Focaccia Recipe
Whether you’re trying to recreate a Panera chicken focaccia sandwich at home or just want to add bread-making to your kitchen resume, this recipe has you covered. Aside from yielding the lightest, fluffiest, most deliciously peppery tray of homemade goodness, this focaccia recipe is also:
- Simply Made With 7 Ingredients - And they’re all pantry staples! If you have active dry yeast on hand, you almost certainly have everything else you need on hand.
- Foolproof - I’ve made this recipe dozens of times in at least 4 different kitchens with 4 different ovens, and it comes out beautifully every single time. It even worked at altitude when I made it for my brother in Boulder, CO!
- Versatile - I love the heat of black pepper, but you’re welcome to switch things up with the seasonings of your choice. Read on below for tons of ideas! You can also use the resulting focaccia for sandwiches or dinner rolls, croutons or crostini.
Ingredients and Equipment
This easy focaccia recipe requires just 7 ingredients (8 if you count water). Here's everything you need:
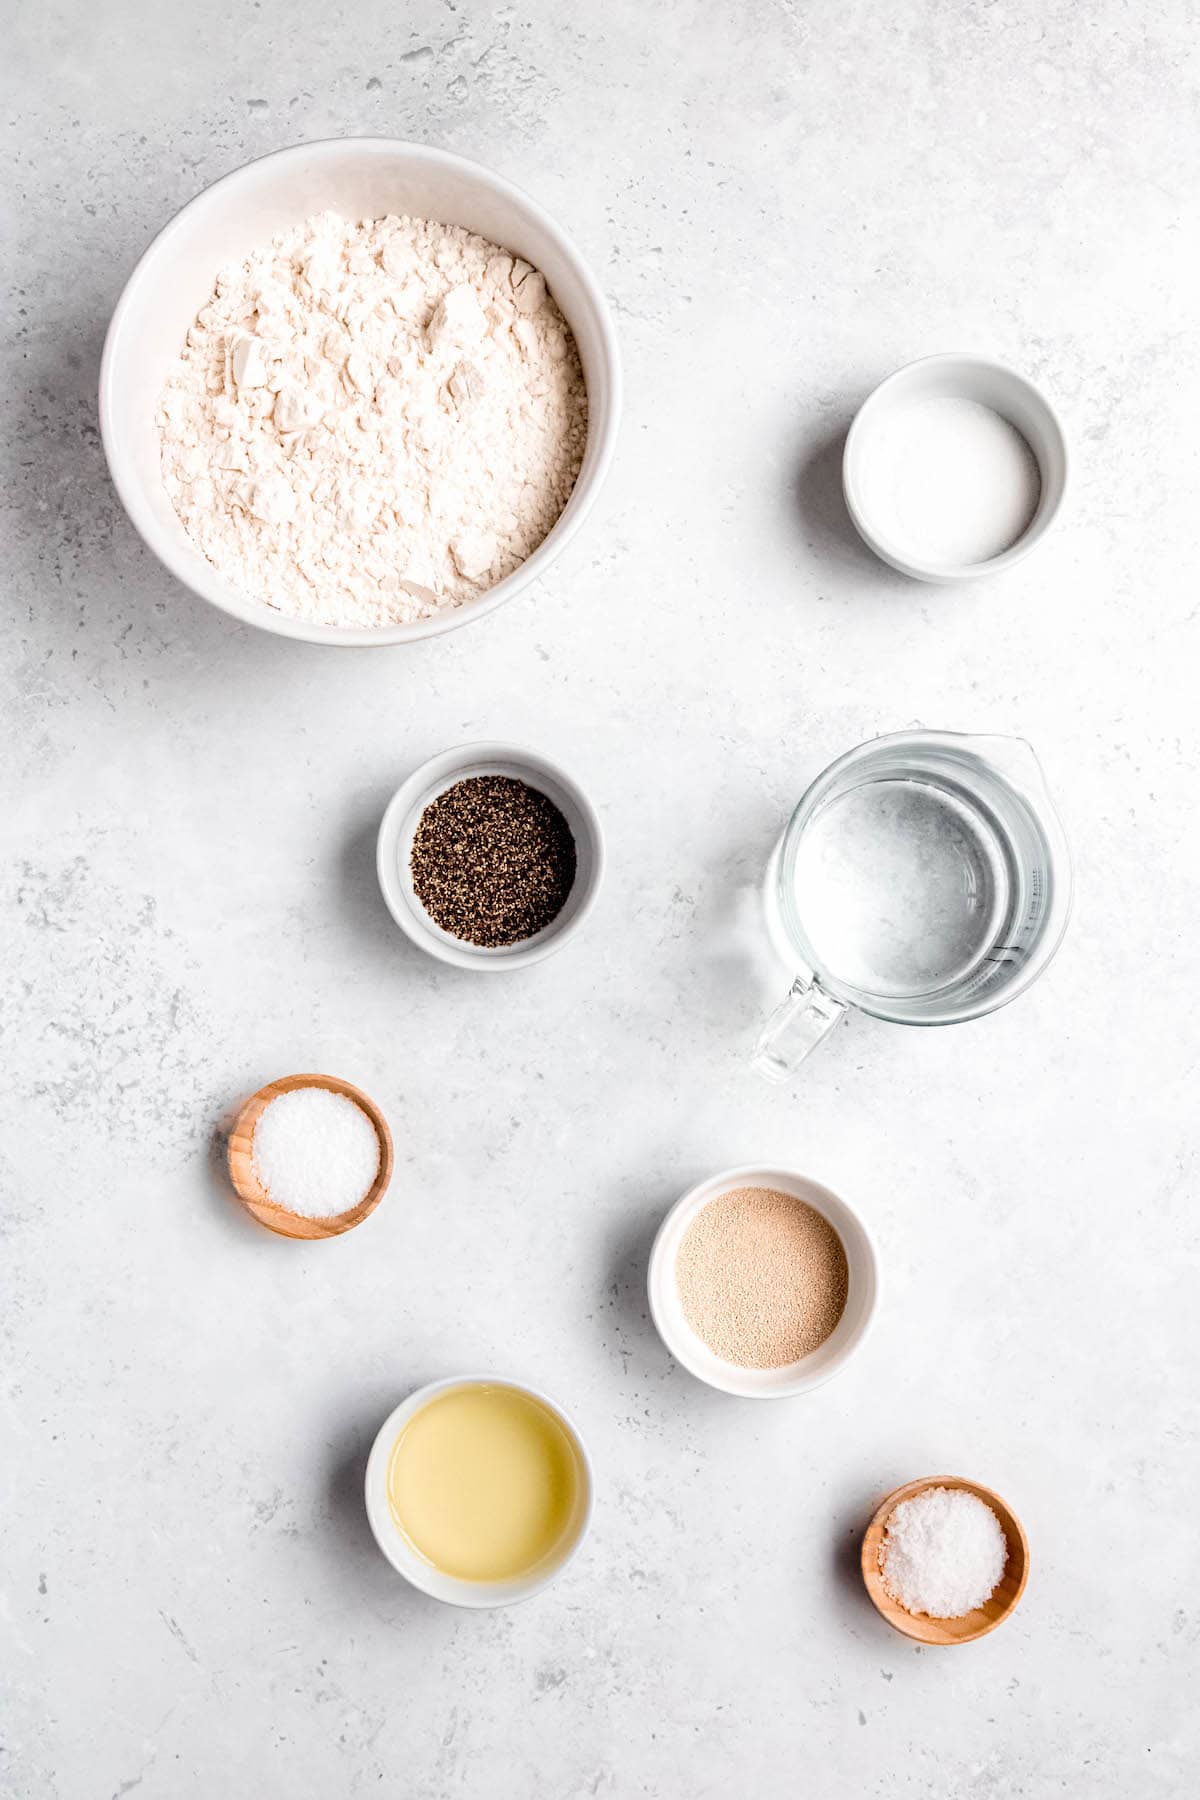
- Lukewarm Water - “Warm” is the operative word here. We’re looking for a temp between 105-115F. If you don’t have a thermometer, aim for about the temperature you’d want to make a baby’s bath.
- Honey - Adding a touch of sweetness to the proofing liquid gives your little yeasty beasties something to feed on. Feel free to swap in maple syrup, agave, or regular sugar.
- Active Dry Yeast - This is the kind of yeast that needs to be activated (or “proofed”) before adding to your dough. I personally always prefer to use active dry yeast because I get a visual signal that it’s alive before I start. That said, you’re welcome to use an equal amount of instant dry yeast and skip Step 1 if you like.
- All-Purpose Flour - Different brands of AP flour have varying levels of protein. White Lily is on the low end of the spectrum and will yield a softer loaf. That said, King Arthur (which runs on the high end of the spectrum) works beautifully, too. Feel free to experiment to find your favorite.
- Olive Oil - You’re welcome to use either regular or extra virgin olive oil here. Note that extra virgin will have a more intense flavor profile. If possible, opt for a peppery varietal to reinforce the black pepper notes.
- Kosher Salt - You can also use fine sea salt, but you’ll need to dial it back by about 50% volume. If you’re working in grams, the amount will stay the same.
- Black Pepper - Make sure you’re using freshly cracked pepper here; the pre-ground stuff just won’t cut it. I also recommend adjusting your grinder to a coarse grind for the best results.
- Flaky Sea Salt - Adding some Maldon or another variety of finishing salt on top of your focaccia not only adds delicious seasoning, but also gives it a bit of crunchy texture. YUM.
How to Make Black Pepper Focaccia
This easy recipe for Panera black pepper focaccia comes together in just a few simple steps:
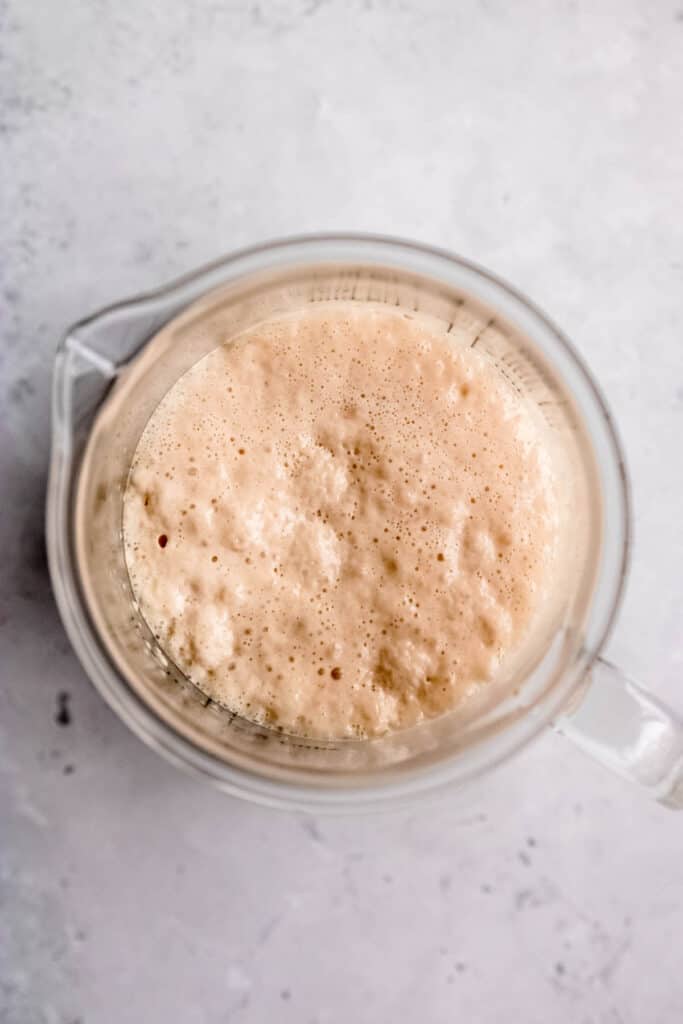
Step 1: Proof Yeast. Mix yeast with lukewarm water (between 105-115F) and honey. Stir it together and wait 5-10 minutes. If your yeast is alive, you will begin to see a bubbly, foamy looking substance on the top of your mixture. It should also smell, for lack of better words, yeasty and bread-like.
NOTE: If there is no foam on the top of your mixture, DO NOT continue with the bread-making process. Go out and get yourself some fresh yeast before continuing, or you'll end up with a solid brick rather than a delicious loaf.

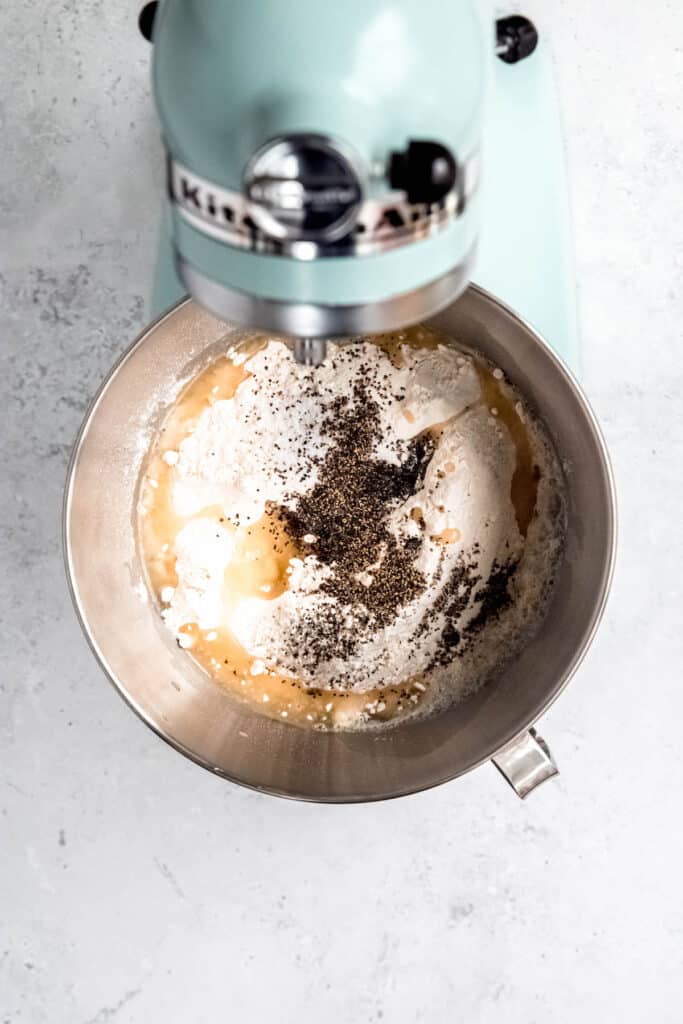
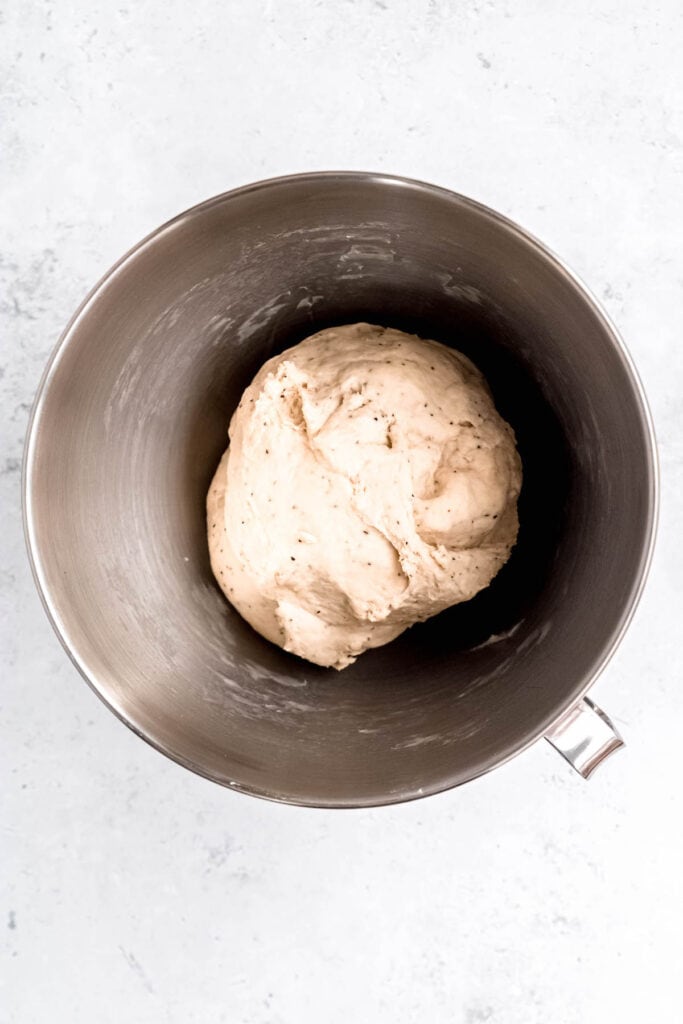
Step 2: Dry Ingredients. Add all-purpose flour, olive oil, kosher salt, and ¾ teaspoon of black pepper to the mix. Set your stand mixer to knead on low speed for about 5 minutes.
NOTE: The dough should begin to come off the side of the bowl easily during this process. If it is sticking to the bowl, add more flour about a tablespoon at a time.
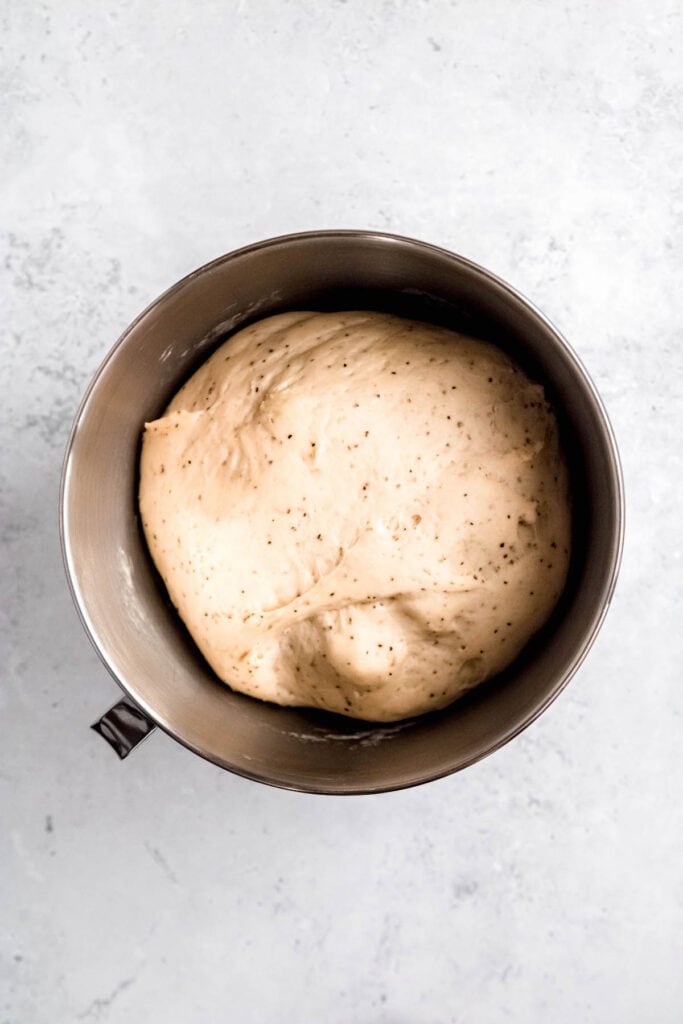
Step 3: First Proof. Cover the bowl with a clean towel and move to a warm, draft-free place in your home. Allow dough to rise until doubled in size, about 60-90 minutes. I suggest snapping a picture with your phone before covering the bowl so you have a visual point of reference for when it has doubled.
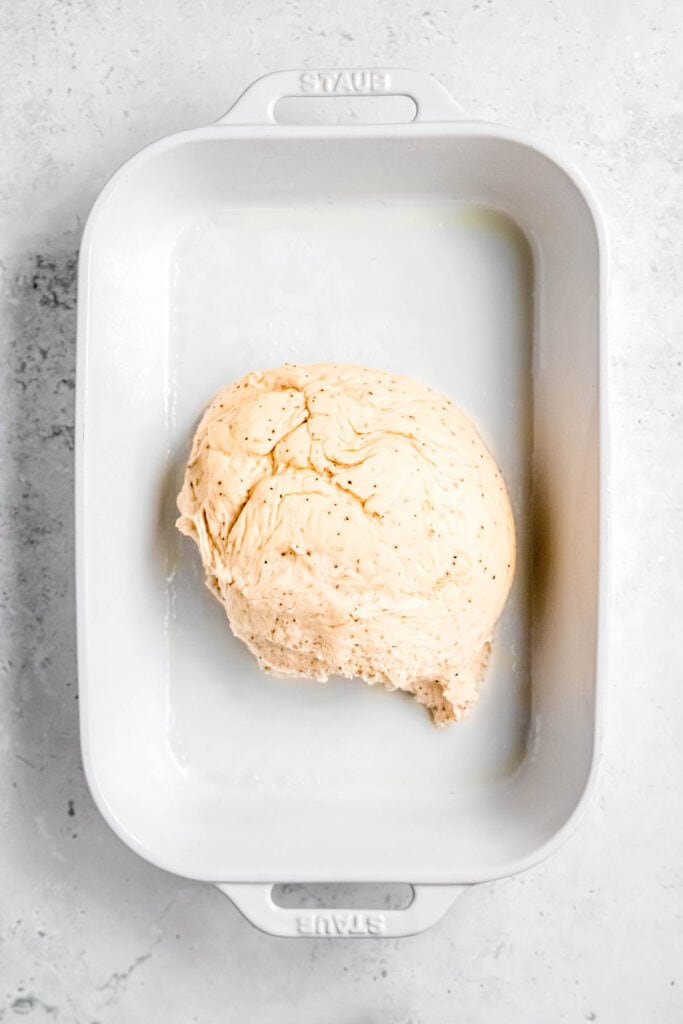
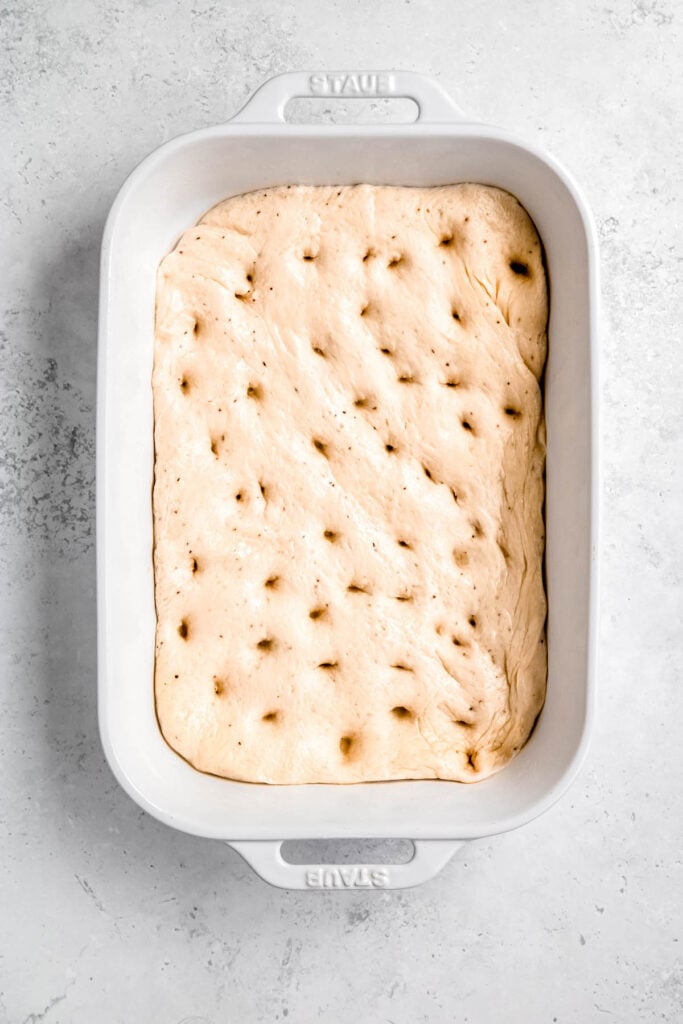
Step 4: Shape. Invert the mixing bowl and dump the risen dough into a 9 x 13 that you've drizzled with a few glugs of olive oil. Rub your hands with a bit of olive oil and shape the dough by stretching it out and pushing your fingers all the way through to the glass. Don’t be shy; focaccia likes to be man-handled a bit.
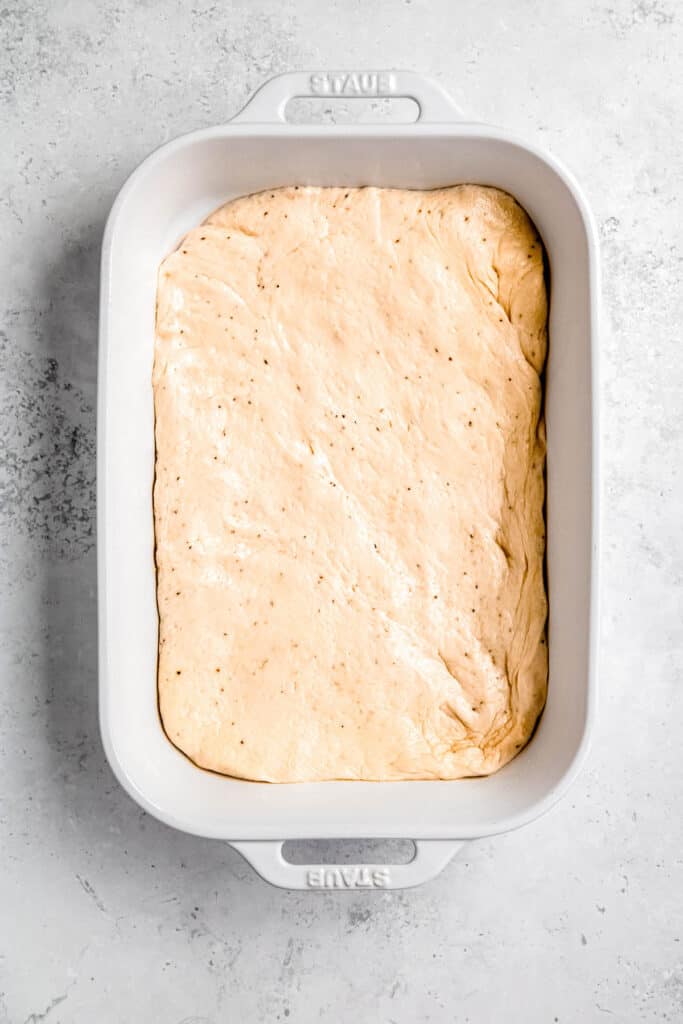
Step 5: Second Proof. When the dough is in a roughly even shape in the pan, cover it again and allow to rise a second time. It should double in size again, although this time should only take about 20 minutes. Preheat your oven to 400F during this second rise.
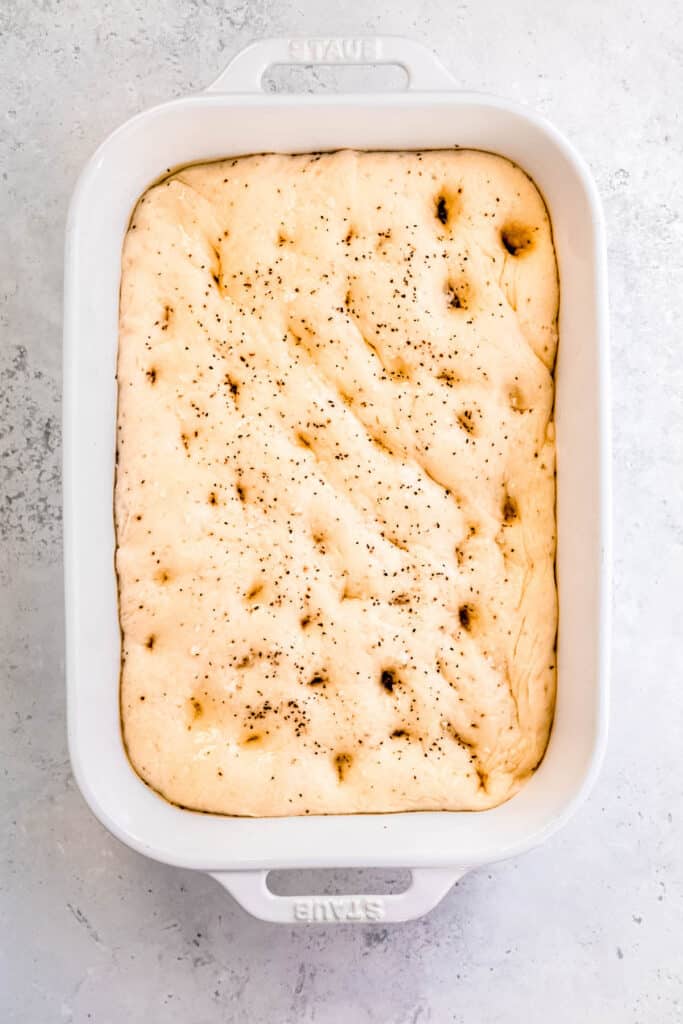
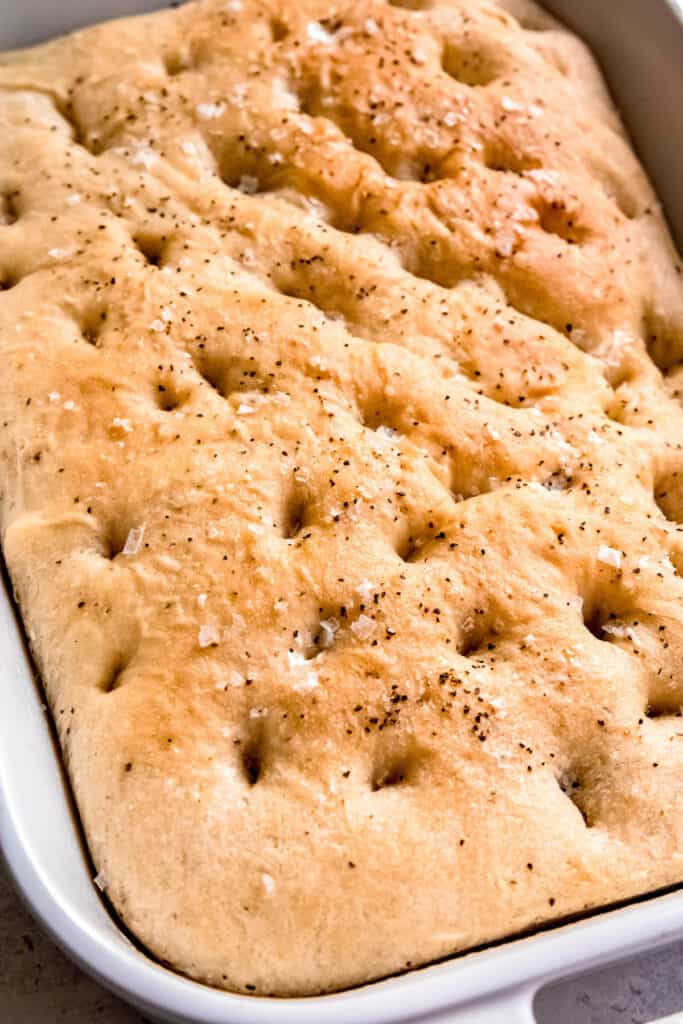
Step 6: Season. When the dough has risen the second time, drizzle with several tablespoons of olive oil and sprinkle liberally with flaky salt (like Maldon) and the remaining black pepper.
Step 7: Bake. Pop in the preheated oven and bake until golden and cooked through, about 20-25 minutes.
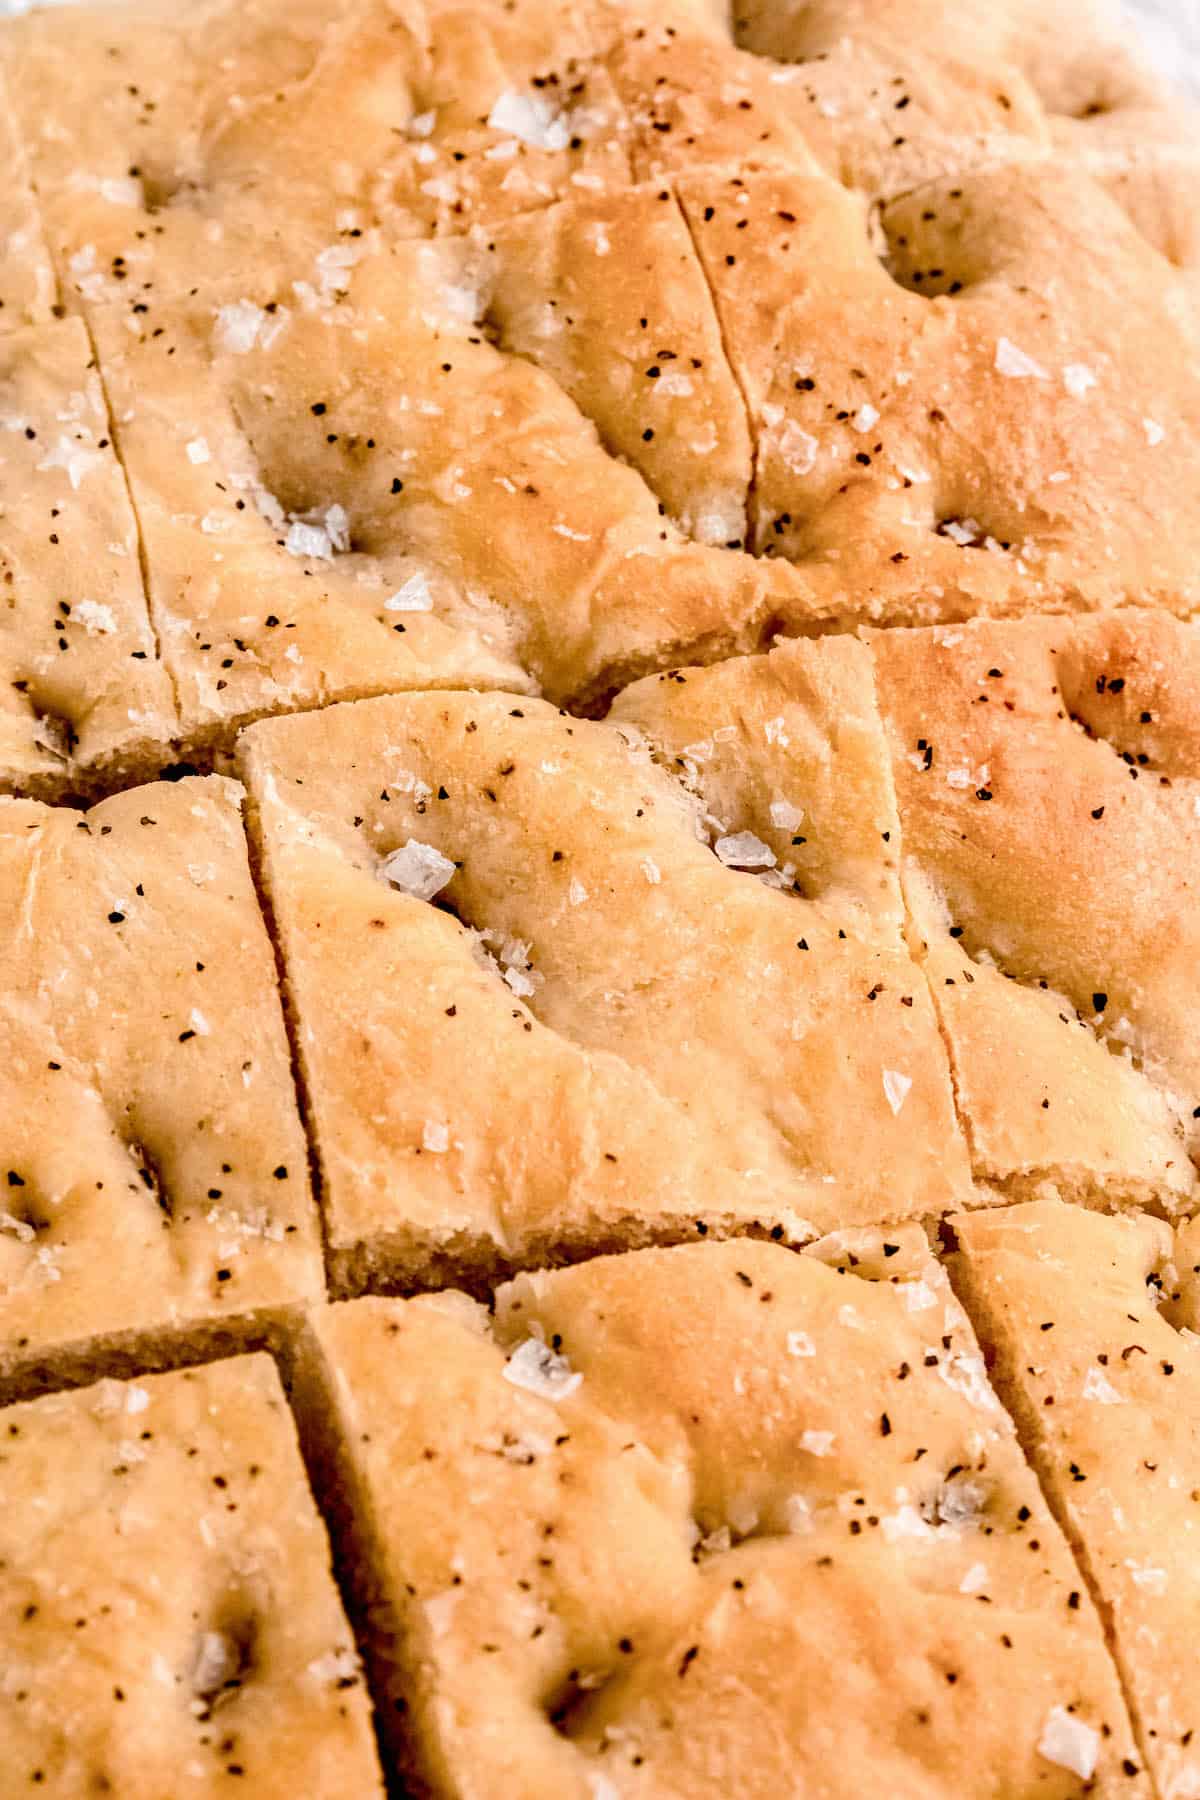
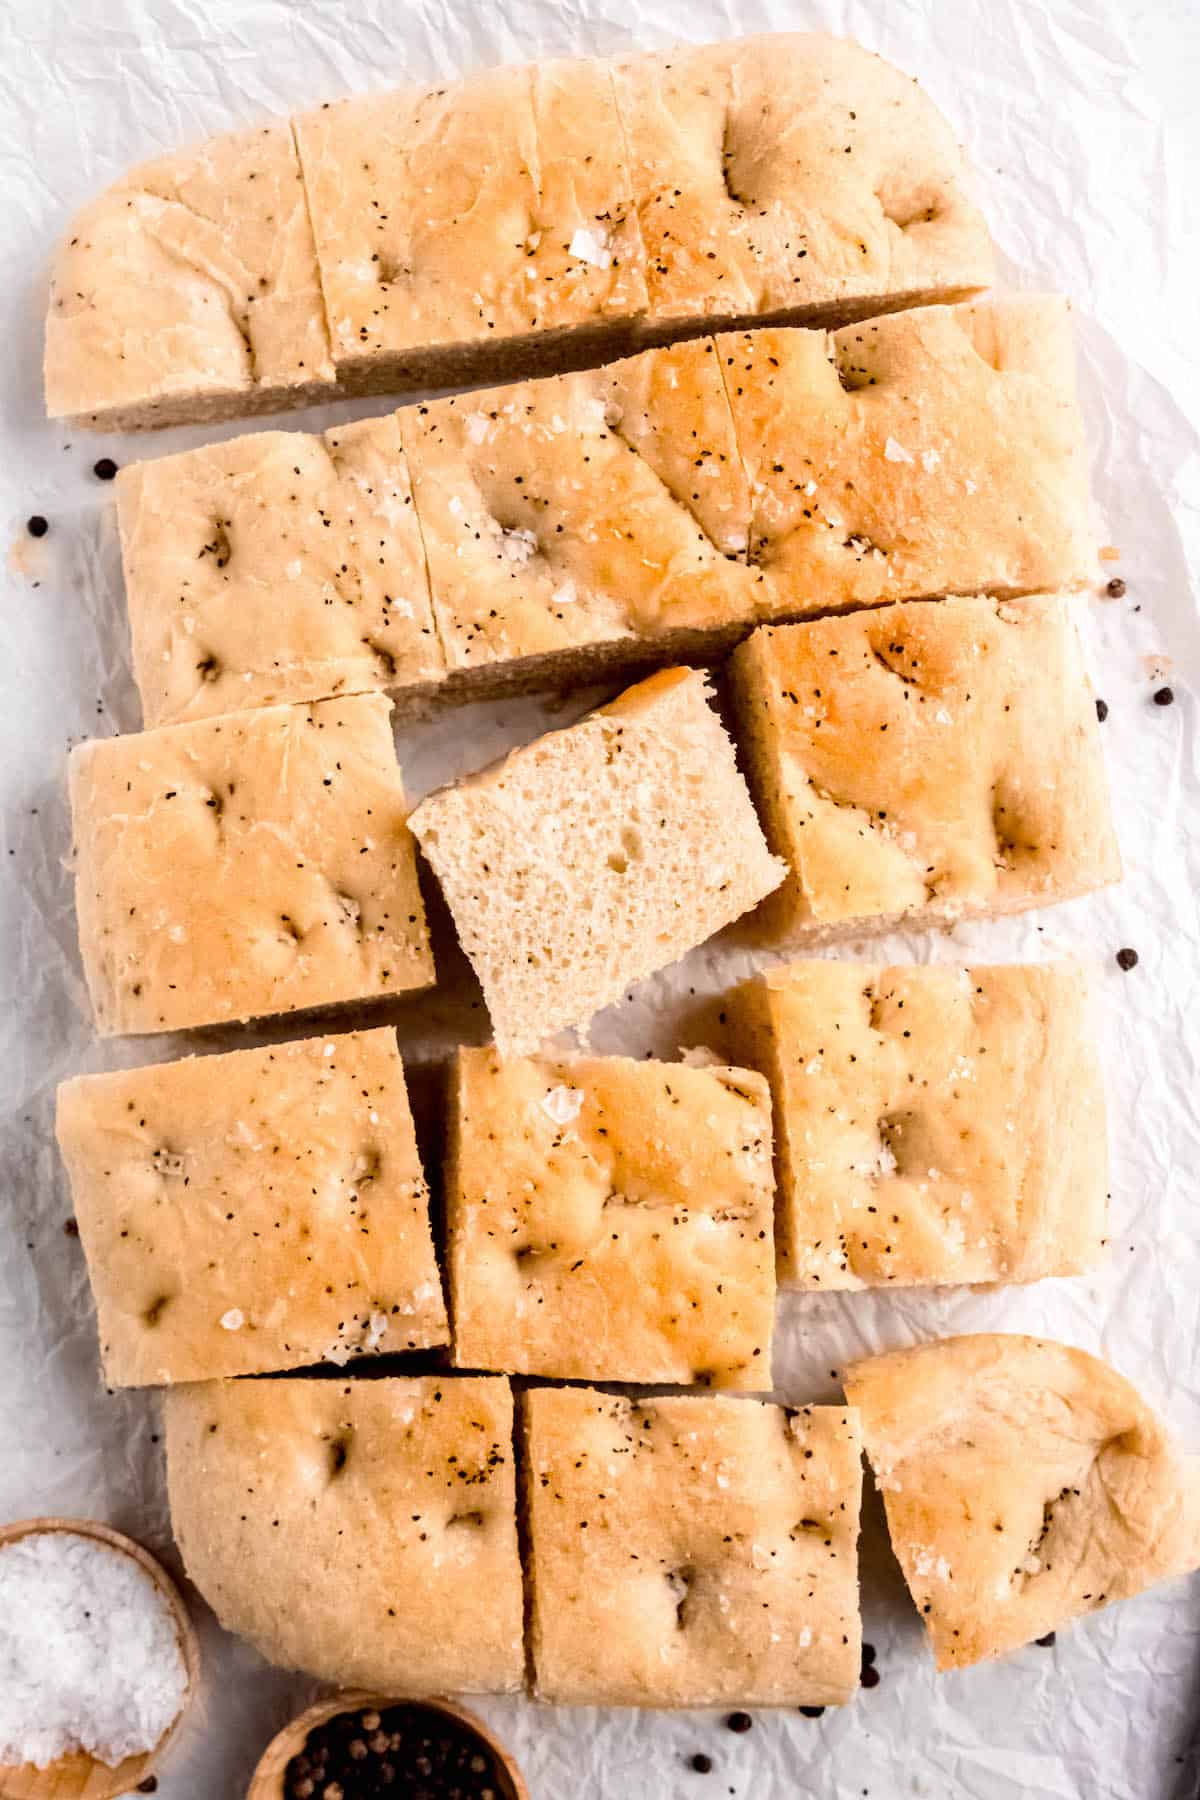
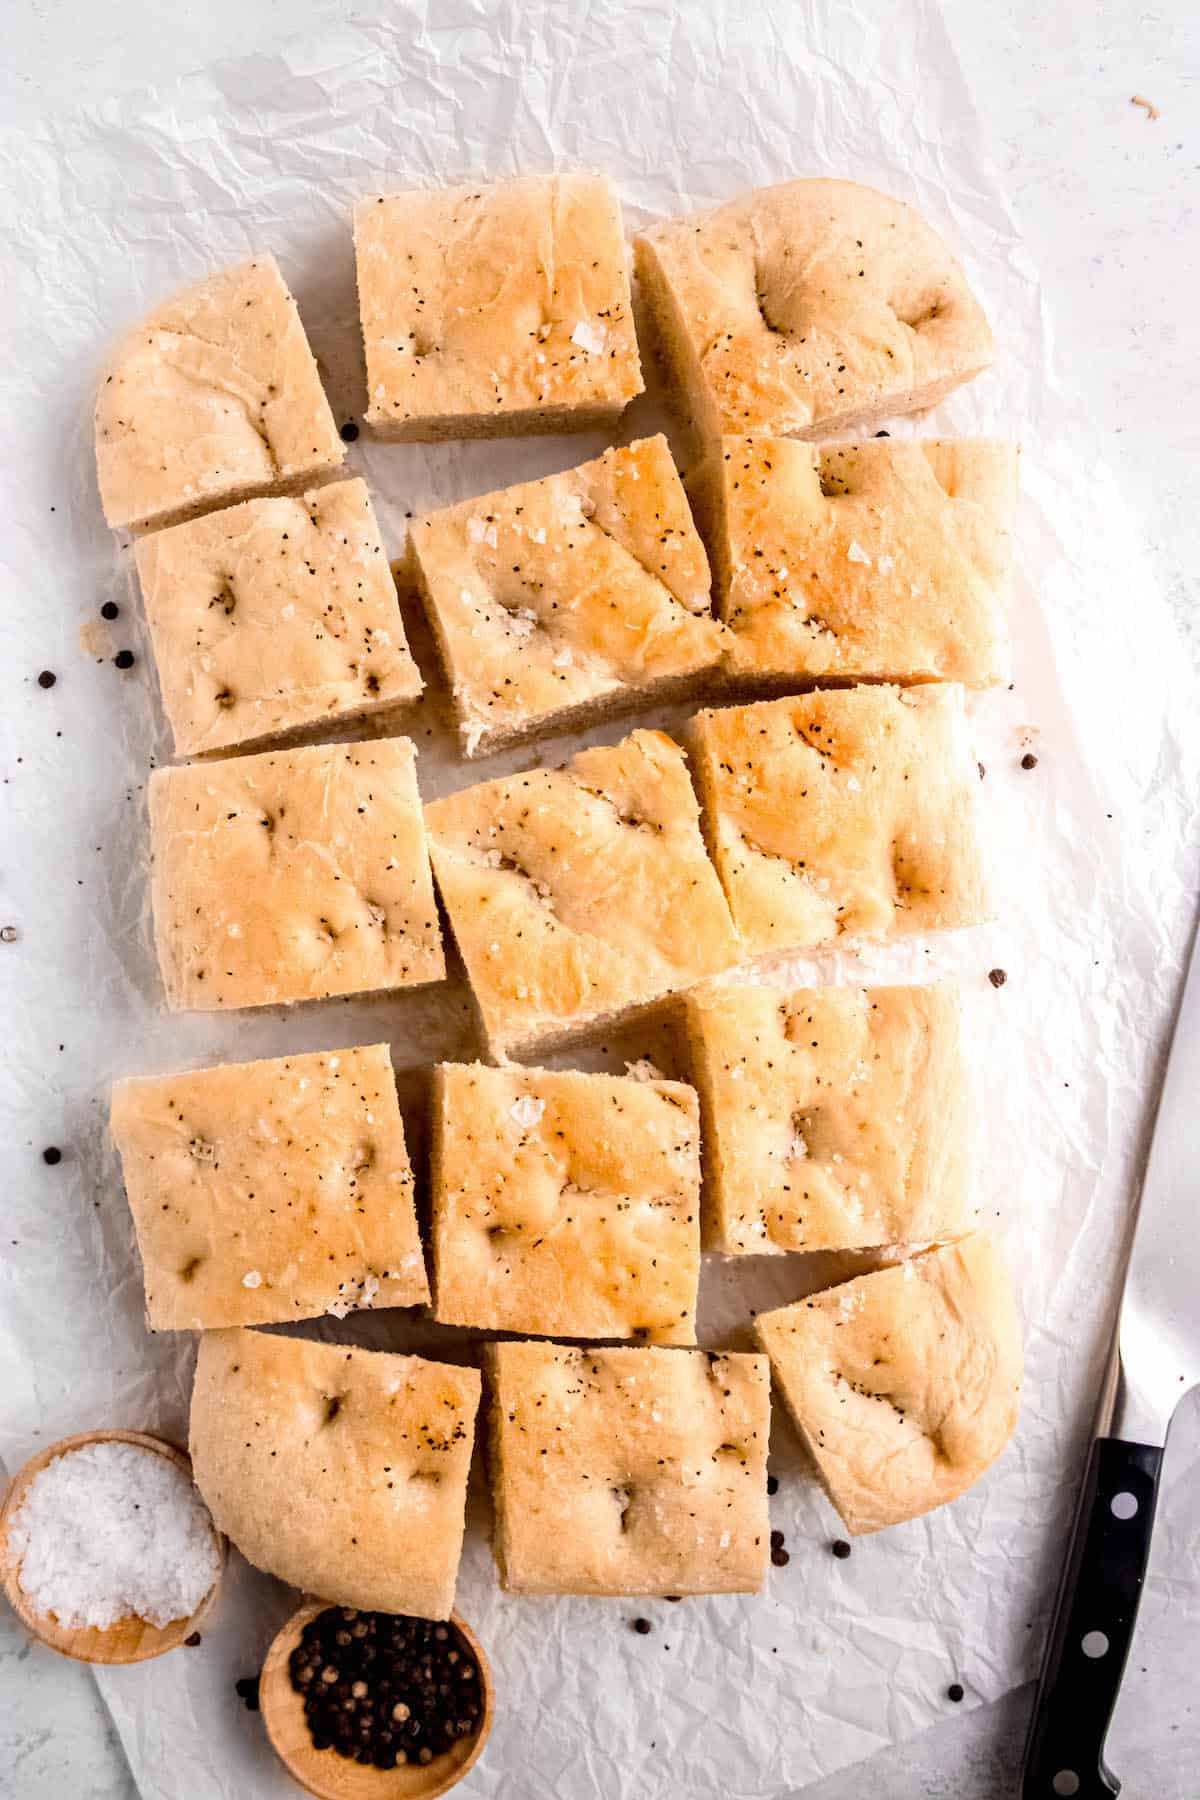
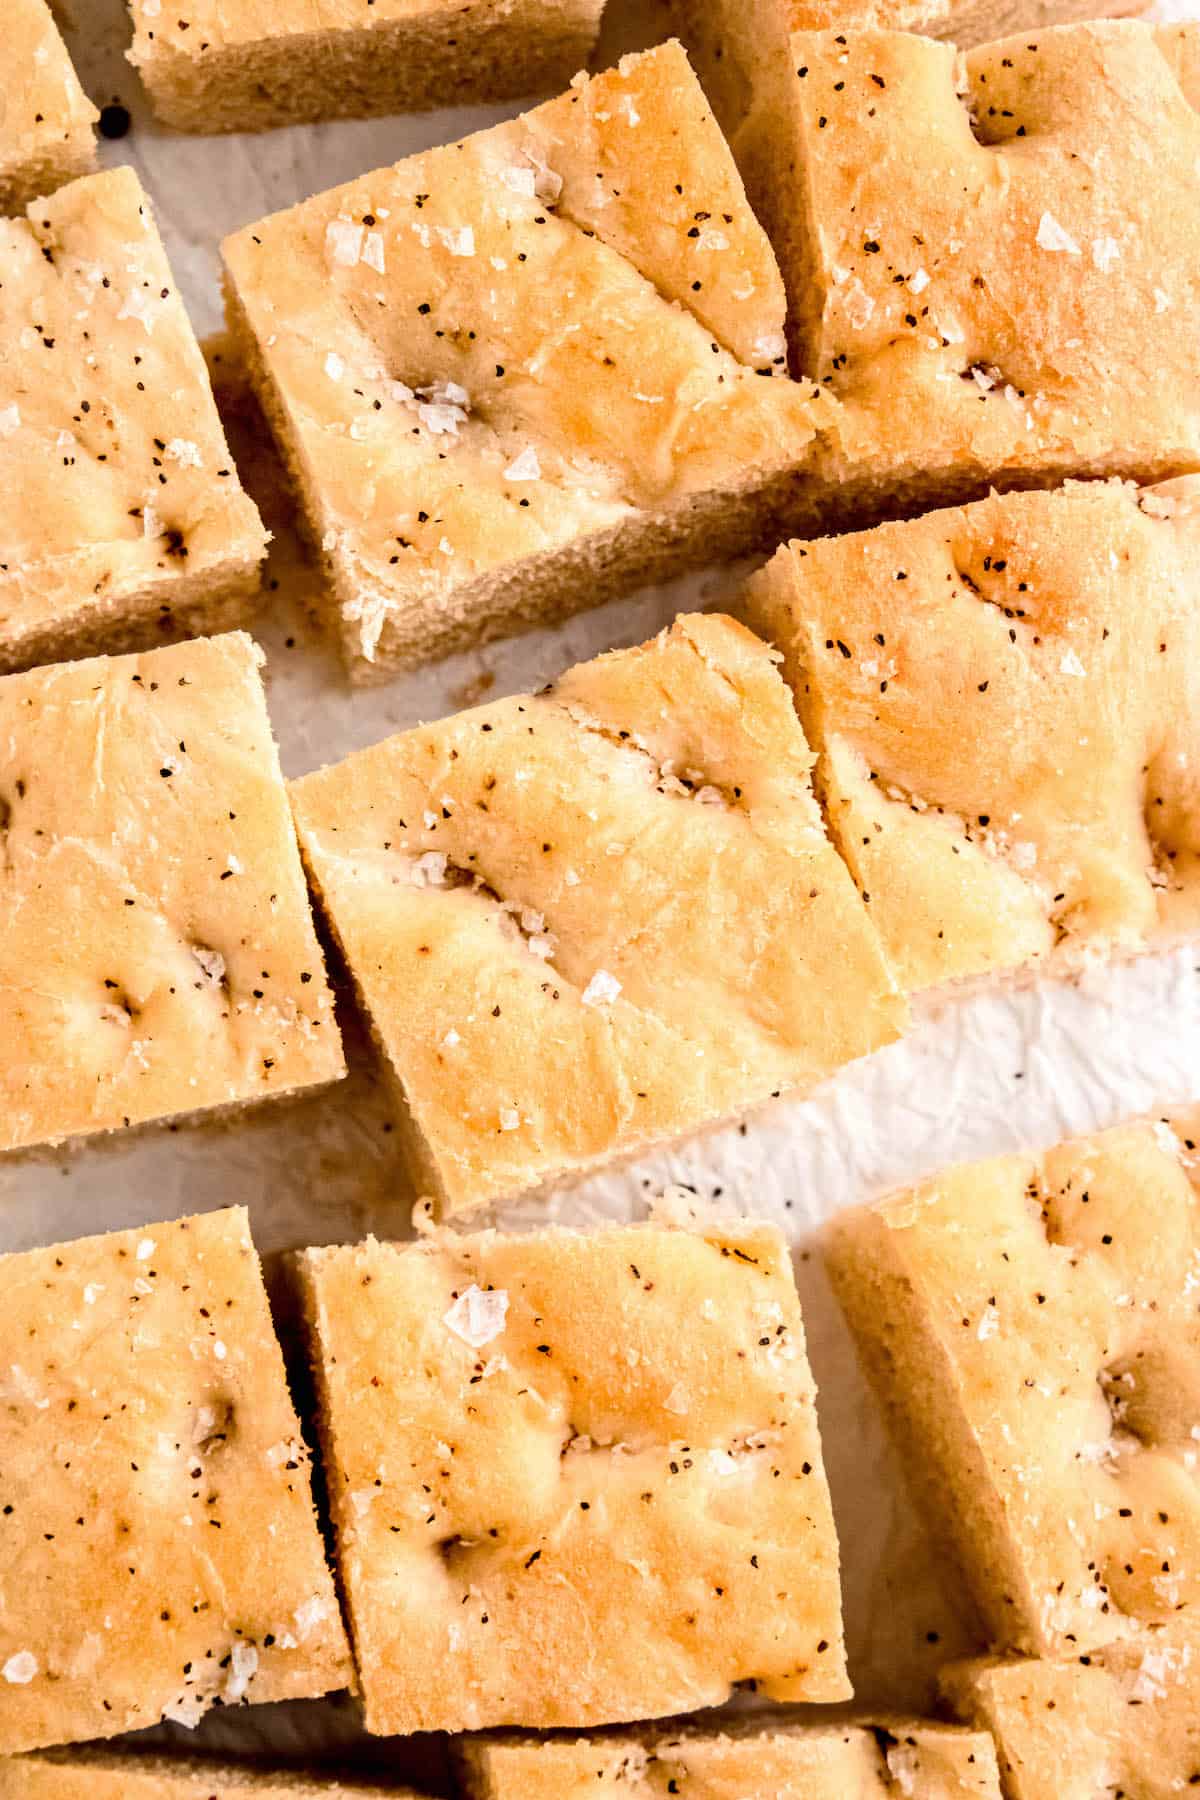
Step 8: Cool & Slice. Remove from the oven and allow to cool for 5-10 minutes, then enjoy!
Optional Variations
While I love making this black pepper focaccia Panera-style, there are tons of ways to make it your own. One of my favorite parts about making focaccia is that you can go totally nuts with your mix-ins and toppings. Here are a few ideas to get your creative juices flowing:
- Breakfast Focaccia - Cut the black pepper down by half. Crisp up 3-4 slices of your favorite bacon, drain on a paper towel, then chop finely. Also chop approximately ¼ cup worth of dates. Sprinkle the bacon bits and dates evenly across the top of the focaccia before baking. The sweet and savory combo is delightful, especially when paired with your favorite style of eggs.
- Christmas Focaccia - Trade out the black peppercorns for festive red and green peppercorns. You can also use fresh herbs, thinly sliced veggies, and cherry tomatoes to create a Christmas scene.
- Cheesy Focaccia - Add about ½ cup of your favorite shredded or crumbled cheese on top before baking. Asiago or gruyere are particularly delightful with the black pepper.
- Rosemary & Sea Salt - Swap out the black pepper in favor of about 3 tablespoons of freshly chopped rosemary. Add half to the dough and save half for sprinkling on top before baking.
Did you come up with a delicious focaccia flavor combination the world should know about? Don’t forget to let me know in the comments below, or tag me in your social posts so I can cheer you on!
Expert Tips For Homemade Focaccia
- Store your yeast in the freezer. Yeast is a living organism, and while it’ll stay pretty fresh in those little packets or jars, putting it on ice is an easy way to extend its shelf-life by a LOT. I’ve used frozen yeast with an expiration date over 6 months old, and it has worked beautifully. No matter how you store it, though, always make sure to proof it before adding to your dough.
- Temperature matters. When you’re proofing the yeast, the idea is to be Goldilocks. Too cold and the yeast is sluggish, too warm and you’ll kill it. You should be able to stick your finger in the water and feel warmth, but it shouldn’t be so warm as to make your skin turn pink.
- Watch the dough, not the clock. Whenever you read an approximate time window for allowing your bread to rise, remember: it’s just an approximation. Different conditions like temperature, humidity, and altitude will all affect how quickly your dough rises. I always recommend you take a “before” pic of your dough before letting it rise — this way you can compare the original to how far it’s risen.
- Use your hands. Seeing isn’t the only sense you can use to determine if your focaccia dough has risen enough. I like to use the middle knuckle of my index finger to poke the dough. If it pops right back (or mostly right back) into place quickly, I know it needs more time. If it stays indented, it means it has over-proofed. (If that happens, punch it down to de-gas, give it a few kneads, then start the rise again.) If it slowly pops back into place, it’s ready to go!
- Make some holes. To get the classic pock-marked focaccia top, make sure you press your fingers all the way through the dough until they touch the baking pan. This is your opportunity to stretch the dough into every last corner and edge, so don’t be shy.
- Use your oven as a proofing box. If your kitchen is cold or drafty, it can make proofing the dough take much longer. To speed up the process, you can easily make a cozy nest for it in your turned-off oven. First, make sure the oven is OFF. Second, arrange one of the racks on the bottom rung. Place a cake pan or heat-proof bowl on that bottom rung, then fill it halfway with boiling water. Pop your proofing dough pan on the middle rack, above the boiling water. Close the door, and voila! You have the perfect humidity and cozy temp for your dough to do its thing.
- Use a glass 9x13. When you’re first getting used to baking bread, it’s hard to know what stage your bread is at. I recommend using a glass baking pan so you can see the bottom and sides of your bread as they bake. You’re looking for an even, consistently golden brown interior. Once you’re more familiar with making bread from scratch, then you can feel free to experiment with different pans. Note that dark metal pans will tend to brown the bottoms much more quickly than glass, light metal, or ceramic-coated pans.
Frequently Asked Questions
Black pepper focaccia is a yummy variation of the traditional Italian bread. This version incorporates black pepper into the dough, infusing it with a distinct, mildly spicy flavor that complements the bread's olive oil richness and airy, chewy texture. The taste features savory and slightly piquant notes, accentuated by crunchy flakes of sea salt. The crust is typically golden and crisp, while the inside remains soft and moist.
Absolutely! Freezing focaccia is a great way to keep it fresh for later. Just let your focaccia cool down after baking, then wrap it snugly in plastic wrap or aluminum foil. You can also pop it into a freezer bag. It'll stay good in the freezer for about three months.
When you're just storing it for a day or two, keep your focaccia in an airtight container or wrap it up well to keep it fresh. You can also pop it in the fridge where it'll last about a week, though it might get a bit firmer. Just remember to warm it up a bit (about 10-15 mins in a 200F oven) before eating — it brings back some of that freshly-baked magic!
Recipes To Serve With Black Pepper Focaccia


If you’d like more tasty recipes delivered straight to your inbox, you can sign up for my email newsletter here. You can also follow me on Instagram, Pinterest or Facebook.
Easy Black Pepper Focaccia
Equipment
Ingredients
- 1 ⅓ C (315 grams) Lukewarm Water between 105-115F
- 2 ½ teaspoon (17 grams)Honey or sugar
- 2 ¼ teaspoon (7 grams) Active Dry Yeast
- 3 ½ C (438 grams) AP Flour
- ¼ C (53 grams) Olive Oil plus more for drizzling; don't be shy!
- 2 ½ teaspoon (12 grams) Kosher Salt
- 1-2 tablespoon (10-20 grams) Flaky Sea Salt preferably Maldon, or to taste
- 2 teaspoon (5 grams) Black Pepper coarsely ground, divided
Instructions
- Mix yeast with lukewarm water (between 105-115F) and honey. Stir it together and wait 5-10 minutes. If your yeast is alive, you will begin to see a bubbly, foamy looking substance on the top of your mixture. It should also smell, for lack of a better word, yeasty and bread-like.NOTE: If there is no foam on the top of your mixture, DO NOT continue with the bread making process. Go out and get yourself some fresh yeast before continuing, or you'll end up with a solid brick rather than a delicious loaf.
- Add all purpose flour, olive oil, kosher salt, and ¾ teaspoon of black pepper to the mix. Set your stand mixer to knead on low speed for about 5 minutes.NOTE: The dough should begin to come off the side of the bowl easily during this process. If it is sticking to the bowl, add more flour about a tablespoon at a time.
- Cover the bowl with a clean towel and move to a warm, draft free place in your home. Allow dough to rise until doubled in size, about 60-90 minutes.
- Invert the mixing bowl and dump the risen dough into a 9 x 13 that you've drizzled with a few glugs of olive oil. Rub your hands with a bit of olive oil and shape the dough by stretching it out and pushing your fingers all the way through to the glass. When the dough is in a roughly even shape in the pan, cover it again and allow to rise a second time. It should double in size again, although this time should only take about 20 minutes. Preheat your oven to 400F during this second rise.
- When the dough has risen the second time, drizzle with several tablespoons of olive oil and sprinkle liberally with flaky salt (like Maldon) and the remaining black pepper.Pop in the preheated oven and bake until golden and cooked through, about 20-25 minutes. Remove from the oven and allow to cool for 5-10 minutes, then enjoy!
Notes
-
- Store your yeast in the freezer. Yeast is a living organism, and while it’ll stay pretty fresh in those little packets or jars, putting it on ice is an easy way to extend its shelf-life by a LOT. I’ve used frozen yeast with an expiration date over 6 months old, and it has worked beautifully. No matter how you store it, though, always make sure to proof it before adding to your dough.
-
- Temperature matters. When you’re proofing the yeast, the idea is to be Goldilocks. Too cold and the yeast is sluggish, too warm and you’ll kill it. You should be able to stick your finger in the water and feel warmth, but it shouldn’t be so warm as to make your skin turn pink.
-
- Watch the dough, not the clock. Whenever you read an approximate time window for allowing your bread to rise, remember: it’s just an approximation. Different conditions like temperature, humidity, and altitude will all affect how quickly your dough rises. I always recommend you take a “before” pic of your dough before letting it rise — this way you can compare the original to how far it’s risen.
-
- Use your hands. Seeing isn’t the only sense you can use to determine if your focaccia dough has risen enough. I like to use the middle knuckle of my index finger to poke the dough. If it pops right back (or mostly right back) into place quickly, I know it needs more time. If it stays indented, it means it has over-proofed. (If that happens, punch it down to de-gas, give it a few kneads, then start the rise again.) If it slowly pops back into place, it’s ready to go!
-
- Make some holes. To get the classic pock-marked focaccia top, make sure you press your fingers all the way through the dough until they touch the baking pan. This is your opportunity to stretch the dough into every last corner and edge, so don’t be shy.
-
- Use your oven as a proofing box. If your kitchen is cold or drafty, it can make proofing the dough take much longer. To speed up the process, you can easily make a cozy nest for it in your turned-off oven. First, make sure the oven is OFF. Second, arrange one of the racks on the bottom rung. Place a cake pan or heat-proof bowl on that bottom rung, then fill it halfway with boiling water. Pop your proofing dough pan on the middle rack, above the boiling water. Close the door, and voila! You have the perfect humidity and cozy temp for your dough to do its thing.
-
- Use a glass 9x13. When you’re first getting used to baking bread, it’s hard to know what stage your bread is at. I recommend using a glass baking pan so you can see the bottom and sides of your bread as they bake. You’re looking for an even, consistently golden brown interior. Once you’re more familiar with making bread from scratch, then you can feel free to experiment with different pans. Note that dark metal pans will tend to brown the bottoms much more quickly than glass, light metal, or ceramic-coated pans.


Comments
No Comments