Homemade Candy Corn with Honey
If you're even remotely a fan of the store-bought stuff, you're going to lose your mind over this Homemade Candy Corn recipe made with real honey. It tastes like regular candy corn and Bit O' Honey had a baby! As an added bonus, it's a fun STEAM activity to do with your kiddos while Trick-or-Treating is out of the question. Adapted from Alton Brown.
Equipment
Ingredients
- 1 ¼ C Powdered Sugar
- 6 ½ teaspoon Dry Milk Powder
- ½ teaspoon Kosher Salt
- ½ C Sugar
- 3 tablespoon Light Corn Syrup
- 2 ½ tablespoon Honey sub light corn syrup if vegan
- 2 ½ tablespoon Water
- 2 tablespoon Butter sub vegan butter if vegan
- ½ teaspoon Vanilla Extract
- 4-10 drops Gel Food Color colors of your choosing
Instructions
- In the bowl of a food processor fitted with the blade (or a blender if you don't have one), combine powdered sugar, dry milk powder and salt. Pulse to combine and cut milk powder into finer pieces, about 30 seconds. Set aside.1 ¼ C Powdered Sugar, 6 ½ teaspoon Dry Milk Powder, ½ teaspoon Kosher Salt
- In heavy bottomed saucepan, combine sugar, corn syrup, honey and water. Bring to a simmer and allow to cook for 4 minutes undisturbed.½ C Sugar, 3 tablespoon Light Corn Syrup, 2 ½ tablespoon Honey, 2 ½ tablespoon Water
- Clip candy thermometer to side of saucepan, ensuring the bulb isn't touching the bottom of the pan. Add butter and stir to combine. Cook until at least 235F and no more than 240F, then remove from heat. (See notes)2 tablespoon Butter
- Stir in vanilla and dry mixture with a silicone spatula until well combined. Pour out onto Silpat or parchment lined cookie sheet to cool. After about 15 minutes, the dough should be cool enough to handle.½ teaspoon Vanilla Extract
- Separate dough into 3 equal pieces. Color each piece (starting with 2-3 drops) of gel food coloring then knead to achieve desired and uniform color.4-10 drops Gel Food Color
- Separate each piece into two halves. Starting with one piece of each color, roll out into a long, thin strand, about ½" thick and 2' long. Stack the colors in the desired order, then gently smoosh (vertically) together all three pieces with your fingertips, being careful not to obscure the middle color.Using the palm of your hand, vigorously rub the top of the triad strand to flatten it and increase its sheen. Flip the piece over and repeat with your palm until mostly smooth.Repeat with other three strands.
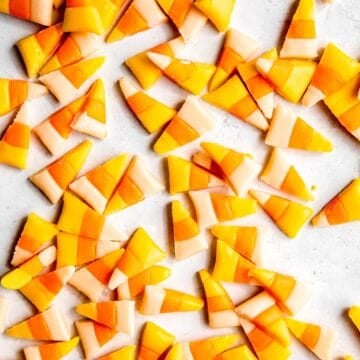
- Using a bench scraper (or sharp knife) cut each strip into small triangles by alternating your tip left and right /. Continue until all pieces are formed.
- Allow to cool completely, then store in single layers separated by parchment in an airtight container for up to 10 days.Enjoy!
Notes
Optional Variations & Dietary Adaptations
- Vegan Candy Corn - Simply sub in powdered coconut milk, vegan butter and extra corn syrup for the honey. If you go this route, try using dark corn syrup in addition to the light corn syrup for greater depth of flavor.
- Candy Corn Colors - By swapping the dye, you can easily make this a year-round treat. For Halloween candy corn that’s a little spookier, try black, green and orange instead of the traditional orange, yellow and white. Want to make some Christmas candy corn? Make it red, green and white. Easter candy corn? Pastel pink, blue and yellow would be cute. Valentine candy corn? Red and pink ought to do the trick. You’re also welcome to use all-natural dyes if you don’t want to use artificial food coloring.
- Customize Shapes - The candy dough can easily be molded however you like. If you prefer pumpkin candy corn, for example, you can either shape them by hand (great if you have a lot of kids to entertain 😅) or use a silicone pumpkin mold to knock out a bunch at once. Just roll the pieces into small balls, then press them with your thumb to fill the molds.
- Candy Corn Flavors - While the honey-vanilla combo is classic, you have plenty of options. Try replacing a few tablespoons of the powdered sugar with unsweetened cocoa powder for chocolate candy corn. Or, substitute the vanilla extract for other flavors like maple (great for Thanksgiving candy corn), lemon or strawberry (for spring), or mint (for Christmas). Note that other flavoring extracts are more potent than vanilla, so start with half as much, then adjust to taste.
- Make it work, regardless of your equipment. If you don't have a candy thermometer, you can still make candy corn, but you'll need a glass of water nearby to know when the mixture gets to soft ball stage.
- Keep kids safe. If you're making this with little ones, be sure to have them only observe and not touch during the simmering step. The caramelization of sugar creates something that I imagine is akin to napalm. If it gets on your skin, it will burn and slough off when you try to remove it. Trust me, I've done it.
- Soften the dough. Allowed the dough to cool too much before kneading and shaping? Not to worry! Simply microwave the candy corn dough in 10 second bursts until it is soft enough to work with.
- Room Temperature: Place the pieces in an airtight container and keep them at room temperature for 7–10 days. To prevent the candies from sticking together, line the container with parchment paper and store them in a single layer, adding additional sheets of parchment between each layer. Avoid refrigeration, as the extra moisture can affect the texture.
- Refrigeration & Freezing are not recommended, as the humidity can negatively impact the consistency.
Nutrition
Calories: 18kcalCarbohydrates: 4gProtein: 1gFat: 1gSaturated Fat: 1gCholesterol: 1mgSodium: 18mgPotassium: 6mgSugar: 4gVitamin A: 16IUVitamin C: 1mgCalcium: 4mgIron: 1mg
Tried this recipe?Let us know how it was!