If you’ve been searching for the perfect vehicle for all your sandwich and burger needs, look no further than these Sourdough Ciabatta Buns! Only 4 simple ingredients stand between you and a tray of plump, golden rolls featuring a crisp crust, airy crumb, and enviably irregular holes.

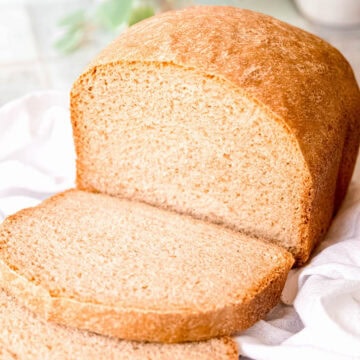
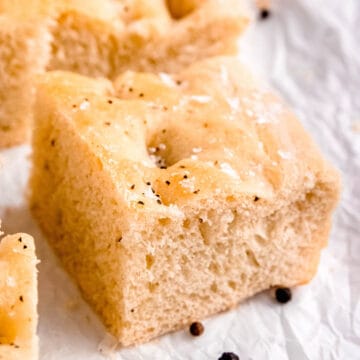
I don’t know about you, but I LOVE homemade bread. From soft, sliceable bread machine sourdough sandwich bread to fantastically fluffy black pepper focaccia, super fast flatbreads to cake-like quickbreads, some form of carb-y goodness is part of my regular routine.
But of all the many options to choose from, this easy sourdough recipe is the one I turn to most often. Why? It requires just a handful of pantry staples, so a batch is never far from reach. It’s also versatile—make large buns for gourmet sandwiches and burgers, small rolls for sliders, or a few smaller sliceable loaves.
Plus, ciabatta has what I consider the hallmarks of perfect bread—a slightly crusty exterior, a stretchy, chewy interior that tastes great regardless of whether or not it’s toasted, and a lightly tangy sourdough flavor that works equally well for sweet or savory applications.
Jump to:
Why You’ll Love This Recipe For Sourdough Buns
- Scheduling Champ - Aside from being the ideal mate for any meal, this recipe for homemade ciabatta rolls is flexible enough to fit into nearly any schedule. The quickest option is ready for baking the next day, but the fridge makes it possible to hold the dough for up to 3 days!
- Beautifully Balanced - As in the ideal blend of a crispy crust, a soft interior, and a delightfully chewy texture all in one bite—perfection!
- Budget-Friendly - Even when shopping at Aldi, fresh ciabatta rolls don’t come cheap—an 18-oz 6-pack costs about $5 with tax. This homemade version makes a whopping dozen for less than half that much! (Calculation: A 5-pound bag of King Arthur bread flour cost me $5.88 with tax at Kroger. This recipe uses about 40% of the bag, or around $2.35, plus water and salt.)

Ingredients & Substitutions
As promised, this sourdough ciabatta bread recipe is super basic. Here’s what to grab:

- Warm Water - Ideally you’re looking for around 75-80ºF. An instant-read thermometer comes in very handy here, but so long as it isn’t cold or hot to the touch, you should be good.
- Active Sourdough Starter - Depending on your particular starter, you may need to plan a few days in advance to get yours happy and well-aerated. Since I use Breadna (my starter) frequently, she is usually good after just one feeding from the fridge, which takes about 8-12 hours after I take her out depending on the temp in my kitchen.
- Bread Flour - I use King Arthur bread flour, which is 12.7% protein. You can find other brands with similar percentages (e.g. Gold Medal 12.3%, Pillsbury 12.9%), meaning they should act similarly.
- Fine Sea Salt or Kosher Salt - I prefer to avoid iodized table salt since it tastes kinda bitter to me. So long as you’re using a fine grain, the weight measurement should be the same across all varieties (e.g. Himalayan pink).
How to Make Sourdough Ciabatta Buns
Making homemade ciabatta is easier than you think! Don’t be discouraged by my lengthy descriptions; none of the steps is particularly hard.
Step 1: Wet Ingredients. Mix together the warm water and active sourdough starter in a large mixing bowl until fully uniform.
Step 2: Rough Mix. Add the bread flour, whisking until it forms a shaggy dough. Cover with a damp kitchen towel or cloth bowl cover for 25-30 minutes to rest.
Step 3: Season & Knead. Add the salt, shaking it evenly across the bread dough. Knead until the salt is well distributed and feels like it has dissolved (you shouldn't feel any grains). This should take about 5 minutes. Note that the dough will feel wet and sticky; this is normal. Cover the bowl with a damp towel and rest for 30 minutes.


Step 4: Improve Bubbles. Over the next 2-3 hours, complete a set of stretches every 30-45 minutes for a total of 4 sets of stretches. The first should be a normal stretch and fold, followed by 3 coil folds. (To perform a coil fold, reach both wet hands into the bowl at 9 and 3, then lift the entire dough from the bowl, letting the two halves stretch out in front and back. Replace the dough to the bowl, do a quarter turn and repeat 3 more times.)

Step 5: Bulk Ferment. For proofing, you have a few options depending on your schedule.
- Option 1: Shortest (Room Temp Ferment). After the final stretch and fold, cover with a damp towel and allow the dough to do a first rise at room temperature, increasing by about 75% in volume. Cover tightly (first with a damp towel, then a lid or plastic wrap) and pop in the fridge for 1-12 hours. (The chill makes it easier to handle)
- Option 2: Medium (Mixed). After the final stretch and fold, cover with a damp towel and allow to rise for about 1 hour to rest and rise slightly. Cover tightly (first with a damp towel, then a lid or plastic wrap) and pop in the fridge for 24-48 hours.
- Option 3: Longest (Cold Ferment). After the final stretch and fold, cover tightly (first with a damp tea towel, then a lid or plastic wrap) and pop in the fridge for up to 3 days.

Step 6: Divide. After the bulk fermentation and refrigeration, liberally sprinkle the top of the dough and your work surface with flour. Press the dough into a rough rectangular shape on the floured work surface. Using a metal bench scraper, divide the dough into 12 equal pieces, approximately 150-155g apiece.
Step 7: Optional Shaping. While a rectangular “slipper” shape is traditional for ciabatta, I like to shape each piece into a boulé to make round buns, especially since I’m not great at getting the pieces perfectly even on my first cut. To do this, gently pull in both sides to the middle, then the top and the bottom, pinching to hold the seam. Flip over so the seam side is down and cup your hands on either side. Begin to rotate the dough in a circle, slightly tightening the shape. Alternatively, eyeball your cuts from the rectangle and leave the buns as squares.
Step 8: Final Proof. Line a standard baking sheet (for my restaurant buds, that’s a half sheet pan) and a quarter sheet pan (or another standard one) with parchment paper for easy cleanup. Place the completed rolls on the parchment-lined pans. (I usually do a 2-1-2 formation to give space for the rolls to expand; 7-8 should fit on the half-sheet, 4-5 on the quarter-sheet.) Let rest at room temperature for an hour.
Step 9: Bake. Preheat oven to 475ºF and move the racks to the center positions. When the oven is preheated, add the rolls and immediately reduce the heat to 450ºF. Bake for 20-24 minutes, until the tops are starting to turn golden brown. (If you have to use two racks, make sure to switch the pans halfway through baking.)


Step 10: Cool. Remove the baked buns from the oven and allow to cool for a few minutes on the sheet pans before transferring to a wire rack to continue the cooling process. Wait at least 1 hour before slicing for the best results—patience is the hardest part!!

Optional Variations
- Go Small - This recipe works equally well for making smaller ciabatta sourdough rolls as either slider buns or dinner rolls. Generally speaking, 60-80 grams per roll is ideal (though they should all be roughly the same in a batch so they cook evenly). To make ciabatta rolls, follow the same shaping and proofing instructions above, but reduce the temperature. Preheat the oven to 450ºF, then drop it down to 400ºF when you put the baking sheets in. They should take around 18-30 minutes depending on the size you choose. (King Arthur has more info on converting bread recipes to rolls.)
- Go Big - Don’t wanna fuss with all the divvying and shaping? No worries! After you flatten the dough out into a rectangle, cut it into 3 even loaves, around 610-615 grams apiece. You can skip the shaping and leave them as rectangles, or shape how you like. The baking time will increase a bit. Start checking around the 30 minute mark—they’re ready when the tops are golden and they sound hollow when you tap on them.

Expert Tips
- Scaled Down. This sourdough ciabatta recipe makes enough for a dozen burger-sized buns. We love them, so it makes more sense for me to bake them all off at once rather than making a batch every week. Feel free to ⅔ the recipe to make just 8 which should fit on one standard half-sheet pan. (They also freeze well—check out storage instructions below.)
- Wait on Salt. While kneading isn’t everyone’s cup of tea, I recently started waiting to add salt to my sourdough until after the first 30 minute rest. Boy, does it make a difference! The rise comes out way stronger. I kind of like the meditative act, but feel free to use your stand mixer outfitted with a dough hook to help you.
- Use Plenty of Flour for your floured surface and for the top of the dough before shaping. Ciabatta has a rather wet dough compared to other recipes, and high-hydration dough is typically quite sticky.
- Get a Danish Dough Whisk. If there was a single tool I’d recommend for making sourdough bread (or any bread) at home, a Danish dough whisk would be it. The circular design ensures it’s easy to clean off, but also does a remarkably good job moving through stiff doughs.
- Heat it Up. It’s important to preheat your oven to a higher degree than you’ll be baking. Why? As soon as you open the door to put the baking sheet in, the oven temperature dips considerably—up to 150ºF or more. By starting with a higher temp, your rolls will get a better chance of baking at the right temperature from the start.

Storage Instructions
- Before storing (or slicing), let the ciabatta buns cool completely to room temperature. If you place them in a storage container before they’ve cooled, condensation will accrue, then rain down on the rolls as they continue to cool off, leaving your crust more soggy than crisp.
- Once buns are completely cooled, transfer to 2 gallon-sized zip top bags or the airtight container of your choice. They are best within the first 24 hours, but will keep well enough at room temperature for 5 days.
- You can also pop them in the freezer, where they'll last for up to 6 weeks.
- To serve, allow the buns to defrost on a wire rack at room temp to allow any ice crystals to evaporate ~or~ pre-slice the buns before freezing and toast open-faced directly from frozen.

Serving Suggestions
- Gourmet Sandwiches. Wanna give your desk lunch an instant glow-up? Use these sourdough ciabatta buns in place of your normal sandwich bread—they’re super hearty, so they’ll last better. Try:
- Roast beef with peppery arugula and horseradish aioli,
- A tuna melt with spicy avocado tuna salad, melted pepper jack cheese, cilantro and sliced tomatoes, or
- A yummy grilled veggie sandwich spread with goat cheese or hummus and piled high with roasted peppers, eggplant, zucchini, and onions. This is my favorite for taking on flights—the veggies and hummus make it safer to leave out of refrigeration for longer periods.
- Tiny Treats. Make small rolls for mini sandwiches, like Southern ham delights or Hawaiian roll chicken sliders.
- Grilling Season. When it comes to BBQ favorites like Asian pork burgers, Greek burgers, or Santa Fe chicken sandwiches, these homemade ciabatta buns are like the cherry on top of a brownie sundae.
- Go Sweet. When I’m tired but craving something to satisfy my sweet tooth, I often turn to chocolate toast. Slice and lightly toast your roll, then add a swipe of butter and sprinkle with chocolate chips (or layer on bar chocolate) and return to the toaster oven to toast on low for about a minute—enough to melt the chocolate. Use a knife to swirl the butter and chocolate evenly across the top, sprinkle with flaky sea salt, and go to town! (If you’re vegan, swap in plant butter or use your favorite jam instead—chocolate and fruit are a winning pair.)

FAQs
It really depends on what your version of “healthy” is, but I think it goes without saying that these homemade sourdough buns are healthier than regular ol’ burger buns. First, the DIY version is made with basically just bread flour, water, and salt; it’s rare to find grocery store buns with a similarly short list.
Second, sourdough goes through a slow fermentation rather than a speedy rise (like yeasted bread). This slower process breaks down starches and gluten, making it easier to digest. It also makes the nutrients more bioavailable and happens to be a probiotic! Finally, sourdough generally has a lower glycemic index, meaning it doesn’t affect your blood sugar as much as white bread. In short, I have zero qualms about eating it daily. Consult with a doctor or RDN if you’re not sure!
When most people think of “sourdough,” a super crusty, artisanal loaf comes to mind. In reality, sourdough can encompass a wide variety of bread types, including ciabatta. The difference is that *most* ciabatta sold in stores is made with commercial yeast as its leavener, whereas this sourdough ciabatta uses the wild bacteria found in your sourdough starter. So, it wouldn’t be wrong to call these either “sourdough buns” or “ciabatta buns.”
While both are delicious types of bread, focaccia is typically much softer, spongier, and has a dimpled surface. Ciabatta, on the other hand, has a crustier exterior and a chewier consistency, more like artisanal sourdough. Additionally, focaccia is typically higher in fat and calories since it’s often flavored and/or baked with a decent amount of oil.
It will depend on where you’re getting your bread, but typically speaking sourdough buns are made from high-protein flour (i.e. bread flour), sourdough starter, salt, and water. Some may also include commercial yeast and other ingredients and preservatives; mine does not.
That said, this sourdough ciabatta contains gluten and wild yeast (i.e. your starter), but no added sugar or dairy. (According to my nutritional calculator, each roll has 0.2 grams of sugar, which is naturally occurring.) Each roll also contains approximately 9 grams of protein (thanks to our bread flour) and 2 grams of fiber (not much, but we’ll take it!).
If this is your first time making sourdough (or any type of bread), I wouldn’t necessarily recommend you start with ciabatta. First, it’s a super sticky dough, which can make it difficult to handle. When I was first starting out in the bread world, there was a strong urge to add more flour to any dough that felt sticky—that’s not what you want here.
Second, because of the high-hydration, the dough is prone to tearing and/or collapsing while you handle it. Finally, the stretch-and-folds are super important for getting the holes ciabatta is known for, while you can get away with not doing them for other types of sourdough.
Generally speaking, ciabatta dough is around 80% hydration, or slightly higher. This recipe lands right at 80% assuming you’re using a 100% hydration starter.

More Bread Recipes


Sourdough Ciabatta Buns
Equipment
- Danish Dough Whisk
- Large Mixing Bowl
- Clean Kitchen Towel
- 1 Half Sheet Pan
- 1 Quarter Sheet Pan
Ingredients
- 720 g Warm Water 75-78ºF
- 225 g Active Sourdough Starter
- 900 g Bread Flour
- 24 g Sea Salt or Kosher Salt
Instructions
- Mix together 720 g Warm Water and 225 g Active Sourdough Starter in a large mixing bowl until fully uniform.
- Add 900 g Bread Flour, whisking until it forms a shaggy dough. Cover with a damp cloth for 25-30 minutes to rest.
- Add 24 g Sea Salt, shaking it evenly across the bread dough. Knead until the salt is well distributed and feels like it has dissolved (you shouldn't feel any grains). This should take about 5 minutes. The dough will feel wet and sticky; this is normal. Cover the bowl with a damp towel and rest for 30 minutes.
- Over the next 2-3 hours, complete 4 series of stretch and folds every 30-45 minutes. The first should be a normal stretch and fold, followed by 3 coil folds. (To perform a coil fold, reach both hands into the bowl at 9 and 3, then lift the entire dough from the bowl, letting the two halves stretch out in front and back. Replace the dough to the bowl, do a ¼ turn and repeat 3 more times.)
- For proofing, you have a few options depending on your schedule. Option 1: Shortest (Room Temp Ferment). After the final stretch and fold, cover with a damp towel and allow the dough to do a bulk rise at room temperature, increasing by about 75% in volume. Cover tightly (first with a damp towel, then a lid or plastic wrap) and pop in the fridge for 6-24 hours.Option 2: Medium (Mixed). After the final stretch and fold, cover with a damp towel and allow to rise for about 1 hour to rest. Cover tightly (first with a damp towel, then a lid or plastic wrap) and pop in the fridge for 24-48 hours.Option 3: Longest (Cold Ferment). After the final stretch and fold, cover tightly (first with a damp towel, then a lid or plastic wrap) and pop in the fridge for 2-3 days.
- Line a half sheet and quarter sheet pan with parchment paper for easy cleanup.After the bulk rise and refrigeration, liberally sprinkle the top of the dough and your work surface with flour. Press the dough into a rough rectangle shape. Divide the dough into 12 even pieces approximately 150-155g apiece.
- (Optional) Gently shape each piece into a boulé—pull in both sides to the middle, then the top and the bottom. Flip over so the seam side is down and cup your hands on either side. Begin to rotate the roll in a circle, tightening the shape and creating a gluten cloak. Place the completed rolls on the parchment-lined pans. (I usually do a 2-1-2 formation to give space for the rolls to expand; 7-8 should fit on the half-sheet, 4-5 on the quarter-sheet.) Let rest at room temperature for an hour, or until slightly puffy.
- Preheat oven to 475ºF and move the racks to the center positions. When the oven is preheated, add the rolls and immediately reduce the heat to 450ºF. Bake for 20-24 minutes, until the tops are starting to turn golden. (If you have to use two racks, make sure to switch the pans halfway through baking.)
- Remove the baked buns from the oven and allow to cool for a few minutes on the sheet pans before transferring to a wire rack to continue the cooling process. Wait at least 1 hour before slicing for the best results.
- Once buns are completely cooled, transfer to 2 gallon-sized zip top bags. They are best within the first 24 hours, but will keep well enough at room temperature for 5 days. I usually leave one bag out and pop the other in the freezer, where they'll last for up to 6 weeks. To serve, allow to defrost at room temp ~or~ pre-slice the buns before freezing and toast open-faced directly from frozen.
Notes
- Go Small - This recipe works equally well for making smaller ciabatta sourdough rolls as either slider buns or dinner rolls. Generally speaking, 60-80 grams per roll is ideal (though they should all be roughly the same in a batch so they cook evenly). To make ciabatta rolls, follow the same shaping and proofing instructions above, but reduce the temperature. Preheat the oven to 450ºF, then drop it down to 400ºF when you put the baking sheets in. They should take around 18-30 minutes depending on the size you choose. (King Arthur has more info on converting bread recipes to rolls.)
- Go Big - Don’t wanna fuss with all the divvying and shaping? No worries! After you flatten the dough out into a rectangle, cut it into 3 even loaves, around 610-615 grams apiece. You can skip the shaping and leave them as rectangles, or shape how you like. The baking time will increase a bit. Start checking around the 30 minute mark—they’re ready when the tops are golden and they sound hollow when you tap on them.
- Scale Down. This sourdough ciabatta recipe makes enough for a dozen burger-sized buns. Feel free to ⅔ the recipe to make just 8 which should fit on one standard half-sheet pan. (They also freeze well—check out storage instructions below.)
- Wait on Salt. While kneading isn’t everyone’s cup of tea, I recently started waiting to add salt to my sourdough until after the first 30 minute rest. Boy, does it make a difference! The rise comes out way stronger. I kind of like the meditative act, but feel free to use your stand mixer outfitted with a dough hook to help you.
- Use Plenty of Flour for your floured surface and for the top of the dough before shaping. Ciabatta has a rather wet dough compared to other recipes, and high-hydration dough is typically quite sticky.
- Get a Danish Dough Whisk. If there was a single tool I’d recommend for making sourdough bread (or any bread) at home, a Danish dough whisk would be it. The circular design ensures it’s easy to clean off, but also does a remarkably good job moving through stiff doughs.
- It’s important to preheat your oven to a higher degree than you’ll be baking. Why? As soon as you open the door to put the baking sheet in, the oven temperature dips considerably—up to 150ºF or more. By starting with a higher temp, your rolls will get a better chance of baking at the right temperature from the start.
- Before storing (or slicing), let the ciabatta buns cool completely to room temperature. If you place them in a storage container before they’ve cooled, condensation will accrue, then rain down on the rolls as they continue to cool off, leaving your crust more soggy than crisp.
- Once buns are completely cooled, transfer to 2 gallon-sized zip top bags or the airtight container of your choice. They are best within the first 24 hours, but will keep well enough at room temperature for 5 days.
- You can also pop them in the freezer, where they'll last for up to 6 weeks.
- To serve, allow the buns to defrost on a wire rack at room temp to allow any ice crystals to evaporate ~or~ pre-slice the buns before freezing and toast open-faced directly from frozen.
Nutrition


Comments
No Comments