If you’re on the hunt for a yummy, cheap, easy entrée, make my brothy Italian Beans and Greens on Toast! All you need are 7 simple ingredients (most of which are pantry staples) and 15 minutes to get this hearty, deeply satisfying, and endlessly customizable meal on the table.
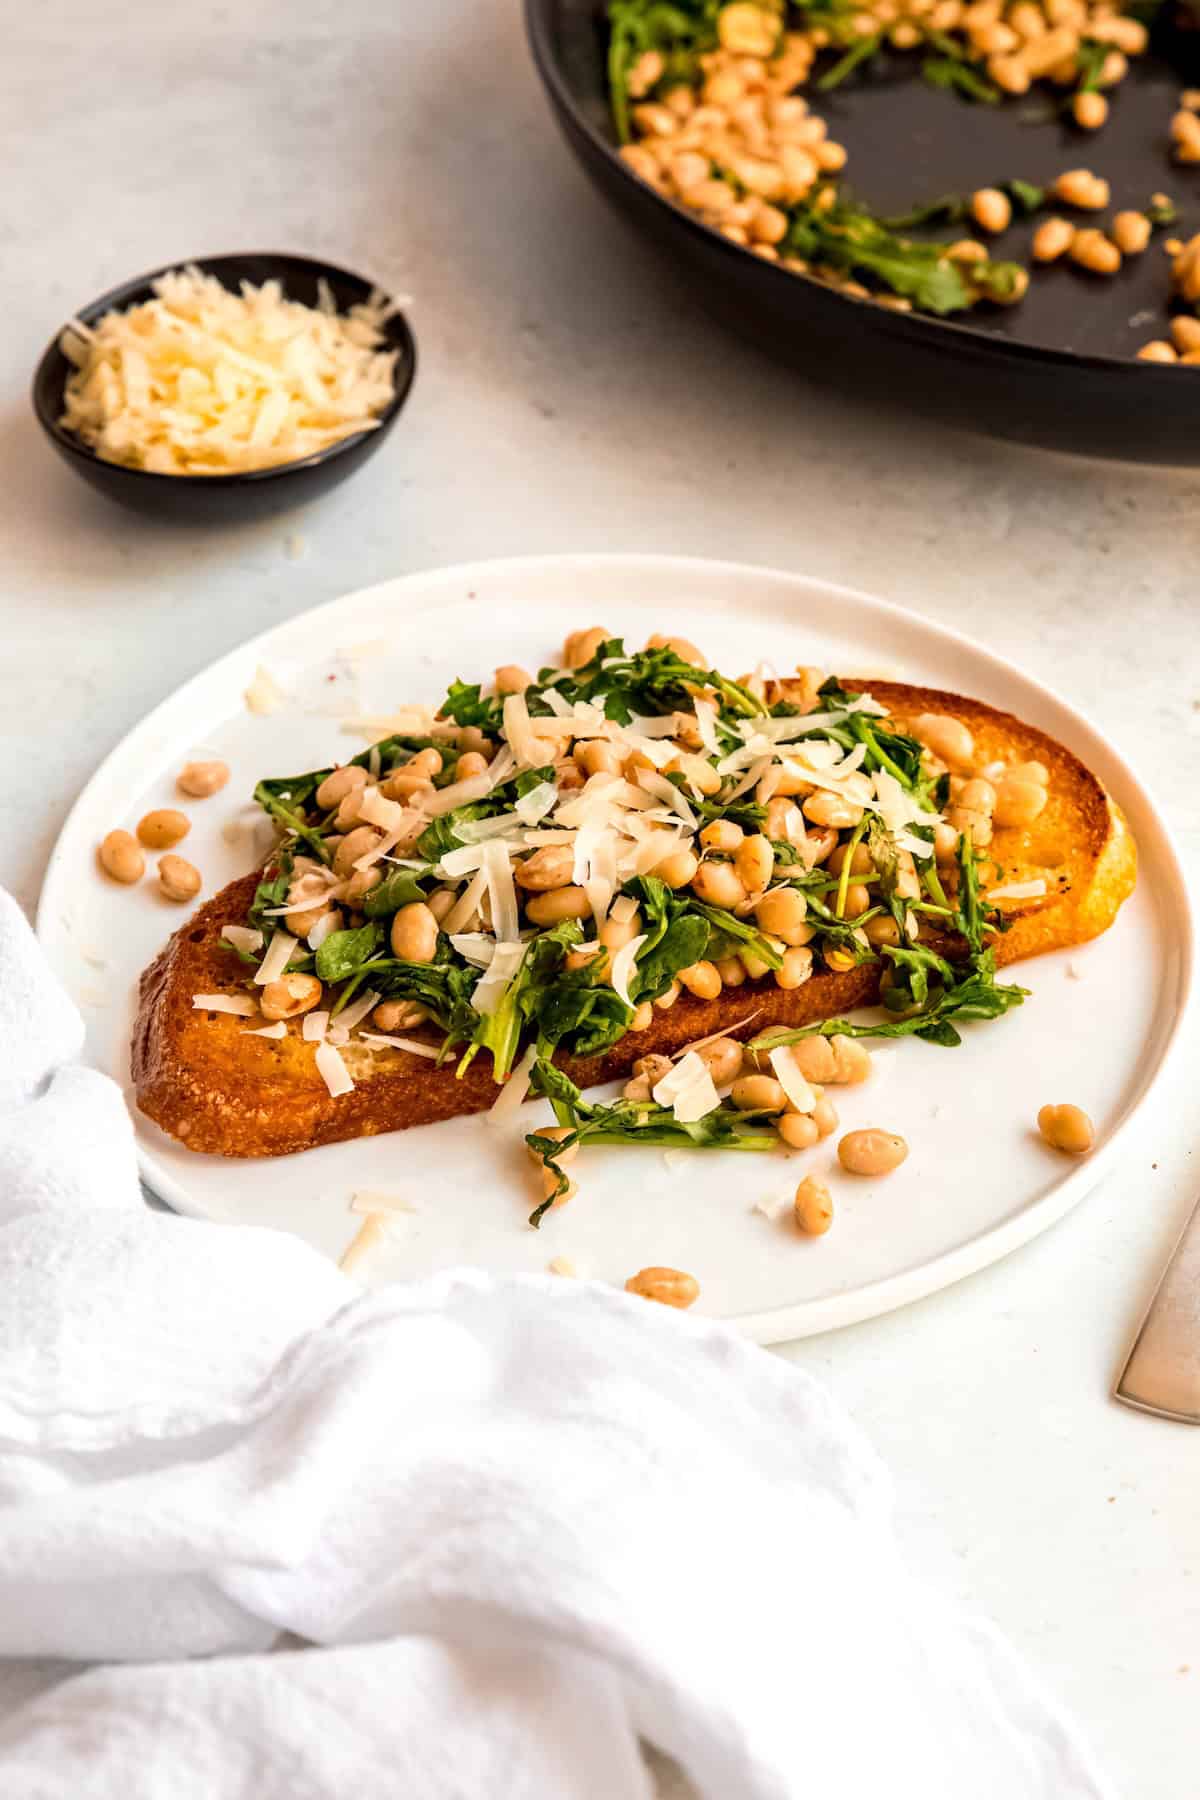
Beans and greens are a beautiful example of how a few humble ingredients can come together to make something truly exceptional. Creamy cannellini beans, perfectly piquant garlic wine sauce, bright and peppery arugula, nutty parmesan, and crunchy, golden brown fried bread hit all the flavorful, textural notes. Like Paul Prudhomme said, “You don’t need a silver fork to eat good food.”
Plus, there's something special about eating a hot meal—no matter what time of year it is. It feels more intentional, something to be savored and actually enjoyed instead of wolfing down in front of your computer screen. The French *used to* really be on to something!
This easy recipe for beans and greens on toast is fast enough to whip up on your lunch break that you'll actually have enough time leftover to sit and enjoy it. WITHOUT the computer. Like a real human adult. Can you even imagine?!?
Heck, you go ahead and pour yourself a nice, crisp glass of Picpoul de Pinet or Vinho Verde and trick yourself into feeling like you're in an Italian trattoria. I promise I won't tell if you won't! And honestly, when was the last time you treated yourself to something so decadent as a real lunch?? You deserve it. Even your dietician will agree.

Jump to:
Why You’ll Love This Recipe For Beans And Greens
- Pantry Perfection - I always have some kind of beans and bread on hand because they’re inexpensive and wildly versatile. This easy recipe puts both to work in a riff on the filling British favorite. The moniker should also indicate how flexible this recipe is. We're talking just about ANY beans, ANY greens and ANY toast you want. It's pure pantry heaven.
- Quick & Easy - Considering beans and greens take just 15 minutes to get on the table, this recipe tastes exponentially more delicious and complicated than it is. The only ingredient that actually needs prep is the garlic, which you just need to slice. The rest is just throw and go!
- Extremely Affordable - When times are tight, putting stuff on toast is my go-to. I can get a can of beans for just 79 cents at my local Aldi, or a pound of dried beans (equivalent to 4 cans) for $1.29. Good grocery store bread can be a bit expensive (around $4.50 in April 2025), but my homemade sourdough ciabatta rolls, sourdough discard sandwich bread, or black pepper focaccia can all be made for $2 or less. Depending on where you live and how much you make from scratch, you can make these braised white beans and greens tartines for just $1-2 per serving!
Ingredients & Substitutions
Greens and beans have become my ultimate template-style meal because I can grab basically everything I need from my pantry. (If you’re missing anything crucial for this specific recipe, don’t fret! Just hop down to the “optional variations” section for tons of ideas on how to tweak it.) Here are some notes to consider in case your pantry looks a little different than mine:

- Beans - My favorite beans for this bean tartine are cannellini, also known as white kidney beans. That said, basically any canned beans oughta do the trick. Great northern, pinto, red kidney, or butter beans are all great subs. Even black beans or lentils work!
- Leafy Greens - I always have at least one clamshell of an arugula mix in the fridge for adding quick veggies to my meals. It doesn't hurt that Aldi sells them for less than $3 a pop! Feel free to use any greens you have on hand—baby spinach, cavolo nero or lacinato kale, fancy farmers market greens, or bitter chicories are all fair game. (More below in FAQ.)
- Garlic Cloves - I love to buy bags of pre-peeled garlic, even though they’re more expensive than whole heads. When you're addicted like I am (i.e. you put garlic in everything savory and use 2-3x what a recipe calls for), the convenience wins! I like to buy the giant 3-pound bags at Costco for $10 (equivalent to about 30-36 heads) and keep it in the freezer. If you’re short on space, Aldi sells bags with 3-4 heads of garlic for around $2.
- White Wine - Back in my restaurant days, I learned to always keep an inexpensive box of both red and white wine on hand in the pantry for cooking—Aldi and Trader Joe’s both sell 4-bottle boxes for $12-13. There's no need to refrigerate it, and since air doesn't touch the wine, it lasts for a very long time. Don't like to keep booze in the house? Swap in a squeeze of lemon juice at the very end of cooking instead.
- Red Chili Flakes - I love a bit of heat with just about every meal. If you're not a fan of spicy foods, or you're sharing this meal with a kiddo, feel free to tone it down or omit it.
- Crusty Bread - I like having a bit of chew to contrast with the brothy beans, so artisan-style sourdough is usually my go-to. That said, any bread or bread-like substitute (like croissants) will do the trick. My only recommendation is to reach for a slice that has a nice, big surface area.
- Salted Butter & Olive Oil - I prefer using both a drizzle of olive oil and a touch of butter for the best of both worlds. If possible, opt for grass-fed cultured butter and a flavorful brand of extra-virgin olive oil. That said, you can use what you have on hand. (Only have unsalted butter? Just add a pinch or two of salt to taste.)
- Equipment - As far as equipment is concerned, you'll just need a sharp knife, a cutting board, a sauté pan and a spoon or spatula. So simple!

How to Make Beans and Greens on Toast
This "recipe" is absurdly simple. All you'll need to prep is your garlic by slicing it*, which takes less time than crisping up your toast.
Step 1: Make Toast **. Heat your oil or butter in a large skillet over medium heat. I suggest rubbing the bread around in it on both sides to ensure a nice coating. Then, just let the bread get nice and toasty! Allow it to sit, relatively undisturbed, for about 2-3 minutes per side depending on how hot your stove gets. In the meantime, slice your garlic so you're ready to boogie as soon as the toast is done. Once the bread is toasted to your definition of perfection, remove it from the pan.
Step 2: Deglaze. Tip the white wine in, scraping up any bits of toasty fond that might be left over. Once it comes to a simmer (which should happen quite fast), throw in your garlic and red pepper flakes to infuse the liquid. Allow the garlic to become fragrant, cooking for about a minute.
Step 3: Simmer Beans. Toss in the drained can of beans and give the mix a good stir. Allow to cook until the beans are heated through, about 2 minutes.


Step 4: Add Greens. Grab a few handfuls of greens and add them to the pan with a 3-5 finger pinch of salt. I like knowing that I ate roughly a salad's worth per serving, so I use about ½ of a clamshell.
Step 5: Wilt Greens. Allow the heat to wilt the arugula a bit, then stir to incorporate everything. Cook until the greens are just wilted but still nice and bright. Switch off the heat and season with any salt and pepper as needed.


Step 6: Assemble. Lay your toasty bread down on a plate or pasta bowl. Scoop roughly half of the brothy beans over the bread, being sure to get some of the yummy liquid. Grate a bit of parmesan over the top and dig in! Bonus points if you treat yourself to a tasty beverage and turn off the screen while you enjoy.


Recipe Footnotes
*Interested in why you want to slice the garlic rather than mince it? It all comes down to how much you love garlic, and in our house that answer is A LOT. Slices of garlic means you not only infuse the mix with garlic flavor, but you also get bites that are particularly garlicky which are my fave. Feel free to press or mince it if you prefer.
**Toast might be a bit of a misnomer if you're doing this the way I suggest. This is more like a crouton, with a slice of your favorite bread that's lightly fried in oil, butter or a combination to get a perfectly golden and lightly crisp exterior that's heavy in flavor. (If pan fried bread sounds like your jam, read more ways to make giant croutons part of your regular life.)

Optional Variations & Dietary Adaptations
This recipe is more of a template than anything else. Beans and greens are endlessly riffable! Use whatever you have on hand—different beans, different greens, different toast, different mix-ins.
Once you get into the swing of it, I can basically guarantee the idea of beans and greens will enter your weekly food lexicon and stay there. I was beginning to feel self conscious about making some variation of beans and greens at least 10 times in a three week span. And then I just didn't care, because it is FREAKING AMAZING. Seriously. Try for yourself.
Here are just a few ideas to get you started:
- While the recipe as written is simply meat free, it can just as easily be made vegan by swapping in plant-based butter and parmesan ~OR~ by using only olive oil (no butter) and omitting the cheese. You can also opt for a completely different flavor profile, like beans in a coconut curry sauce.
- Add nuts or seeds for crunch.
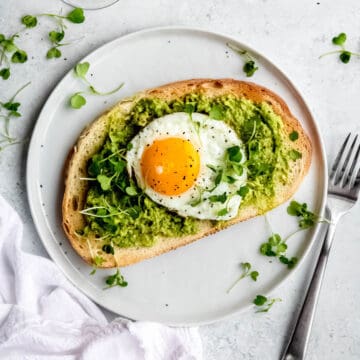
- Top with a fried, poached, or spicy pickled egg for a gorgeous pop of color, a sauce-enhancing runny yolk, and some extra protein.
- Make it without wine. Look to other inspiring ingredients like acidic tomatoes, jarred tomato sauce, pre-made simmer sauces or coconut milk.
- Experiment with other pulses like lentils or black-eyed peas, or other greens like kale, collard, swiss chard or escarole.
- Shake up the flavor profile using different herbs, spices, seasonings or acids. This cheesy white bean bake and Instant Pot navy bean soup are both great over a giant, buttery crouton.
- When it comes to the toast, feel free to infuse your oil with flavor by tempering some spices in the oil prior to pan frying the bread.
- You can also play with different kinds of oil depending on the flavor profile of your beans and greens. Sesame oil adds lovely nuttiness for more Asian inspired meals, while unrefined coconut oil will lend a sweetness that blends beautifully with curries of all kinds.
Expert Tips
- Fewer Dishes - This is supposed to be a fast lunch or dinner, so don't bother busting out the colander for your beans. Simply open the can most of the way, and use the lid to hold the beans in place while you drain out the liquid.
- Smart Savings - Cut down on food waste and get the most out of your grocery budget by saving the bean liquid—it’s great for adding body to soups, stews, and sauces, and makes a nice stand-in for pasta water if you accidentally tossed yours. Note that bean liquid can be frozen for up to a year.
- Spicy Twist - Want some extra garlic punch? Rub a raw clove of garlic on the toast after it's done. It'll sort of shred into the toast and give you a bit of a bruschetta vibe!
- Make-Ahead - The recipe as written will make two perfect portions, so if you're rocking solo life, just wrap up half the beans and greens mix for your lunch tomorrow. Just don’t toast up the second piece of bread until you’re ready to serve it.

Storage Instructions
- Once assembled, the toast will start to soak up all the bean broth, so it’s best served fresh. That said, leftovers can be stored in an airtight container in the fridge for a few days—just know that the bread will be soggy when you reheat it, kinda like Tuscan pappa al pomodoro (bread soup).
- Leftover beans and greens can be stored in an airtight container in the fridge for up to 5-7 days, or frozen for up to 3 months. Defrost overnight in the fridge as needed.
- To reheat the beans, use a saucepan or skillet over medium heat, or the microwave.
- I recommend pan frying the toast right before eating for best results, but you could totally get away with making it the day before. Just place the fried bread in a zip-top bag and store at room temperature for up to a day, or in the fridge for up to 2 days. Heat it up in the toaster oven before serving up leftovers.
Serving Suggestions
If you can’t already tell, greens and beans are lovely in a gazillion different variations, all year long. Also, don’t feel like you have to serve them on buttery toast!
- If I'm feeling lazy, sometimes I'll omit the fried bread and just eat the beans and greens all on their own with a quick grating of parm on the top. While it doesn't taste quite as special as with the giant crouton, it's still pretty dang delicious. If you happen to have some leftover garlic bread from dinner, that makes an excellent ready-made stand in as well.
- Keeping on theme with the carbs-on-carbs idea, beans and greens also taste great tossed with some cooked pasta or heaped on top of cheesy polenta or creamy mashies—try my healthier Greek yogurt mashed potatoes or roasted garlic cauliflower mash. You can also use them to stuff your baked potatoes or sweet potatoes. (Sweet potatoes go particularly well with coconut milk based B&G.)
- If you are packing lunch, grab some Wasa or crackers for serving. (Trader Joe's has yummy, long cheesy crackers that would be excellent as a stand-in for the toast.)
- Finally, look to other protein sources instead of carbs. Add a fried or poached egg to a bowlful of beans and greens. Serve alongside zhoug chicken or spicy harissa steak. Heck, even sausage links would work beautifully here. The point is, JUST PLAY!

FAQs
While it’ll depend on your personal dietary needs, my dear friend (and RDN) Megan Byrd tells me “both beans and leafy greens are generally considered healthy. Beans are an excellent source of both soluble and insoluble fiber, plant-based protein, and important nutrients like folate, magnesium, potassium, iron, and zinc. Leafy greens are a rich in vitamins A, C, and K, plus other nutrients like calcium and antioxidants.”
Additionally, even though we’re serving our braised beans and greens on fried toast, not all is lost. Megan says “beans are high in protein, but aren’t a complete protein because they lack all 9 amino acids. But, when you add grains to the mix (e.g. bread or rice), the grains fill in the gaps and create a whole protein.”
What about the fat? Megan says, “Fat isn’t a 4-letter word!! You need some fat in your diet to help with nutrient absorption and to keep your brain and heart healthy and happy. Just remember that not all fat is created equal! Heart healthy olive oil (or avocado oil) is a great option for sautéing. Also, grass-fed butter is way better than conventional butter—it has a higher proportion of unsaturated fats and lower proportion of saturated fats, is rich in Omega-3s and CLA (conjugated linoleic acid), is rich in fat-soluble vitamins A and K and beta carotene, and is a great source of butyric acid, which can reduce inflammation in the gut.”
Unfortunately, no—beans and greens don’t create a whole protein. That said, beans and toast does make a complete protein, so if you serve your beans and greens as described in the recipe card below, you’re golden! Also, feel free to introduce more protein with a jammy pickled egg or a dollop of plain yogurt.
Yep! They’ll keep well for about 3 months. (Hop back up to “storage instructions” for more details.)
First, should you use dry or canned beans? They’re a bit more expensive than dried beans, and they’re usually not *quite* as yummy, but there is no arguing that canned (or jarred) beans are infinitely more convenient than dry. If you're a meal prepping type, make a big pot of beans at the beginning of the week or keep some homemade beans in the freezer. (You can follow the first part of this recipe for dried butter beans.)
In terms of what variety of bean to reach for, basically any will do. I happen to love the creaminess of cannellini beans, but any white, pinto or kidney bean will do. You can also reach for garbanzos or lentils if you want to switch it up! (GROCERY HINT: Trader Joe's sells pre-cooked black lentils in the refrigerator section, or canned Greek chickpeas with cumin and lemon.) Seriously, just have fun with this recipe template and let your pantry guide you.
If speed is high on your list of priorities, look for tender greens. Baby spinach, arugula or mixed greens are all going to take zero prep (just grab by the handful and toss in!), and will wilt quite quickly. If you're a fan of a bit of bitterness, reach for chicories. Escarole, radicchio and even frisée could work! Finally, heartier greens like kale, collards and chard are delicious, but require a bit of prep to remove the woody stems. Consider using frozen options to cut back on your prep time, or do the work ahead of time on your meal prep day.

More Fast & Easy Tartine Recipes


If you tried this recipe and loved it, be sure to rate and review it below! For more inexpensive and delicious recipe inspiration, be sure to follow me on Pinterest. You can also get all of my newest content delivered straight to your inbox by signing up for my email newsletter!

Italian White Beans & Greens on Toast
Ingredients
- 2 slices Sourdough or bread of choice
- 1 tablespoon Olive Oil
- 2 teaspoon Butter
- ¼ C White Wine
- 5-8 cloves Garlic sliced
- ½ - 1 teaspoon Red Pepper Flakes optional
- 1 can Cannelini Beans drained. See notes.
- 2-3 handfuls Arugula or greens of choice
- Kosher Salt & Pepper to taste
- Parmesan or Pecorino optional, for garnish
Instructions
- Heat your oil and butter in a pan over medium heat. I suggest rubbing the bread around in it on both sides to ensure a nice coating. Then, just let the bread get nice and toasty! Allow it to sit, relatively undisturbed, for about 2-3 minutes per side depending on how hot your stove gets.2 slices Sourdough, 1 tablespoon Olive Oil, 2 teaspoon Butter
- Once the bread is toasted to your definition of perfection, remove it from the pan. Tip the white wine in, scraping up any bits of toasty fond that might be left over. Once it comes to a simmer, throw in your garlic and red pepper flakes to infuse the liquid, cooking for about a minute.¼ C White Wine, 5-8 cloves Garlic, ½ - 1 teaspoon Red Pepper Flakes
- Toss in the drained can of beans and give the mix a good stir. Allow to cook until the beans are heated through, about 2 minutes.1 can Cannelini Beans
- Grab a few handfuls of greens and add them to the pan with a 3-5 finger pinch of salt. I like knowing that I ate roughly a salad's worth per serving, so I use about ½ of a clamshell. Cook until the greens are just wilted but still nice and bright. Switch off the heat and season with any salt and pepper as needed.2-3 handfuls Arugula, Kosher Salt & Pepper
- Lay your toast down on a plate or pasta bowl. Scoop roughly half of the mix over the bread, being sure to get some of the yummy liquid. Grate a bit of parmesan over the top and dig in! Bonus points if you treat yourself to a tasty beverage and turn off the screen while you enjoy.Parmesan or Pecorino
Notes
- Make it vegan by swapping in plant-based butter and parmesan ~OR~ by using only olive oil (no butter) and omitting the cheese. You can also opt for a completely different flavor profile, like beans in a coconut curry sauce.
- Go gluten-free by choosing GF bread, or swapping in another carb like rice or polenta.
- Add nuts or seeds for crunch.
- Top with a fried, poached, or spicy pickled egg for a gorgeous pop of color, a sauce-enhancing runny yolk, and some extra protein.
- Make it without wine. Look to other inspiring ingredients like acidic tomatoes, jarred tomato sauce, pre-made simmer sauces or coconut milk.
- Experiment with other pulses like lentils or black-eyed peas, or other greens like kale, collard, swiss chard or escarole.
- Shake up the flavor profile using different herbs, spices, seasonings or acids. This cheesy white bean bake and Instant Pot navy bean soup are both great over a giant, buttery crouton.
- When it comes to the toast, feel free to infuse your oil with flavor by tempering some spices in the oil prior to pan frying the bread.
- You can also play with different kinds of oil depending on the flavor profile of your beans and greens. Sesame oil adds lovely nuttiness for more Asian inspired meals, while unrefined coconut oil will lend a sweetness that blends beautifully with curries of all kinds.
- Fewer Dishes - This is supposed to be a fast lunch or dinner, so don't bother busting out the colander for your beans. Simply open the can most of the way, and use the lid to hold the beans in place while you drain out the liquid.
- Smart Savings - Cut down on food waste and get the most out of your grocery budget by saving the bean liquid—it’s great for adding body to soups, stews, and sauces, and makes a nice stand-in for pasta water if you accidentally tossed yours. Note that bean liquid can be frozen for up to a year.
- Spicy Twist - Want some extra garlic punch? Rub a raw clove of garlic on the toast after it's done. It'll sort of shred into the toast and give you a bit of a bruschetta vibe!
- Make-Ahead - The recipe as written will make two perfect portions, so if you're rocking solo life, just wrap up half the beans and greens mix for your lunch tomorrow. Just don’t toast up the second piece of bread until you’re ready to serve it.


Kim says
So delicious and simple. Thank you!
(The beans are missing from ingredient list)
Ash, The Grocery Addict says
Yay! I'm so glad you liked it! And thank you for the heads up... I'm adjusting the ingredient list now! 💛