I can't think of a better gift to give your loved ones (or yourself) than a batch of Homemade CBD Gummies. It's been a trying year, and a jar full of literal chill pills in cheerful shapes and fruity flavors seems like a perfect solution. (P.S. You can totally make Homemade THC Gummies using the same method.)
Y'all, if Martha Stewart can get in on the CBD craze, I'm gonna go ahead and say the rest of us can, too. But as with many things you can buy nowadays, you're gonna save a whole lot of money if you make them yourself. While one of her 25mg CBD gummies will run you over $1 each, you can make your own, customizable version at home for less than half as much.
Here in Nashville, the incidence of cannabis shops has seriously blown up in the last few years. Heck, Joe even bought some CBD gummies at a gas station in rural Tennessee several years ago. Clearly folks are starting to buy into the health and wellness benefits of cannabinoids.
As a born and raised Californian, the wealth of benefits associated with these products comes as no shock to me. I happen to fall in that category of people who are wondering "WHY IS NOBODY IN POLITICS TALKING ABOUT NATIONAL CANNABIS LEGALIZATION TO HELP GET OUR COUNTRY OUT OF OUR SEVERAL TRILLION DOLLAR DEBT?!?"
I also happen to hate the fact that tobacco—a leading killer in the US and around the world—is perfectly legal, but THC—which many scientific studies indicate could help to safely replace dangerous opioids like OxyContin—is considered a Schedule I drug, alongside heroin. For reference, fentanyl is considered less dangerous, as a Schedule II. WTF?!? That's DUMB. But I digress.
While THC products are currently only legal for recreational use in 24 states and Washington D.C., as of 2025, CBD products have been made legal in at least some form nationwide. Like I said, even Martha is in on the game! So, time to go get your hands on some CBD (or THC) flower so I can show you how to turn it into yummy, chill-inducing weed gummies.
Jump to:
Why You’ll Love These Homemade Cannabis Gummies
- Quick & Easy - Once you have your cannabis oil or cannabutter ready, making these DIY edibles takes just about 20 minutes of active time. It's even easier than making a batch of my favorite oat flour chocolate chip cookies (which, BTW, are excellent at quashing the munchies). And once you're done, you and your loved ones will reap actual health benefits from your efforts!
- Simple Ingredients - All in all, you need just five (5!!!) ingredients, including the flower to make a batch of these adorable cannabis-infused gummies. And one of the ingredients is WATER. If that's not enough to convince you that this recipe is awesome, I'm afraid nothing will.
- Customizable & Versatile - Not only can you choose your flavor, you can also directly decide how potent you want your edibles to be, which strain or variety you use, and the balance of CBD and THC. When you make your own gummies, you have greater control over the ingredients, so you can tailor the final product to your personal preference.
Ingredients & Substitutions
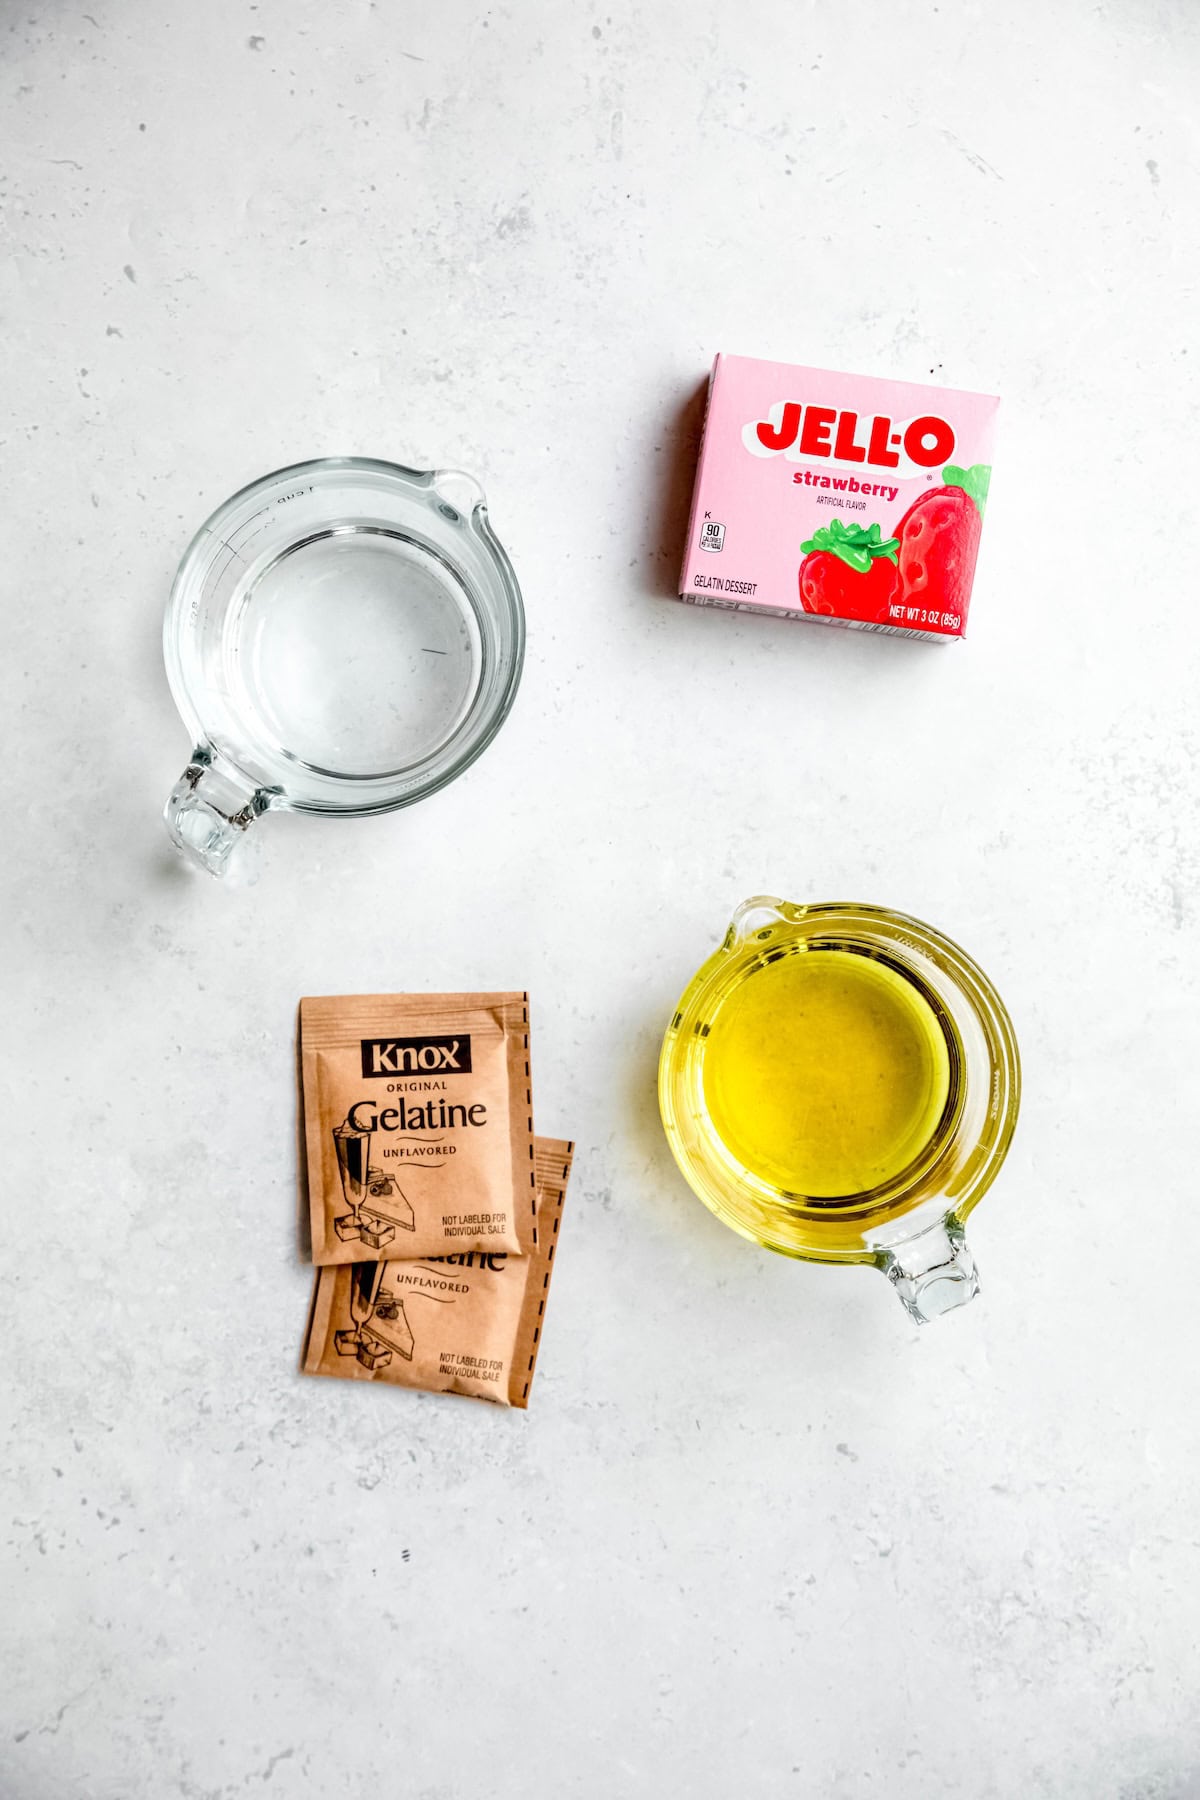
As promised, you only need a handful of ingredients to make your own weed gummies. Here’s what to grab for these homemade edibles:
- CBD Oil/Cannabutter - The key ingredient for these chewy treats! Making your own cannabis-infused oil is simple, requiring just the oil/butter of your choice and flower. My Instant Pot method is awesome for reducing the amount of time it takes to make and preventing the whole house from smelling like Bonnaroo. 😅
- Filtered Water - If you don’t have filtered water, boil for 15 minutes first or leave out overnight covered with a light cloth so the chlorine (in tap water) can evaporate away.
- Flavored Gelatin - Classic Jell-o is my preferred choice, but you’re welcome to use white label store brands instead. Just note that you will want to use the optional lecithin if you use a non-Jell-o box. The only times I’ve had issues with the mixture separating have been when I’ve used off-brand gelatin without adding the emulsifier. Experiment with different flavors to find your favorite!
- Unflavored Gelatin - Adding extra gelatin ensures a chewy gummy consistency and helps to hold the oil in suspension.
- Sunflower Lecithin - Optional, but recommended if you’re using vegan or off-brand Jell-o. This natural emulsifier helps ensure the oil stays in suspension in the gummy mixture. Feel free to use either lecithin powder, liquid lecithin, or lecithin granules. You’re also welcome to use other varieties of lecithin (e.g. egg or soy lecithin) depending on your preferences.
- Silicone Molds - When you make your own edibles, the fun part is you get to choose the gummy molds. Try gummy bears, turtles, sea creatures, dinosaurs, pot leaves, fruit shapes or a mixed bag of anything else that tickles your fancy.
How to Make Homemade CBD or THC Gummies
It takes just a few simple steps to make these delicious homemade weed gummies:
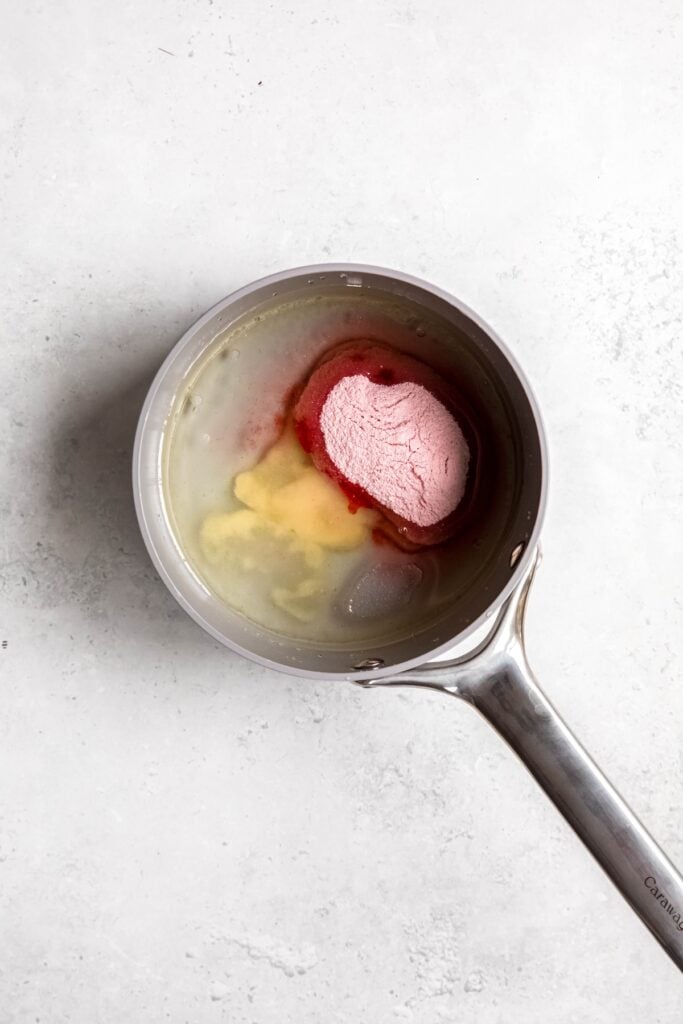
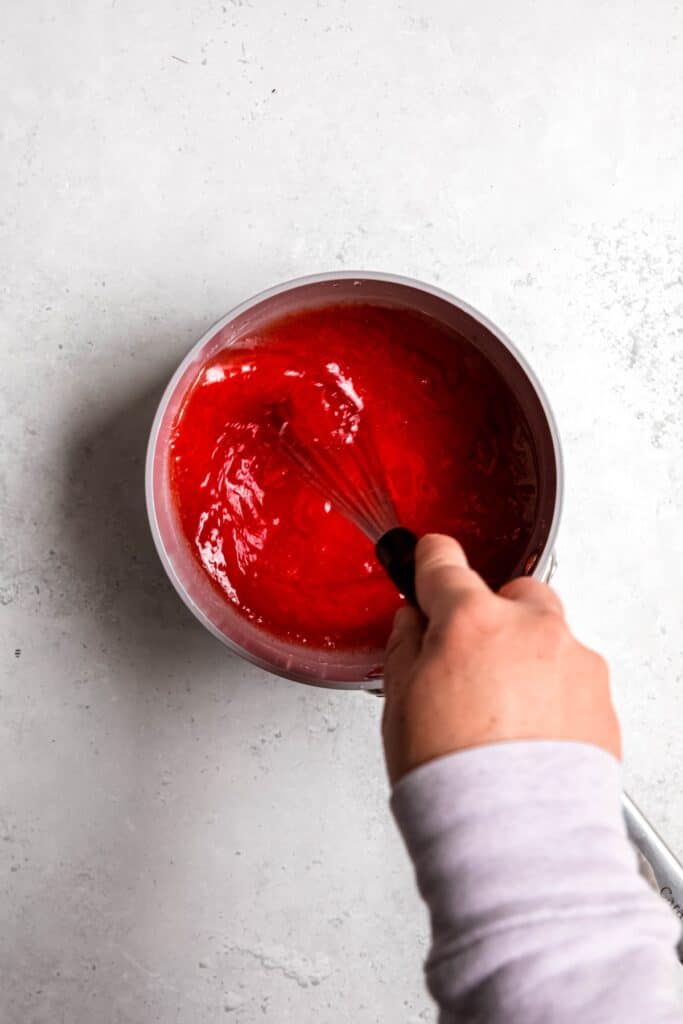
Step 1: Prep. Set your molds and droppers/mini turkey basters up somewhere close to your stove or heating element. The mix will need to stay on the heat while you fill the molds. In a small saucepan, melt your CBD oil (if needed after refrigeration). Combine your oil/cannabutter, water, flavored gelatin pack and plain, unflavored gelatin, whisking to combine.
Step 2: Heat & Mix. Set the saucepan over low-medium heat (about a 3.5/10) and continue whisking until all solids are dissolved. Reduce the heat to low.
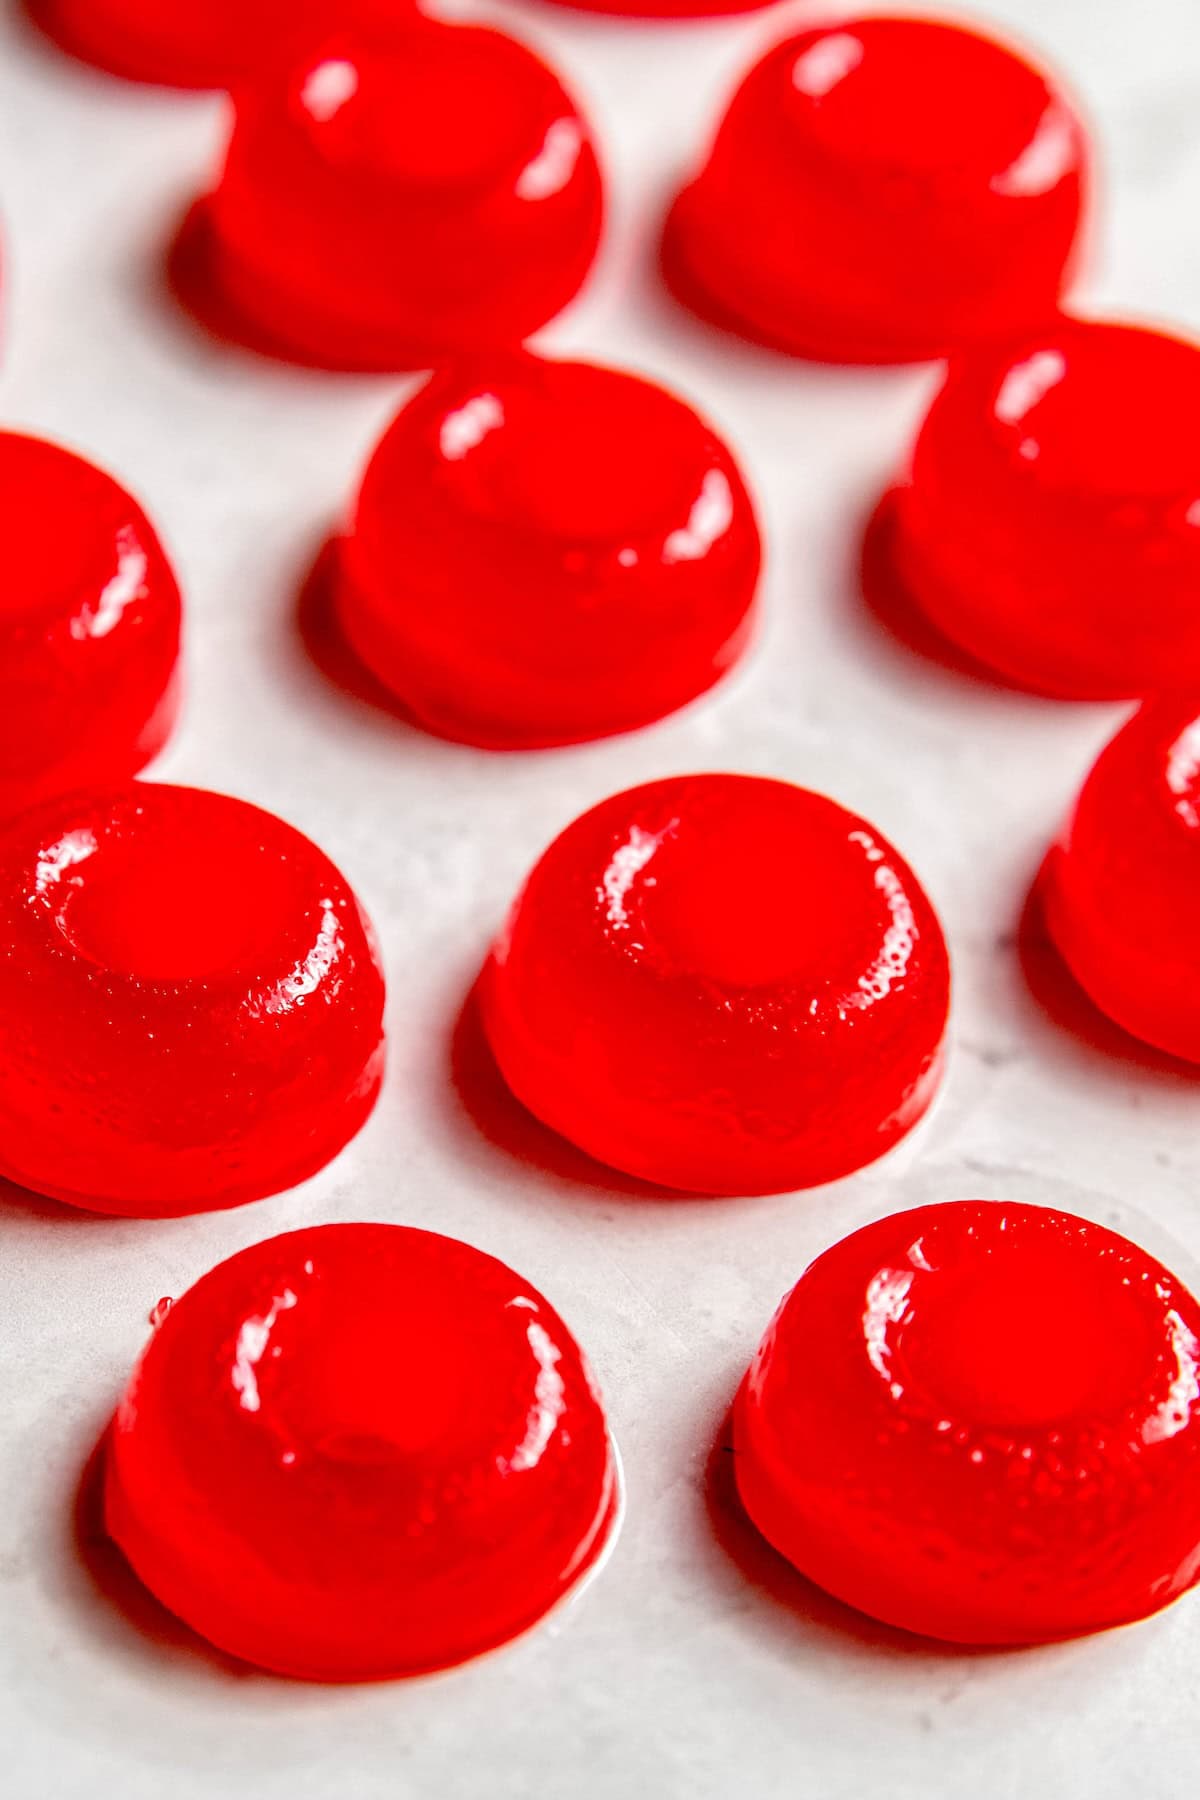
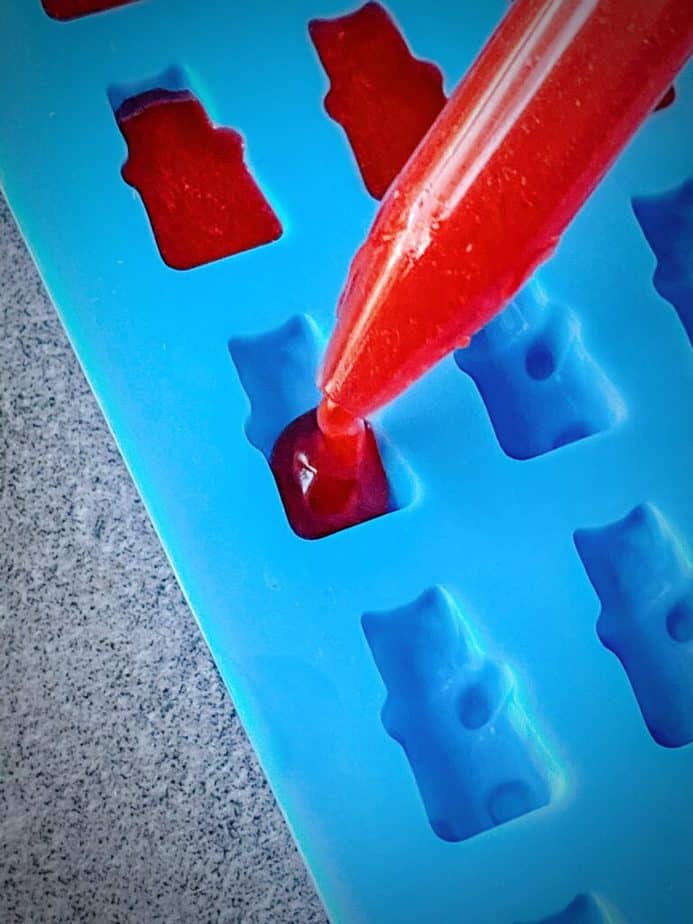
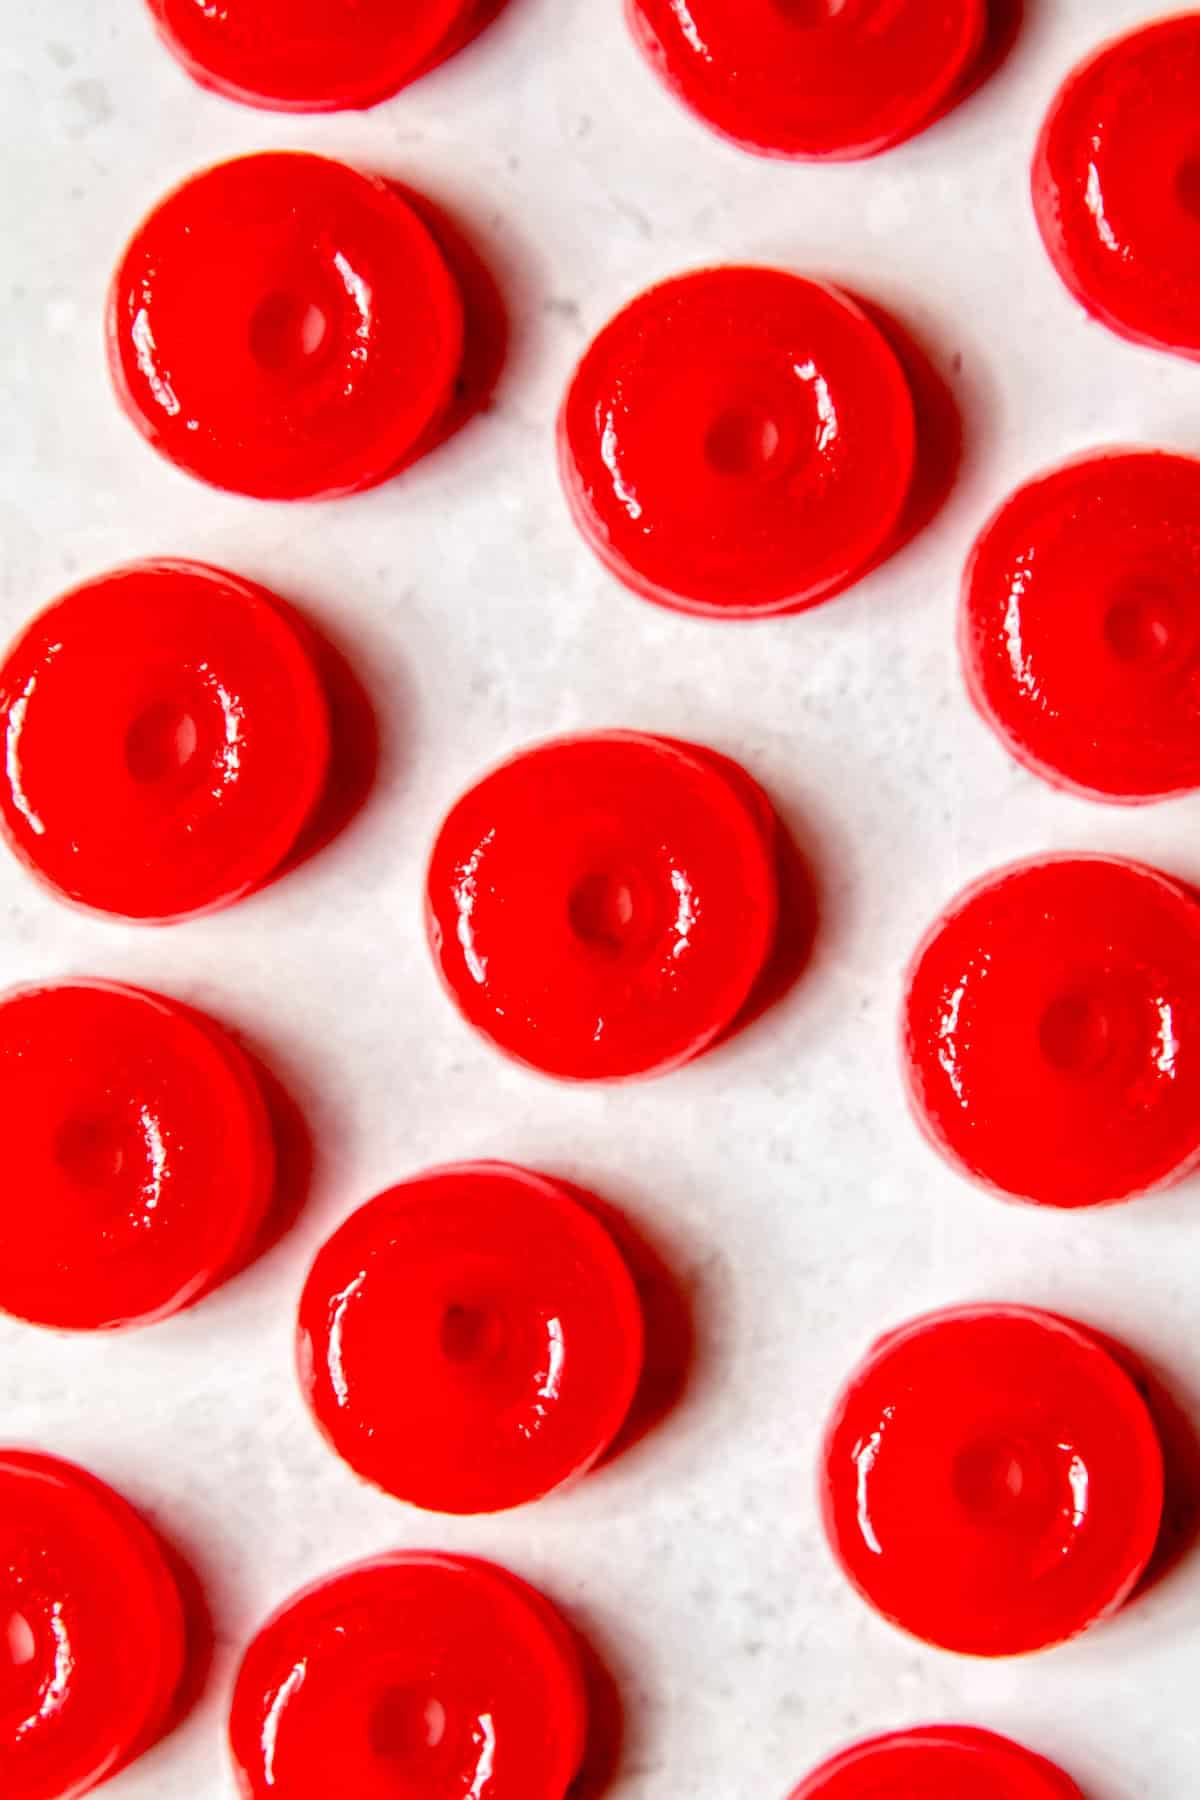
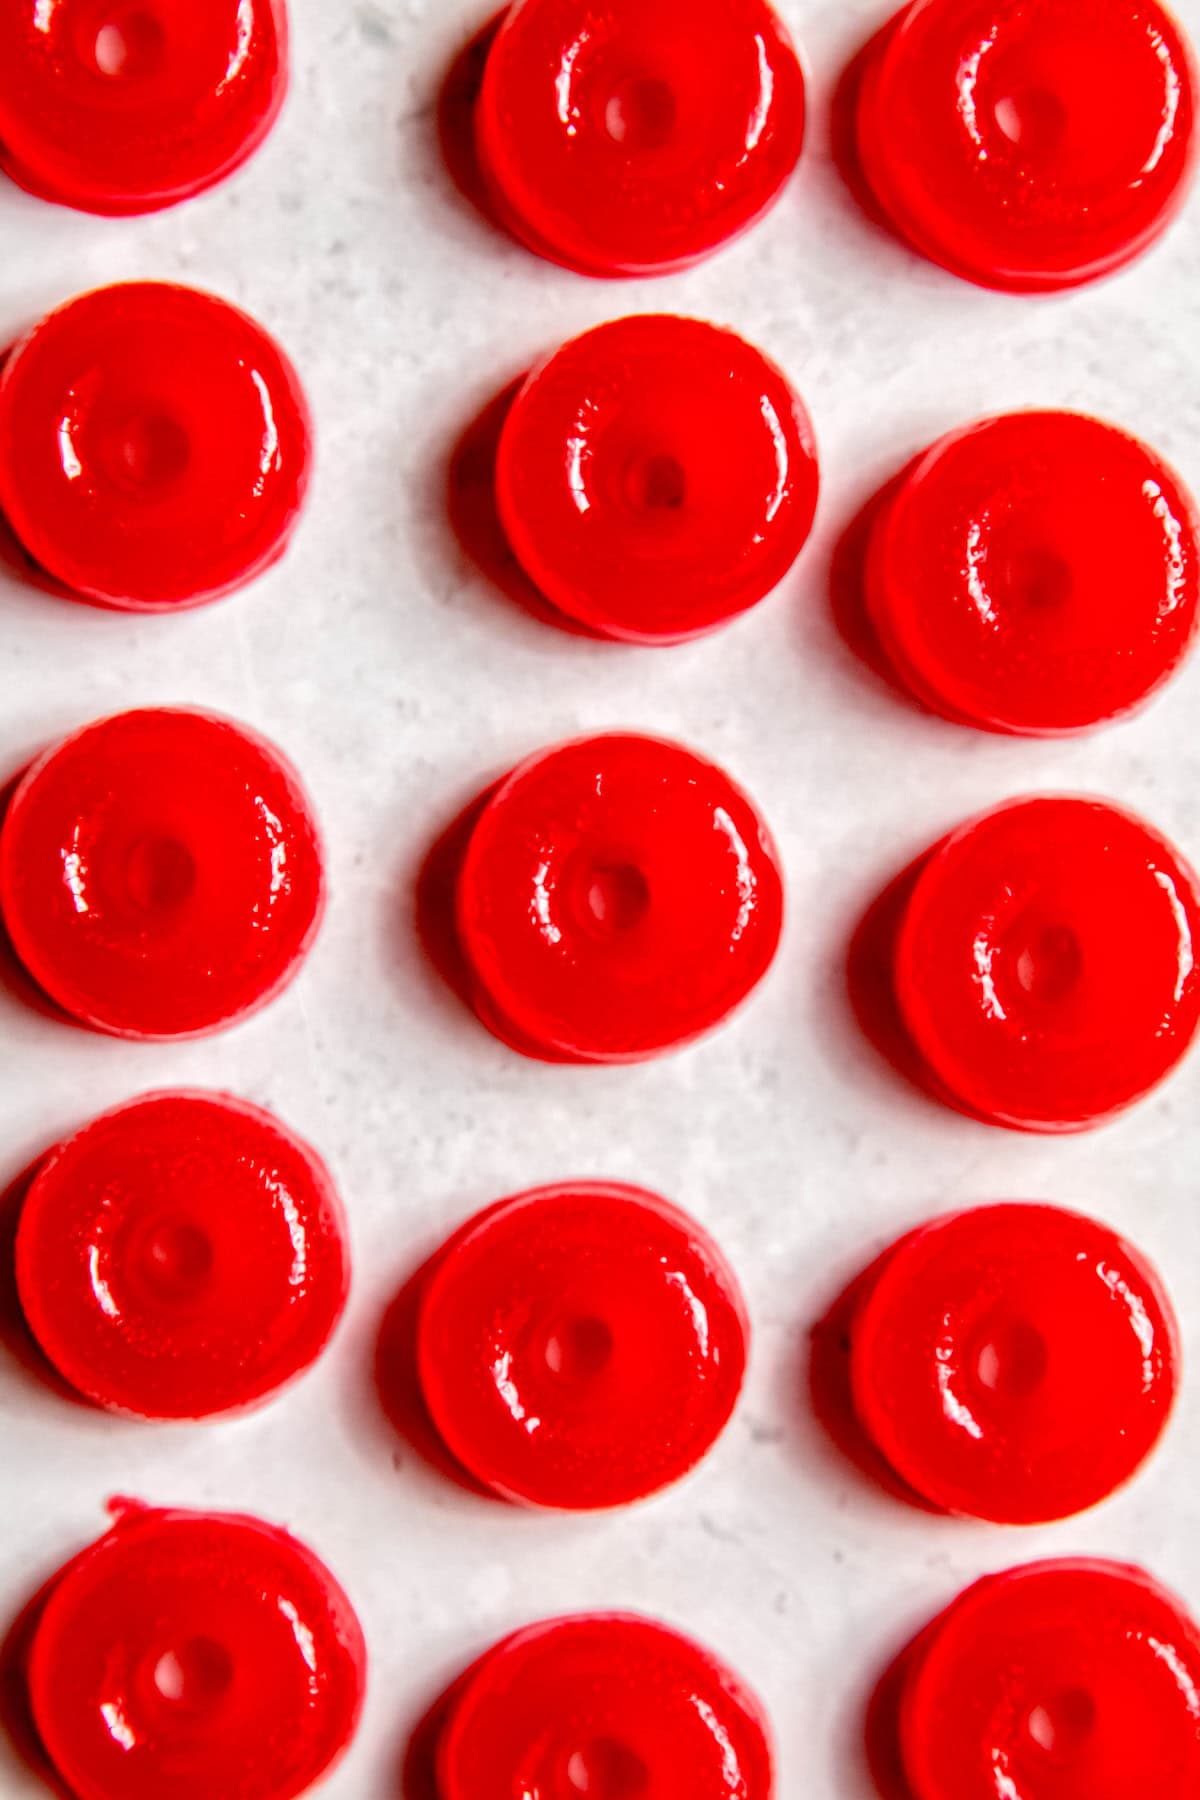
Step 3: Fill Molds. Working somewhat quickly, use the mini baster that came with the set to fill your molds. Give your mix a stir every so often as you work, ensuring that the mixture doesn't split. When one whole mold is filled, lightly tap it on the counter to release any pent up air bubbles. Continue until all of the gelatin mix is portioned out. NOTE: Don't worry if you drip some excess mixture on the seams outside of the molds. They'll peel off just fine and give you little nibbles for yourself so you can gift the real cuties.
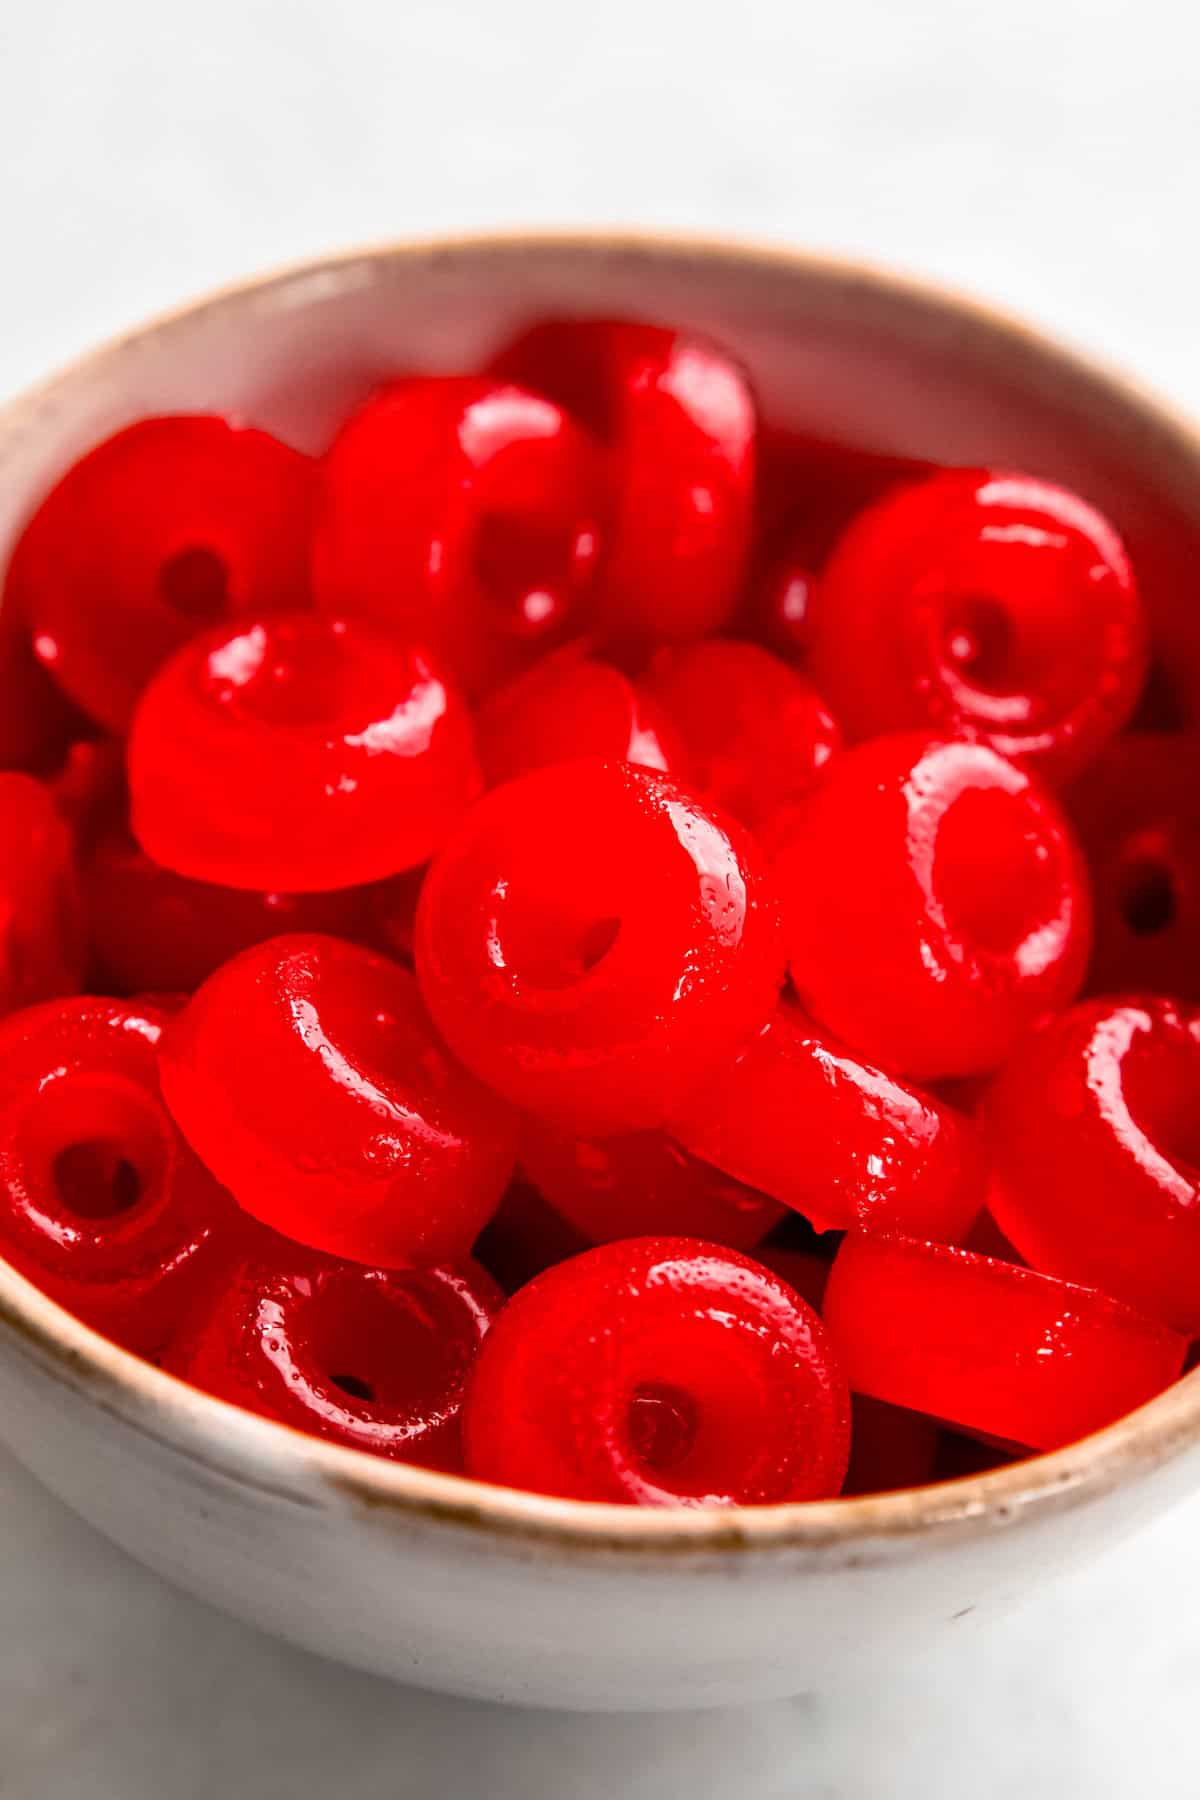
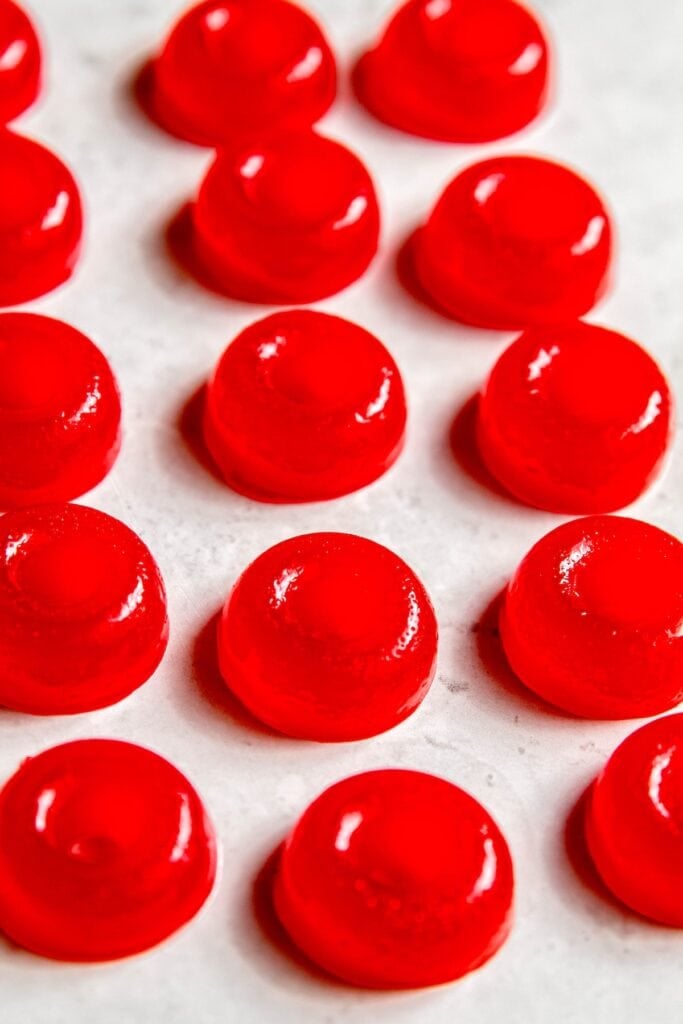
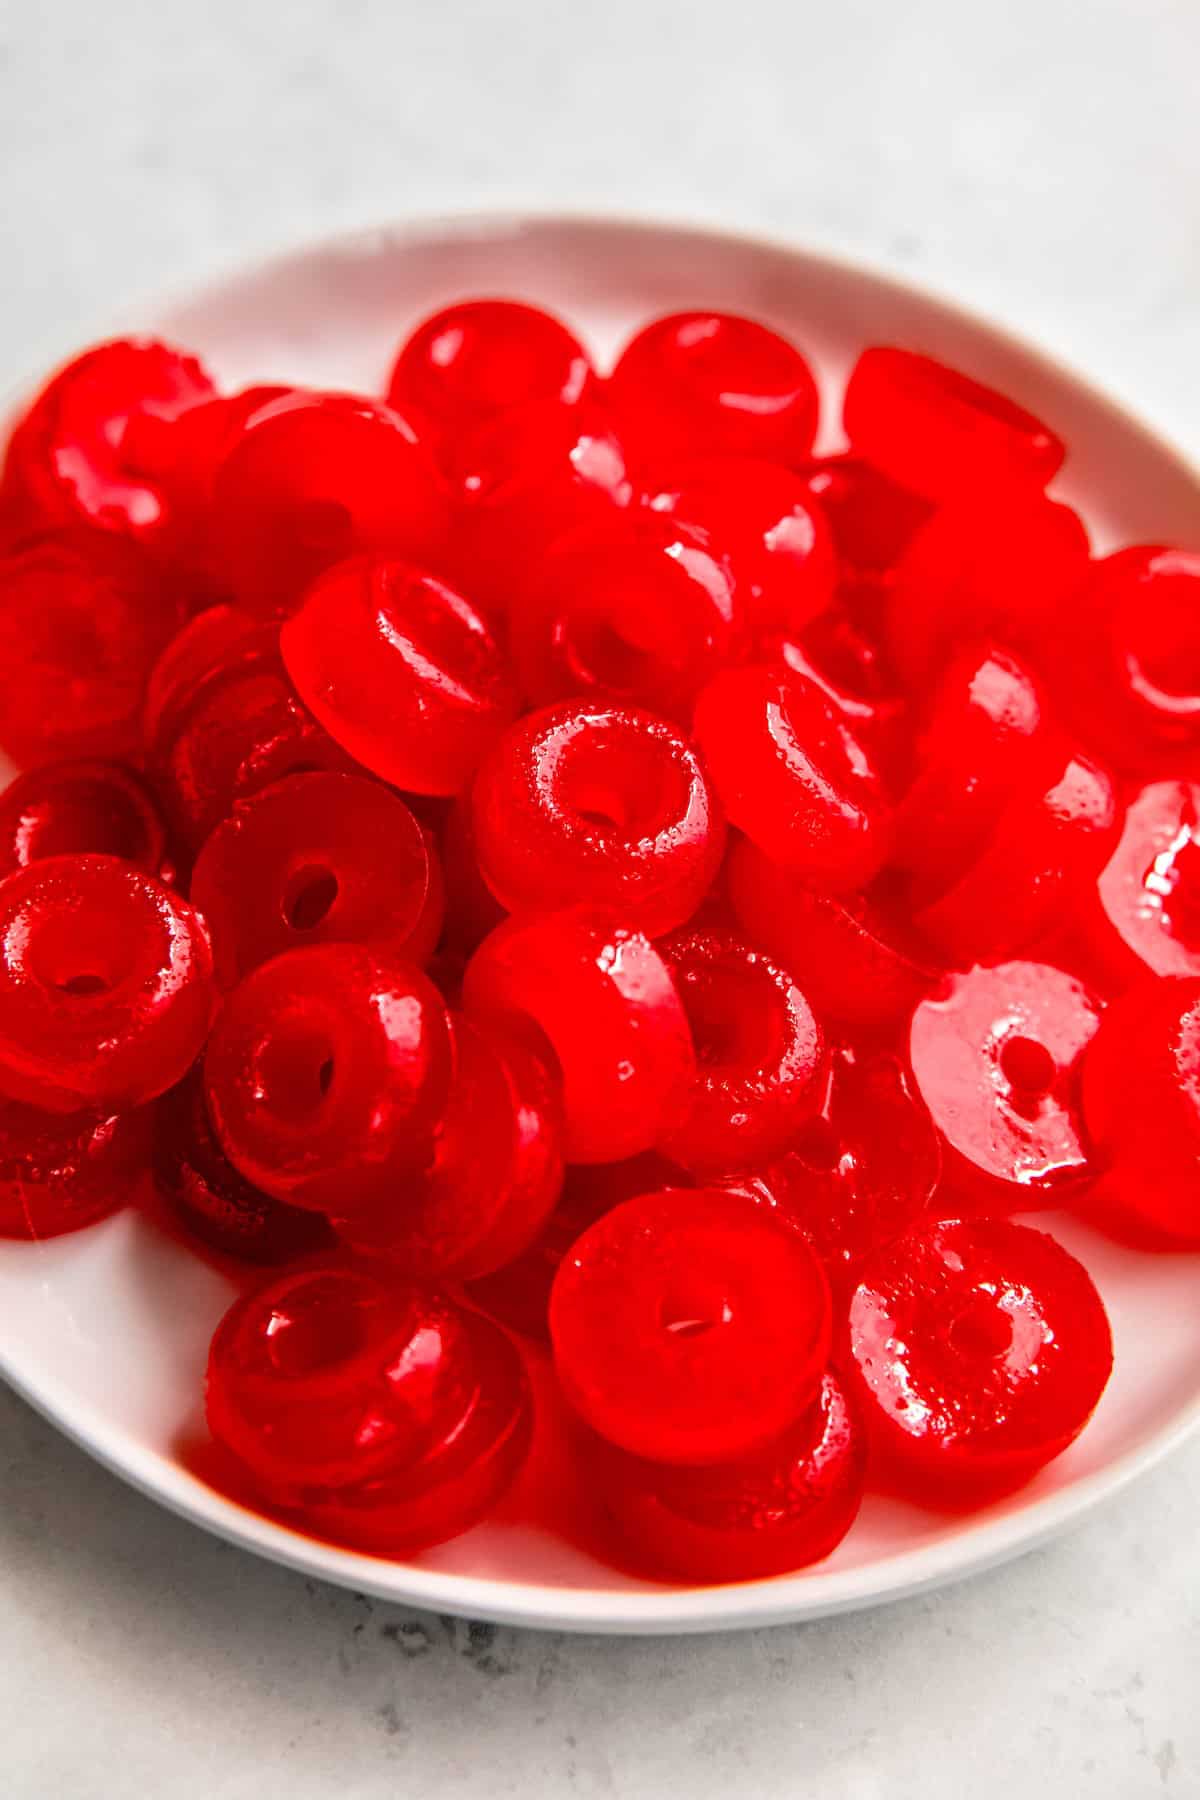
Step 4: Rest & Unmold. Allow the gummies to rest, undisturbed, for about 90 minutes to 2 hours, or until set. For the fun part, flip the molds over and press the shapes to remove each piece. Enjoy!
Optional Variations & Dietary Adaptations
- Vegan Gummies - Use vegan Jell-o and swap in about half as much agar-agar for the unflavored gelatin. Make sure to use the optional lecithin! Note that agar agar doesn’t have quite the same “bouncy” consistency as gelatin—you may want to experiment with how much you add to achieve your preferred level of chewiness.
- Sugar-Free - Use your favorite sugar-free Jell-o substitute. Again, the optional lecithin is highly recommended here.
- Dye-Free - Use dye-free gelatin dessert mix that is naturally colored. Since it’s not the same as Jell-o, I recommend using the lecithin.
- Sour Gummies - If you want to turn your homemade CBD or THC gummies into sour gummies, the trick is in the coating. After the gummies have fully set, unmold them and let them dry at room temperature for 12–24 hours so the surface isn’t too sticky. Then, toss them in a mixture of granulated sugar and citric acid (about 1 teaspoon citric acid per ½ cup sugar, adjusting to taste) until each gummy is well coated. This gives them that classic tart-sweet bite. Be sure to coat only after setting, since adding citric acid directly to the hot mixture can interfere with how the gummies firm up. Store the finished sour gummies in an airtight container with a little extra sour sugar to prevent sticking, and keep them in the fridge for up to 2–3 weeks.
Expert Tips
- Keep the heat low. Work over low heat to avoid scorching or breaking down the gelatin and CBD oil, which can ruin both texture and potency.
- Work quickly. Once the gelatin mixture is ready, pour it into molds right away. It begins setting fast! I recommend keeping the pot over the lowest heat on your burner as you work to keep it easy to work with.
- Stir occasionally. Gentle stirring keeps the mixture from separating as it rests in the pan before pouring.
- Watch for oil separation. If you see an oily layer forming in the pan, that’s a sign the mixture could use lecithin. Adding it helps the oil and liquid bind together smoothly.
- Fixing separated gummies. Don’t toss them if they don’t set evenly! You can re-melt the batch in the pan, add lecithin if needed, and try again.
- Be patient with setting time. Gummies need plenty of time in the fridge to firm up. Rushing this step can lead to sticky, soft results.
- Potency and size. Larger gummies (say, gummy worms) will have more oil per piece than medium rounds or small size gummy bears. Keep this in mind and don’t forget to read up on how to calculate your oil potency (in the FAQ section of my CBD oil post). Feel free to thin the CBD oil out with plain oil as needed to reach your preferred potency.
Troubleshooting Common Problems
Even with care, homemade CBD gummies can be finicky. Here’s how to fix the most common issues:
- Oily tops or separation. This usually means the oil didn’t fully bind to the liquid. Next time, add lecithin to help emulsify. If it happens mid-batch, re-melt the gummies, whisk in lecithin, and reset them.
- Gummies are too soft or sticky. This is usually caused by not adding enough gelatin or rushing the set time. Re-melt with a little extra gelatin, pour back into molds, and let them chill fully in the fridge.
- Mixture set before molding. If the mixture thickens before you get it into molds, gently re-warm it over low heat until pourable again.
- Uneven potency. Make sure your CBD oil is thoroughly whisked into the mixture and it has a consistent texture—lecithin helps!
Storage Instructions
Proper storage is essential for keeping your cannabis gummy stash in good shape.
- Refrigerator: For the best texture and potency, store your CBD gummies in an airtight container in the refrigerator. They’ll stay fresh for about 2–3 weeks when kept cold. If you prefer them firmer, spread them in a single layer on parchment inside the container to keep them from sticking together.
- Freezer: You can also freeze CBD gummies for longer shelf life. Place them on a baking sheet lined with parchment, freeze until solid, then transfer to a freezer-safe container or bag. They’ll keep for up to 3 months this way. When you’re ready to enjoy, let them thaw in the fridge overnight—don’t thaw at room temperature, as condensation can make them sticky.
- Cool & Dark Place: Always store gummies out of direct sunlight and away from heat, since both can affect the CBD’s potency over time.
Serving Suggestions
Cannabis edibles are a discreet way to have an enjoyable experience with THC or CBD. Because different strains vary in cannabinoid and terpene profiles, the effects of cannabis gummies can change pretty drastically. It’s worth experimenting to find the right match for your goals, whether that’s relaxation, sleep support, or sharper focus.
Here are some ideas for how to use (and share) them:
- Daily wellness support. A gummy made with a broad-spectrum CBD is a great way to promote overall balance and a sense of calm. This type works well for people who want to avoid THC but still enjoy the “entourage effect” of other cannabinoids and terpenes.
- Stress relief. For unwinding after a tough day, strains or extracts rich in linalool (a terpene also found in lavender) or myrcene (common in indica-leaning varieties) may help amplify the relaxing effects.
- Pain relief. Many people find CBD helpful for easing everyday aches and discomfort. Strains with higher levels of myrcene or beta-caryophyllene are often chosen for their soothing, anti-inflammatory properties.
- Better sleep. Look for gummies made with strains higher in CBN or indica-leaning profiles, which are more sedative and are popular choices for bedtime.
- Focus and clarity. Sativa-leaning strains, or those with higher levels of limonene and pinene, can offer a brighter, more uplifting effect—a good choice for daytime use without feeling drowsy.
- Homemade gifts. THC and CBD gummies make thoughtful DIY wellness gifts. Package them in small jars or tins, label them with the strain/extract type (such as “Relax Blend” or “Daytime Focus”), and always note the dosage per gummy (and whether they have THC or not) so recipients know exactly what they’re enjoying.
FAQs
Making your own CBD gummies is generally legal in the U.S. as long as you’re using hemp-derived CBD that contains less than 0.3% THC, in line with federal law. Making your own THC gummies, however, depends on where you live. In states where recreational or medical use is legal, you can usually make them at home for personal consumption—but not for selling. In states where cannabis is still prohibited, making THC gummies would not be legal. It's of utmost importance that you research and follow local laws!
Yes! It's a convenient way (probably one of the most popular ways!) to make your own edible gummies. Check out the recipe card and step-by-step guide to learn how.
The best oils for making CBD or THC gummies bind well with cannabinoids and stay stable in candy-making. Cannabis-infused MCT oil (from coconut oil) and avocado oil are great choices because they have a neutral flavor, smooth texture, and help with fast absorption. Coconut oil also works well and adds a subtle richness, though it can solidify at cooler temps. Some people use olive oil, but the stronger flavors may not pair as nicely with sweet gummies.
The amount of THC or CBD in homemade gummies really depends on how you make them. Factors like how much flower you use, the potency of the strain, how much oil you infuse, and even the size of your gummies all affect the final dose. Prefer higher doses? Use more potent flower, a lower ratio of oil to flower, and/or make the gummies larger. Prefer them milder? Use less flower in the oil (or add more oil to dilute it after the fact), a less potent strain, or make smaller gummies. The easiest way to know the dose of each weed gummy is to plug your numbers into a dosage calculator. Also, remember that gummy edibles have a much longer onset time than smoking—start with a low dose until you're familiar with the effects of THC or CBD.
More DIY Gifting inspiration


If you tried this recipe and loved it, be sure to rate and review it below! For more inexpensive and delicious recipe inspiration, be sure to follow me on Pinterest. You can also get all of my newest content delivered straight to your inbox by signing up for my email newsletter!

Homemade Weed Gummies With Jello (CBD or THC)
Equipment
- Gummy Bear Molds with Mini Droppers
Ingredients
CBD Oil/Cannabutter
- ¼ oz CBD Flower ground
- ½ C Unrefined Organic Coconut Oil or sub preferred oil
CBD Gummies
- ½ C CBD Oil
- ½ C Filtered Water
- 85 g Flavored Gelatin small box of any flavor of Jell-o or store brand gelatin.
- 3 ¼ tablespoon Unflavored Gelatin
- 1 teaspoon Sunflower Lecithin optional, will help prevent separation
Instructions
- Take your flower and grind it into a fluffy state, but not so small that it's powder. I use my spice grinder to shorten this process, but one of those hand held grinders will absolutely work. Place the grinds into a small, clean mason jar and firmly attach the lid.Place trivet in the bottom of your Instant Pot, and place the mason jar on top. Pour in enough water to cover roughly half of the jar.Secure the lid, set the Instant Pot to pressure cook on high for 40 minutes. Do a quick release, being sure to avoid the scorching hot steam as it escapes.¼ oz CBD Flower
- Measure out oil (or butter) of choice into a small mason jar.Carefully remove the jar you used for decarbing the flower from the Instant Pot. Using either a mesh tea steeper or a piece of cheesecloth, secure the flower and add it to the container with the oil. Secure the lid on the jar with your oil and flower. Place it back into the Instant Pot, again looking for the water to cover about half of the jar.Secure the lid of the Instant Pot and set to pressure cook on high for 20 minutes. Allow to naturally release for 40 minutes, then quick release any remaining pressure.Carefully remove the jar from the Instant Pot and allow to cool enough to handle. Remove the lid, then remove your flower. Squeeze any oil that has seeped into the cloth or flower back into the jar, then discard the flower. If necessary, add more oil to the jar to get the amount you need for your recipe. In the case of making these homemade CBD gummies, I need ½ cup oil total.TIP: Cheesecloth is compostable, so once you squeeze all the good stuff out, you can chuck the whole package into your compost.Either proceed to making the CBD gummies straightaway, or pop the lid back on your jar and place it in the fridge to use another day. From what I can tell, CBD oil will keep for several months in the fridge with no detectable degradation of potency or quality.½ C Unrefined Organic Coconut Oil
- Set your moulds and droppers/mini turkey basters up somewhere close to your stove or heating element. The mix will need to stay on the heat while you fill the moulds.In a small saucepan, melt your CBD oil (if necessary). Now combine your oil/cannabutter, water, flavored gelatin pack and plain, unflavored gelatin, whisking to combine. Set the saucepan over low-medium heat (about a 3.5/10) and continue whisking until all solids are dissolved. Reduce the heat to low.Working somewhat quickly, use the mini baster that came with the set to fill your moulds. Give your mix a stir every so often as you work, ensuring that the mixture doesn't split. When one whole mould is filled, lightly tap it on the counter to release any pent up air bubbles. Continue until all of the gelatin mix is portioned out. Allow the gummies to rest, undisturbed, for about 90 minutes to 2 hours, or until set. Flip the moulds over and press the bear shapes to remove each piece. Enjoy!½ C CBD Oil, ½ C Filtered Water, 85 g Flavored Gelatin, 3 ¼ tablespoon Unflavored Gelatin, 1 teaspoon Sunflower Lecithin
Notes
- Refrigerator: For the best texture and potency, store your CBD gummies in an airtight container in the refrigerator. They’ll stay fresh for about 2–3 weeks when kept cold. If you prefer them firmer, spread them in a single layer on parchment inside the container to keep them from sticking together.
- Freezer: You can also freeze CBD gummies for longer shelf life. Place them on a baking sheet lined with parchment, freeze until solid, then transfer to a freezer-safe container or bag. They’ll keep for up to 3-6 months this way. When you’re ready to enjoy, eat frozen or let them thaw in the fridge overnight—don’t thaw at room temperature, as condensation can make them sticky.
- Cool & Dark Place: Always store gummies out of direct sunlight and away from heat, since both can affect the CBD’s potency over time.
- Vegan Gummies - Use vegan Jell-o and swap in about half as much agar-agar for the unflavored gelatin. Make sure to use the optional lecithin! Note that agar agar doesn’t have quite the same “bouncy” consistency as gelatin—you may want to experiment with how much you add to achieve your preferred level of chewiness.
- Sugar-Free - Use your favorite sugar-free Jell-o substitute. Again, the optional lecithin is highly recommended here.
- Dye-Free - Use dye-free gelatin dessert mix that is naturally colored. Since it’s not the same as Jell-o, I recommend using the lecithin.
- Sour Gummies - If you want to turn your homemade CBD or THC gummies into sour gummies, the trick is in the coating. After the gummies have fully set, unmold them and let them dry at room temperature for 12–24 hours so the surface isn’t too sticky. Then, toss them in a mixture of granulated sugar and citric acid (about 1 teaspoon citric acid per ½ cup sugar, adjusting to taste) until each gummy is well coated. This gives them that classic tart-sweet bite. Be sure to coat only after setting, since adding citric acid directly to the hot mixture can interfere with how the gummies firm up. Store the finished sour gummies in an airtight container with a little extra sour sugar to prevent sticking, and keep them in the fridge for up to 2–3 weeks.
- Keep the heat low. Work over low heat to avoid scorching or breaking down the gelatin and CBD oil, which can ruin both texture and potency.
- Work quickly. Once the gelatin mixture is ready, pour it into molds right away. It begins setting fast! I recommend keeping the pot over the lowest heat on your burner as you work to keep it easy to work with.
- Stir occasionally. Gentle stirring keeps the mixture from separating as it rests in the pan before pouring.
- Watch for oil separation. If you see an oily layer forming in the pan, that’s a sign the mixture could use lecithin. Adding it helps the oil and liquid bind together smoothly.
- Fixing separated gummies. Don’t toss them if they don’t set evenly! You can re-melt the batch in the pan, add lecithin if needed, and try again.
- Be patient with setting time. Gummies need plenty of time in the fridge to firm up. Rushing this step can lead to sticky, soft results.
- Oily tops or separation. This usually means the oil didn’t fully bind to the liquid. Next time, add lecithin to help emulsify. If it happens mid-batch, re-melt the gummies, whisk in lecithin, and reset them.
- Gummies are too soft or sticky. This is usually caused by not adding enough gelatin or rushing the set time. Re-melt with a little extra gelatin, pour back into molds, and let them chill fully in the fridge.
- Mixture set before molding. If the mixture thickens before you get it into molds, gently re-warm it over low heat until pourable again.
- Uneven potency. Make sure your CBD oil is thoroughly whisked into the mixture and it has a consistent texture—lecithin helps!
- Daily wellness support. A gummy made with a broad-spectrum CBD is a great way to promote overall balance and a sense of calm. This type works well for people who want to avoid THC but still enjoy the “entourage effect” of other cannabinoids and terpenes.
- Stress relief. For unwinding after a tough day, strains or extracts rich in linalool (a terpene also found in lavender) or myrcene (common in indica-leaning varieties) may help amplify the relaxing effects.
- Pain relief. Many people find CBD helpful for easing everyday aches and discomfort. Strains with higher levels of myrcene or beta-caryophyllene are often chosen for their soothing, anti-inflammatory properties.
- Better sleep. Look for gummies made with strains higher in CBN or indica-leaning profiles, which are more sedative and are popular choices for bedtime.
- Focus and clarity. Sativa-leaning strains, or those with higher levels of limonene and pinene, can offer a brighter, more uplifting effect—a good choice for daytime use without feeling drowsy.
Marie says
I made these gummies several times and they turn out great. This last time I did everything the same but when I went to check them in the molds the jello and the butter didn’t mix. I have jello gummies and then I have butter gummies. What went wrong
Ash, The Grocery Addict says
The only time that has happened to me, I think it came down to rushing… when they didn’t set properly, I poured them back into the saucepan and cooked until the mixture was uniform and they turned out great!
If the mix still isn’t emulsifying, try adding another teaspoon of gelatin and keep stirring over low heat.
I also find that oils that are solid at room temp (eg coconut oil) seem to emulsify faster than oils that remain liquid (eg olive oil). Let me know if any of that works!!
Tussler says
Question: "WHY IS NOBODY IN POLITICS TALKING ABOUT NATIONAL CANNABIS LEGALIZATION TO HELP GET OUR COUNTRY OUT OF OUR SEVERAL TRILLION DOLLAR DEBT?!?"
Answer: Big Pharma - Money rules the world and there is too much money at stake for people to stop taking their prescription pills and start taking natural alternatives.
Ash, The Grocery Addict says
^^^ 1000%
JIMMY says
I have made these HHC gummies several times and they are great. This last time I did everything the same but when I went to check them in the moulds the gelatin and butter did not mix. I have jelly beans and then I have butter beans. what went wrong.
Ash, The Grocery Addict says
So, I've since discovered that some brands of gelatin seem to hold better than others. Good news is, the ones that went awry are still salvageable. If you are using a brand that has some separation, I suggest purchasing some lecithin. Melt the gummies back down to liquid over low-medium heat. Once melted, add between 0.5-1 teaspoons and whisk it well to combine. Pour back into your molds and they should be right as rain.
Kendra says
For more precise dosing in each gummy, can we add the oil to each individual bear (or whatever mold shape) and then mix it?
Ash, The Grocery Addict says
Hey Kendra,
I think it might be a little difficult to mix in, especially with uneven mold surfaces (like the bears). That said, if you know how much is going in overall and divide by the number of pieces, you should have an accurate dose. Just make sure you're using the same mold size for everything.
Tom says
One post I read said that if something didn’t turn out you could melt the gummies and try again. My issue was my mixture solidified before I could get in the molds and then I noticed the I still had oil in the pan. Is my heat too hot? Or am I doing something else wrong. What I am sure of is no way could I reheat and melt my mixture. It was setting up more and more the longer it stayed on the heat
Ash, The Grocery Addict says
Hey Tom, I've only had that happen to me once, and I do think the problem is heating it at too high of a temperature and/or heating it for too long. If this happens again, you can melt it down and add more water (start with just a tablespoon) to help thin it out. Also, if the oil is separating from the mix, I think that's an indication that you should use the optional lecithin. For whatever reason, some brands of gelatin (usually the store brands) don't seem to absorb it quite as well and need the emulsification boost.
Kim says
I have CBD powder. I’m assuming that would work in the jello also. Do you have any experience with powder?
Ash, The Grocery Addict says
I haven't worked with powder, but it *should* work. You may need to fiddle with the proportions of liquids to get it right, though!
Roy says
I keep reading your recipe over and over and I don't see how much warm/hot water is needed to add to the jell-o and gelatin along with the oil ?
Ash, The Grocery Addict says
1/2 Cup 🤓
Noreen says
Does it matter if lecithin is liquid or powder?
Ash, The Grocery Addict says
I have only used liquid lecithin, but I don't think it should matter. I suggest adding it to the powdered ingredients and stirring for equal distribution before adding it to the remaining liquids.
H. Hood says
When you measure your coconut oil, do you measure as a solid or a liquid?
Ash, The Grocery Addict says
I typically measure it as a slightly softened solid because I can stick my dry measuring cup in, but the volume shouldn't change if you're measuring it in a liquid state instead.
CBD Provisions says
Thanks for the posting CBD-Provisions
Richard says
I make my gummies with DakotaLabs.com CBD.... It is USDA Organic!
Ash, The Grocery Addict says
Right on! Thanks for the rec <3
Ronda Howard says
when do you add the Sunflower Lethicin?
Do I use powered or liquid form?
Ash, The Grocery Addict says
I've only ever used liquid form, but powdered should work too! You might just need to mix it with the hot water before adding it to the pot. For the liquid kind, I add it to the pot with the Jell-o and hot water. Just make sure to whisk like crazy so it gets fully incorporated.
Ronda says
Not sure what I did wrong....thinking of adjusting the amount of gelatin.
They turned into rubber. I used 3 1/4 tablespoons of gelatin like the recipe states.
I also put finished gummies in jar and they weeped, after that happened I took them out to dry and they turned into unedibles.
My friend made these and had the same problem with the rubber consistency.
What do you suggest?
Ash, The Grocery Addict says
Oh shoot! Are you sure you used the right size of Jell-o box? If you accidentally grabbed a large box rather than the small 85 gram box, that would throw off the gelatin by a lot, resulting in hard, rubbery gummies. As for weeping, that tends to happen with some brands of flavored gelatin. To prevent that, I suggest adding the lecithin, which helps to keep the mixture emulsified. Let me know if you have more for me to go on and I'll try and help troubleshoot!
Michelle says
I tried this and I rolled the finished product in sugar to prevent them from sticking together. It worked great!
Ash, The Grocery Addict says
Awesome, so glad you like the end result!! And I love the idea of a sparkly sugar coating. So cute!