Step up your autumnal snacking game with my simple Dehydrated Apple Chips recipe! It’s easy to make a big batch for a healthy treat—all you need is two ingredients, a sharp knife, and some patience while they dry out. No dehydrator? No problem. I've included instructions for making them in the oven. Oh, and I’ve included 9 different flavor options so you won’t get bored!
A few years ago, Joe got a food dehydrator for Christmas. At first, we were absolutely obsessed—we made our own fruit rollups, dried veggies and apple chips on the regular for months. While we don’t use it with quite the same frequency, it’s still great for drying herbs and preserving fruits and veggies when you get a little too ambitious with purchases.
But, even if you don’t have this specific kitchen gadget, homemade apple chips are a snap to make. You just need a sheet pan and an oven! Either way, these crispy, chewy, sweet-tart snacks are certain to become a family favorite. With tons of flavoring options—think chai, chili lime, or caramel apple chips—there are plenty of ways to shake things up all season long.
So, next time you go a little bonkers on your apple picking adventures, give this dehydrated apple chips recipe a shot! And, if you’re still up to your elbows in apples when you’re done, try my homemade cinnamon apple preserves and no-peel spiced apple butter next. That way, you can enjoy cozy fall flavors all year round!
Jump to:
- Why You’ll Love Homemade Apple Chips
- Ingredients & Substitutions
- How to Make Apple Chips in the Dehydrator
- How to Make Apple Chips in the Oven
- Optional Variations & Dietary Adaptations
- Expert Tips
- Storage Instructions
- Serving Suggestions
- FAQs
- More Copycat DIY Snack Recipes
- Dehydrated Apple Chips (Oven or Dehydrator)
- 💬 Reviews
Why You’ll Love Homemade Apple Chips
- Quick & Easy - This is a fantastically simple snack recipe you’ll turn to all season long. Just slice your apples thin, spread them out on a tray, sprinkle them with seasoning (if you want), then flip a switch. It’s that easy!
- Budget-Friendly - Rather than spending $5 on a store-bought bag (that maybe has 3 apples’ worth), make these crispy apple chips instead. Depending on where you shop, you can buy them fresh for just $1-2 per pound when they’re in season, saving you up to 50% or more.
- Better-for-You - Not only are homemade apple chips cheaper than store-bought, they’re also more natural. No cheap oils, corn syrup, dextrose, or artificial flavors here—just fresh apples and real spices.
Ingredients & Substitutions
As promised, you don't need much to make your own dried apple chips. Here's what to grab:
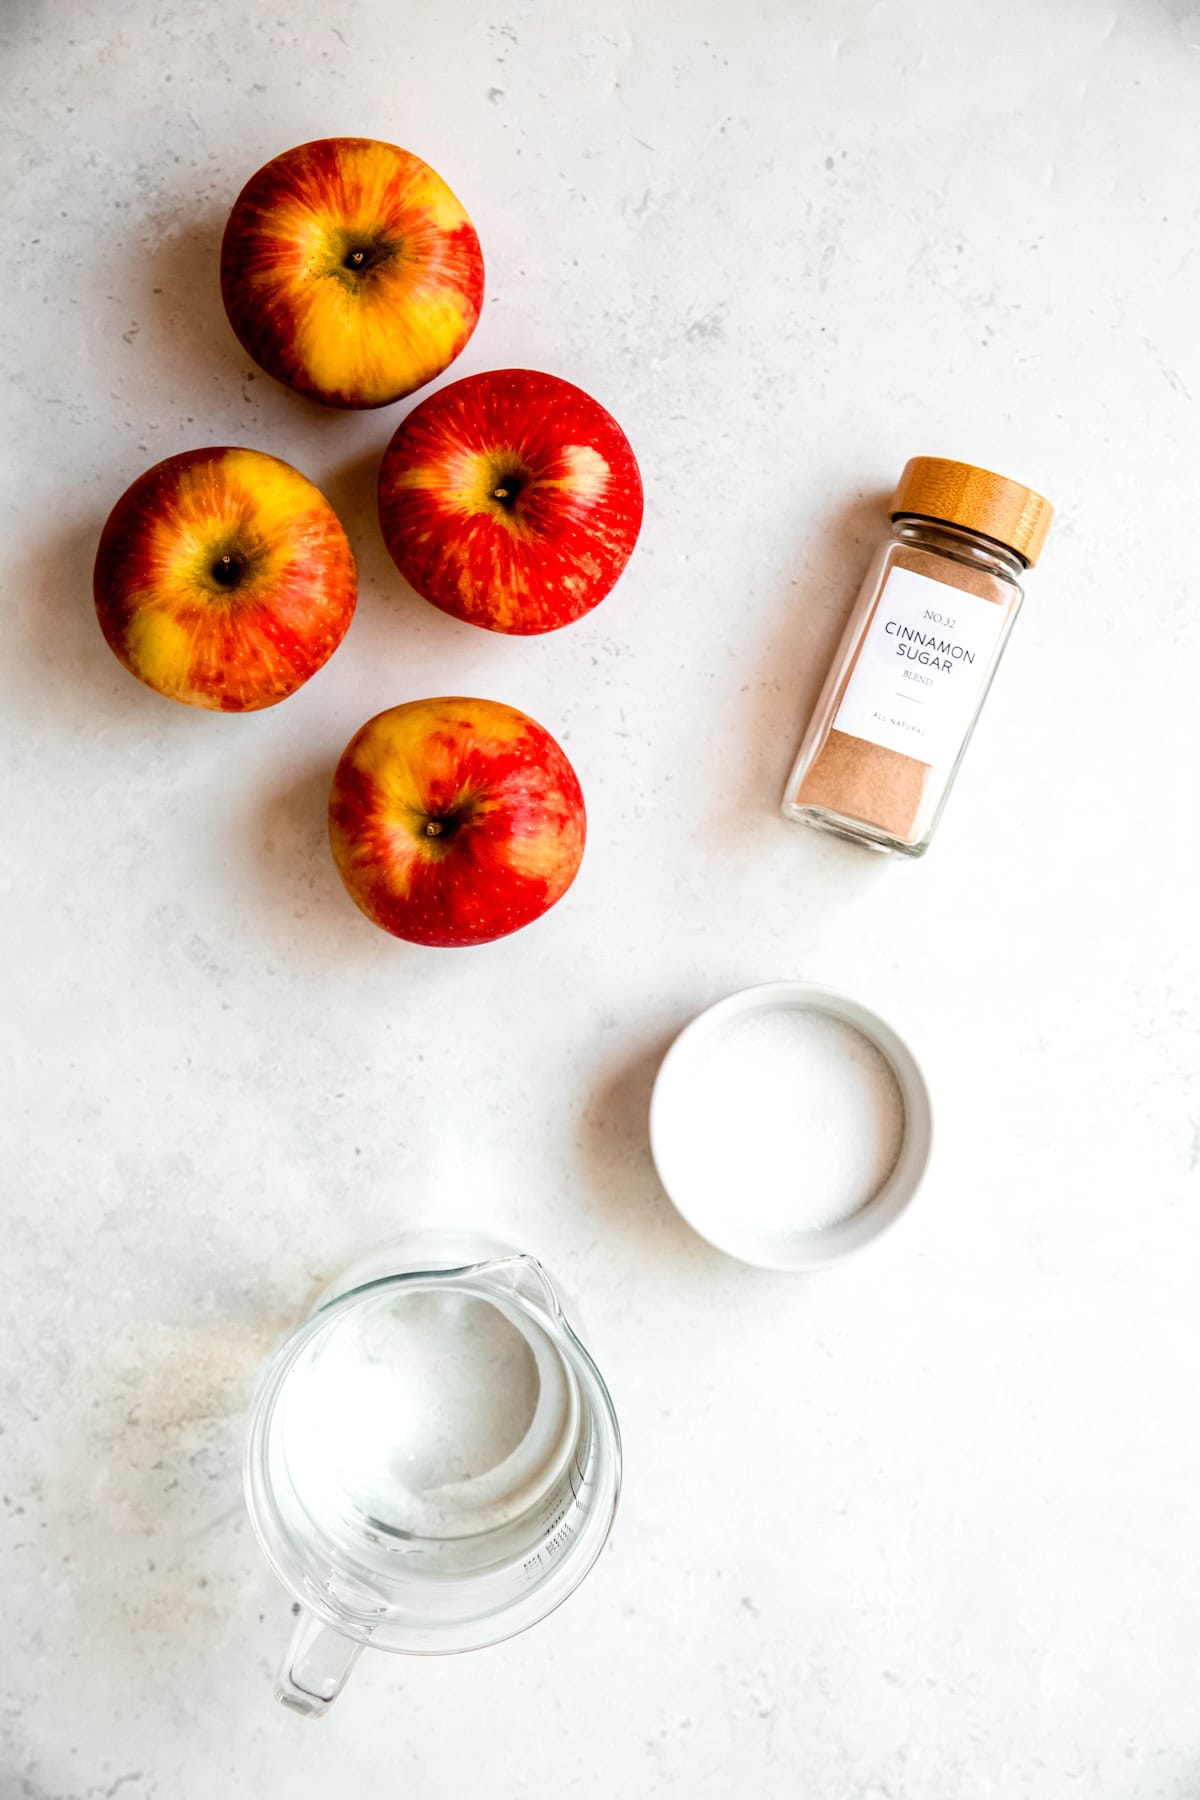
- Citric Acid & Water - Soaking the apple slices in an acidic solution before dehydrating helps prevent unattractive oxidation and helps preserve the apple chips for longer—though, that’s never been an issue in our house! We usually crush the whole batch in a day or two. If you don’t have citric acid, sub 2 tablespoons of lemon juice.
- Apples - Any variety will work beautifully, so pick your favorite! This is also a great way to make use of mealy apples you don’t want to eat out of hand.
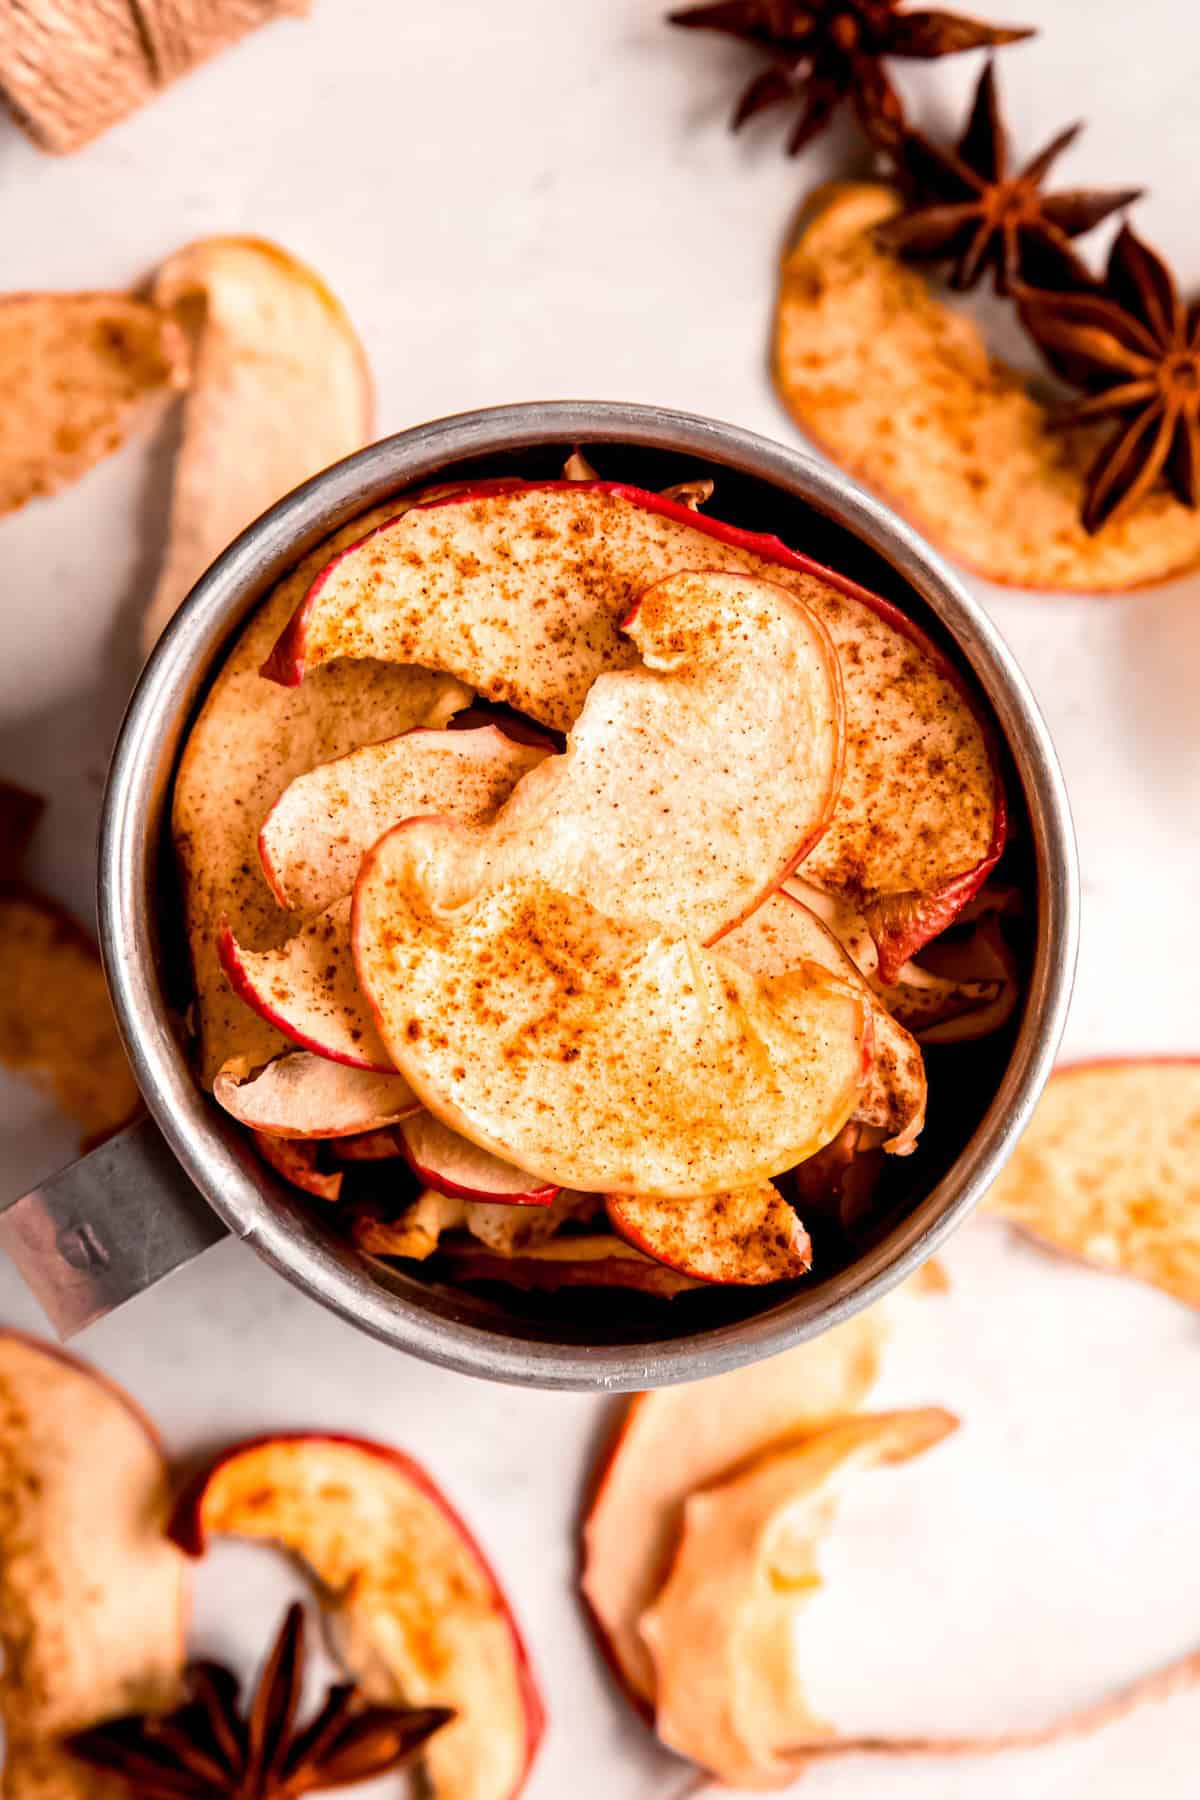
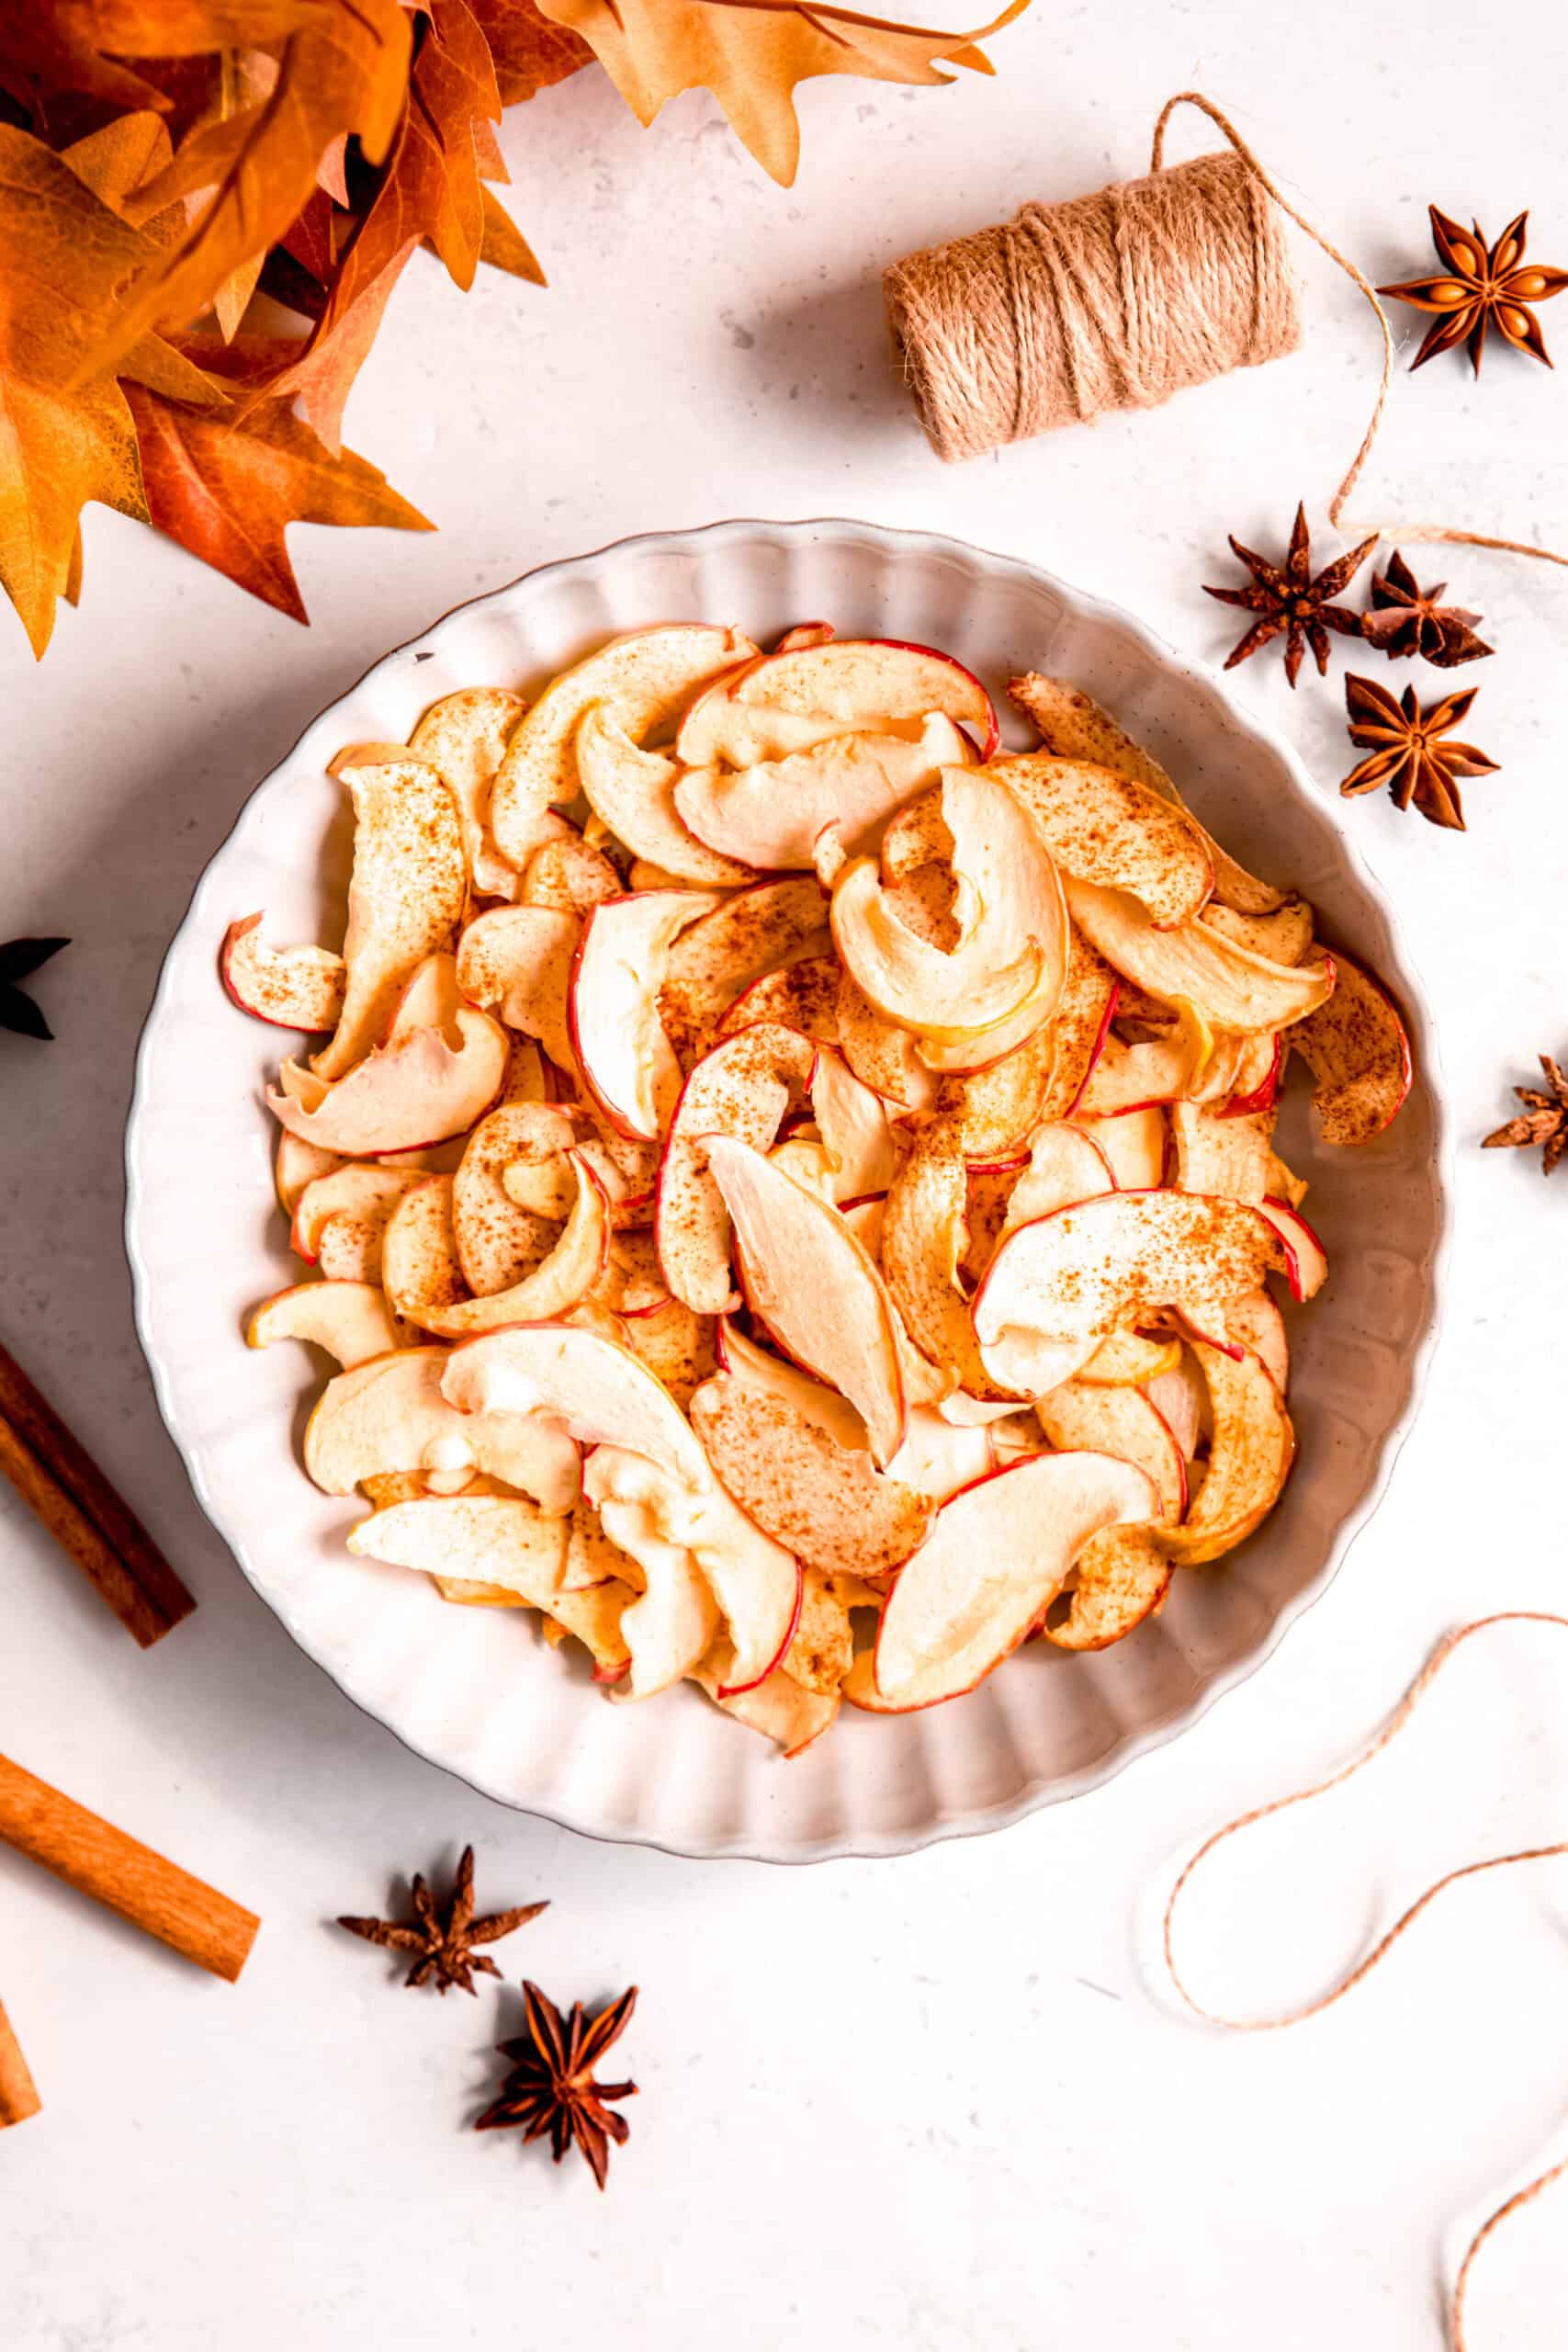
- Seasoning of Choice - There are tons of options to choose from on your spice rack, so have fun mixing and matching. Go classic with cinnamon, lean into fall with pre-blended apple pie spice or pumpkin spice, or bust out some chai masala. Or, go more savory with chili lime salt (Tajin), make ‘em spicy with a cinnamon-cayenne mix, keep it simple with sea salt, or add some rosemary to the mix. More ideas below!
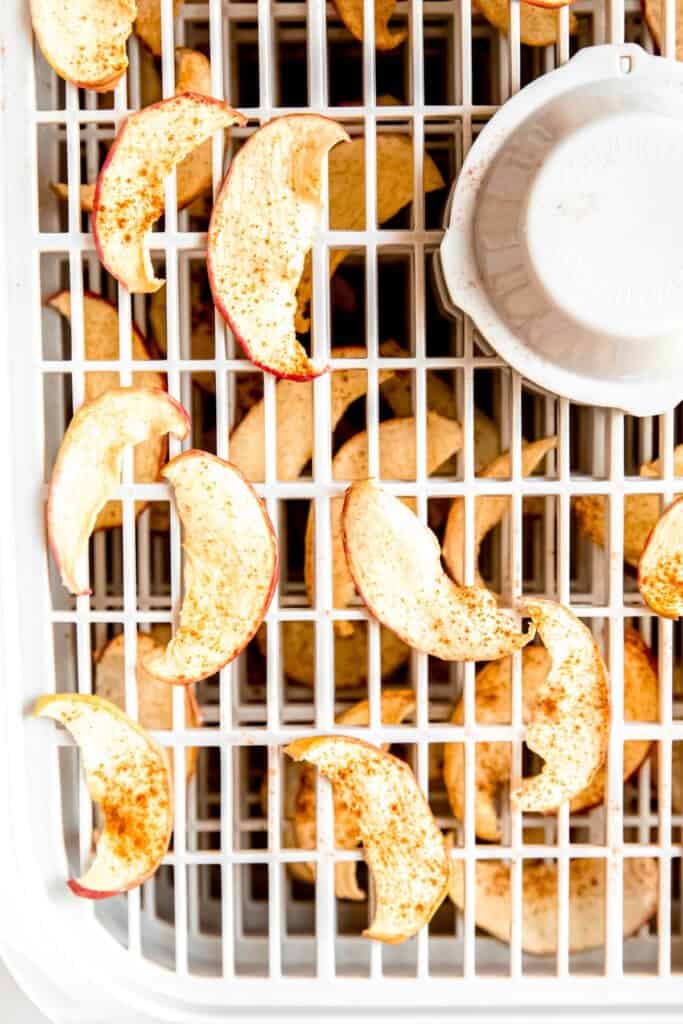
How to Make Apple Chips in the Dehydrator
Step 1: Prep. Even if you’ve picked them fresh from an orchard, store-bought apples are often coated in wax or treated with pest deterrents. Properly washing them ensures you’re starting clean. In a large bowl, dissolve a little citric acid in water (or just use lemon juice if that’s what you have). Set aside until your apples are ready.
Step 2: Prep Apples. Peeling is optional—I usually skip it since the skin has nutrients (and, TBH, I’m lazy). But you will want to core the apples to remove any hard parts and seeds. Next, grab your mandoline and set it to 3mm (about ⅛ inch). Use the hand guard or wear cut-resistant gloves. Seriously—don’t risk it. (I lost part of a fingerprint slicing a cucumber, and it was not fun.)
Tip: No mandoline? No problem. A sharp knife works too; just aim for thin, even slices.
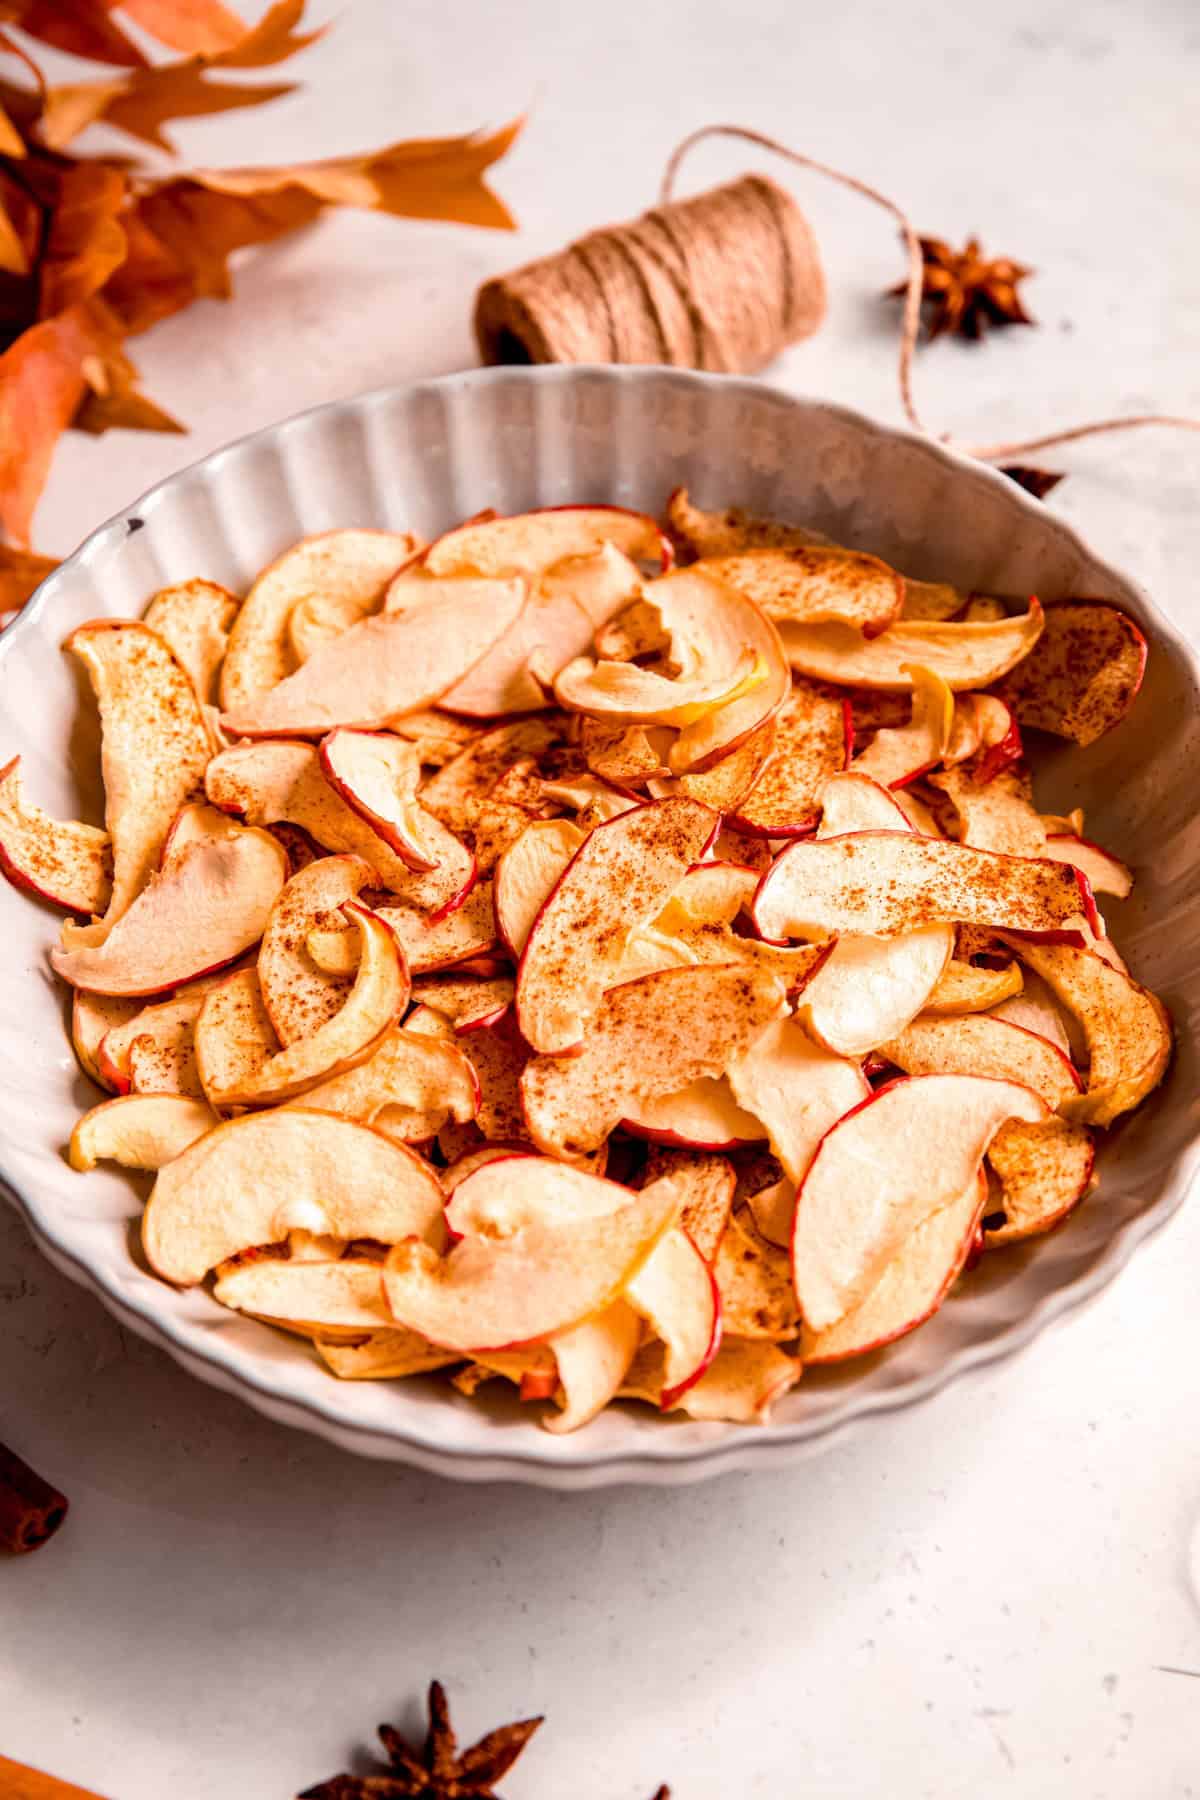
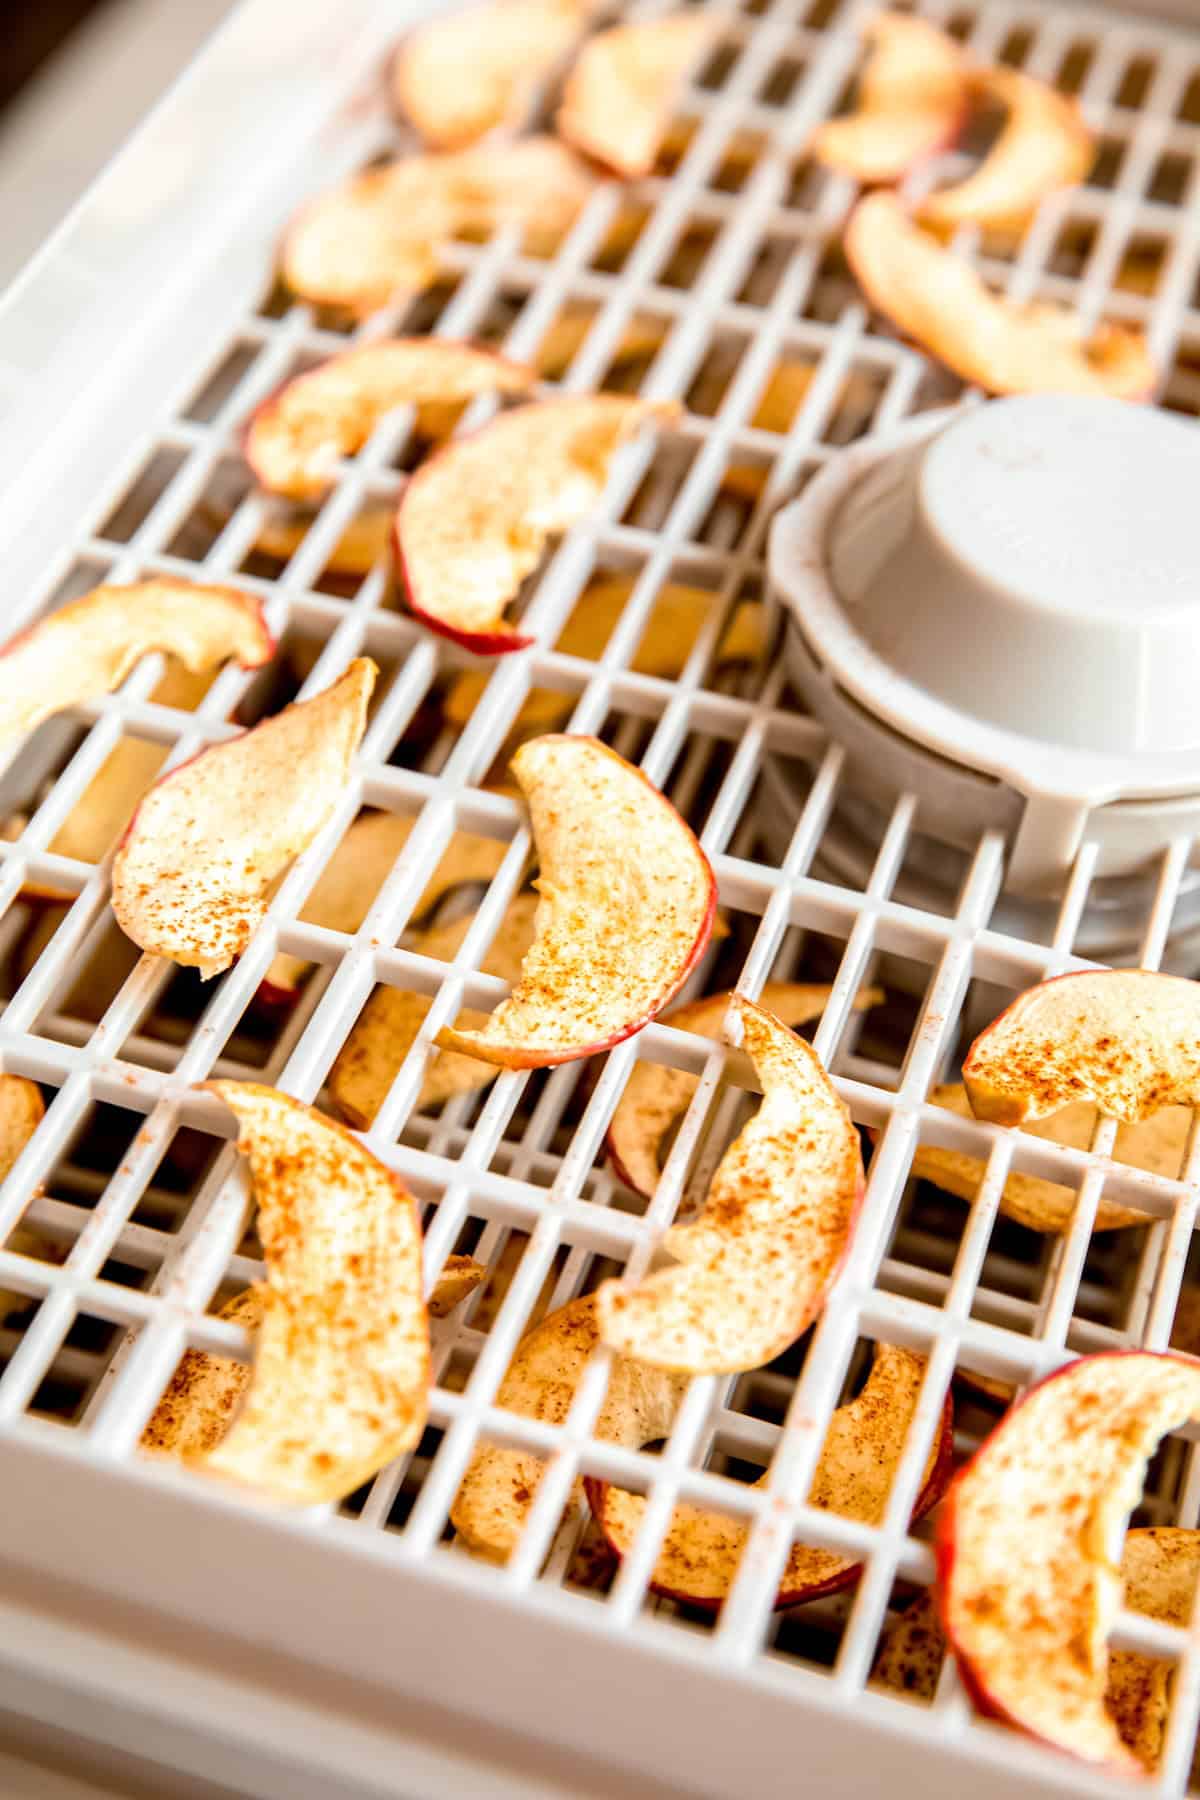
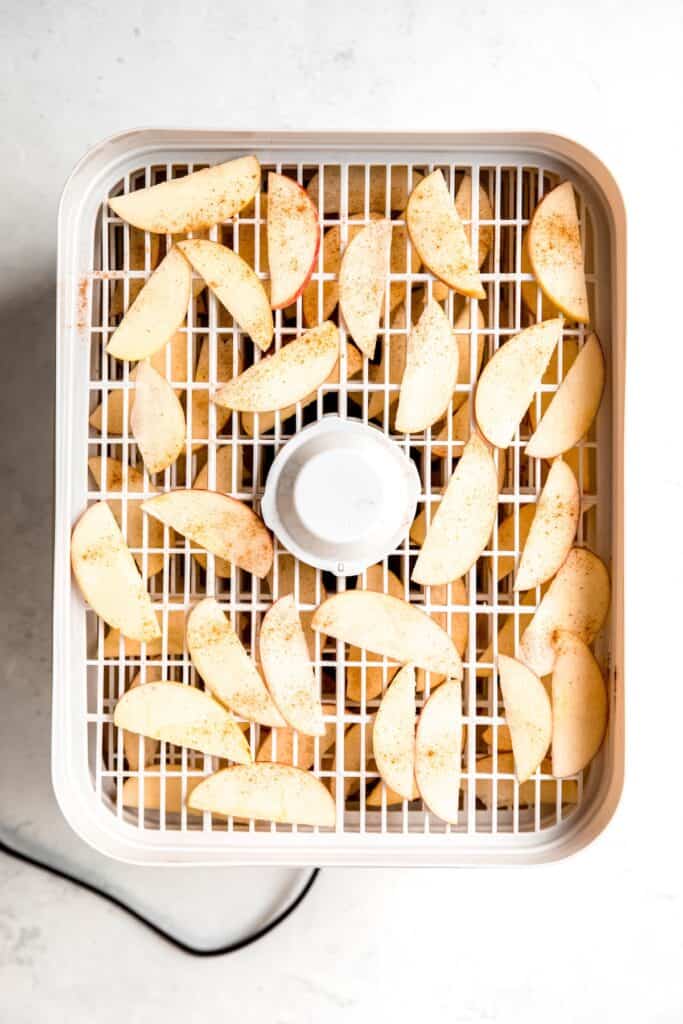
Step 3: Soak & Dry. Toss the apple slices into your citric acid (or lemon) bath. Let them soak for at least 15 minutes, or up to overnight if you cover and refrigerate them. Drain the apple slices, then pat them dry with a clean towel. Lay them out in a single layer on your dehydrator racks. Sprinkle with your favorite seasoning—cinnamon sugar, pumpkin spice, or even a pinch of sea salt all work great.
Step 4: Dehydrate Set your dehydrator to 135ºF and let it do its thing. Depending on slice thickness and your crispiness preference, this can take 6–8 hours. Once they’re dry and crunchy, let them cool and enjoy!


How to Make Apple Chips in the Oven
Step 1: Prep the apples Follow the same wash, soak, and slice steps as above. Once your slices are done soaking, pat them dry with a clean towel.
Step 2: Arrange. Line a baking sheet with parchment paper and spread the apple slices out in a single layer—no overlapping, or they’ll steam instead of crisp.
Step 3: Season & Bake. Sprinkle the slices with your favorite seasoning, then slide the pan into a 200ºF oven. Bake for about 1 hour, then flip the slices over and add a little extra seasoning if you’d like. Return to the oven for another 45–60 minutes, or until the chips are crisp and dry to your liking. Let the apple chips cool on the pan—they’ll crisp up a bit more as they come to room temperature. Then dig in!

Optional Variations & Dietary Adaptations
- Air Fryer Apple Chips - Prep and season your apple slices as instructed, then pop them into an air fryer basket in a single layer. Cook at 300ºF for 15-20 minutes, flipping halfway through, until crisp. Keep an eye on them toward the end—they can go from perfect to too dark pretty quickly!
- Dehydrated Apple Cubes - Instead of slicing, cut your apples into ½ -1 inch dice. Proceed with the soaking and drying steps, then dehydrate as usual. They’ll take longer than slices, but the chewy little cubes are perfect for toddlers just starting solids. I also love tossing them into homemade trail mix or adding them to DIY instant oatmeal packets for an apple-cinnamon vibe.
- Flavoring Options - This is where you get to go Willy Wonka crazy and decide for yourself. We love making them super traditional with just a sprinkling of cinnamon, but we've also made them with a bunch of other flavors too. The sky is the limit! Here are some of my favorites:
- Cinnamon Sugar - Simple, classic, and cheap. Don’t buy it pre-mixed—making it at home is easy and will save you money. Plus, you can adjust how spicy you like it! For an added boost, sprinkle in some freshly grated nutmeg, too.
- Chai Spices - This fragrant blend of cardamom, ginger, cinnamon, cloves, and black pepper is a fantastic pair for apples.
- Pumpkin Pie Seasoning or Apple Pie Seasoning - Having the fall flavors in a single bottle makes seasoning a snap.
- Tajin (or Chili Lime Salt) - Salty, spicy, and tangy all in one bite! If you’ve ever eaten seasoned fruit from a street vendor, you know this is a yummy combo.
- Garam Masala - If you remember my dutch oven turkey breast with apple curry gravy, you know these flavors will work well together!
- Rosemary & Sea Salt - Savory and grown-up tasting, these apple chips are perfect for cheese plates and garnishing pork.
- Popcorn Salt - This makes them taste like caramel apple chips! It’s also great paired with cinnamon sugar for a salty-sweet-cozy mashup.

Expert Tips
- Uniform slices = even crisping. Whether you’re using a mandoline or a sharp knife, aim for consistent thickness. Thicker slices will be chewier, while thinner ones crisp up faster.
- Don’t skip the soak. A quick dip in a citric acid or lemon water bath not only prevents browning, it also helps the apples dehydrate more evenly and keeps them naturally shelf-stable for longer.
- Dry thoroughly before dehydrating. Patting the slices dry with a clean towel speeds up the process. Excess water = longer drying times and a higher chance of sogginess.
- Keep an eye on them. Every dehydrator (and oven) runs a little differently, so start checking for doneness on the earlier side. The chips should feel dry and crisp, not sticky.
- Cool completely before storing. Apple chips continue to crisp as they cool. If you stash them while they’re still warm, trapped steam can soften them back up and make them taste stale.
- Season lightly. A little goes a long way with spices and sugar since the flavor concentrates as the apples dry. You can always sprinkle on more at the halfway mark if needed.
- For extra-crisp oven chips, crack the oven door slightly with a wooden spoon handle to let steam escape. Better airflow = crunchier results.

Storage Instructions
- Room Temperature: Keep your apple chips in an airtight container at room temp for up to 1 week. They’re best enjoyed within the first few days when the crunch is at its peak.
- Add a Silica Packet: To keep them crisp longer, toss a food-safe silica gel packet into the container. It absorbs excess moisture that can make your chips turn chewy.
- Freezer: For longer storage, you can freeze apple chips in a sealed freezer bag for up to 3 months. Let them come back to room temp before snacking—no need to reheat.
- Avoid the Fridge: The refrigerator is too humid, which can cause the chips to soften and lose their crunch.
Serving Suggestions
- Straight-up snacking. Enjoy them by the handful for a naturally sweet, crunchy treat. They’re especially great for keeping in your purse, backpack, or car for a healthy grab-and-go option. You can also toss a bag into lunchboxes for kids (or yourself!)—they hold up better than fresh apple slices and still sneak in a serving of fruit.
- Breakfast boost. Crumble apple chips over oatmeal, yogurt, or cottage cheese for extra crunch and sweetness. They’re also fantastic stirred into my vanilla almond granola. Or, make the cubed version listed above, then DIY your breakfast by making instant oatmeal packets with instant oats and mason jars.
- Trail mix upgrade. Mix apple chips with nuts, seeds, and a little dark chocolate for a DIY trail mix that’s sweet, salty, and satisfying—and made with all whole foods.
- Cocktail garnish. Use whole slices to garnish fall cocktails, mulled wine, or even a mug of hot cider. They look gorgeous and add a subtle apple undertone!
FAQs
It depends on how thick you slice them, what temperature you set them to dry at, and how crispy you like them. ⅛-inch thin slices should be ready in 6-8 hours in a dehydrator set to 135ºF.
Yes—dehydrated apple chips are typically healthy! My RDN friend Megan says “These homemade apple chips keep most of the fiber, vitamins, and antioxidants found in fresh apples, but in a concentrated form since the water is removed. That said, the natural sugars are also concentrated, so portions can add up more quickly than with fresh fruit. As long as you enjoy them in moderation (and ideally without much added sugar), they’re a wholesome, nutrient-rich snack that’s much better than most packaged chips or candy.”
If your apple chips aren’t crispy, they likely weren’t sliced thin enough, dried long enough, or had too much moisture trapped during baking or dehydrating. Aim for even ⅛-inch slices, spread them in a single layer so air can circulate, and keep drying until they feel completely crisp—remember they’ll firm up a bit more as they cool. If they soften later, just pop them back in the oven or dehydrator for a quick refresh.
While you technically don’t have to, I highly recommend it. The process of soaking in an acidic bath helps prevent ugly oxidation from turning them brown, plus helps to keep them fresher for longer.
I know citric acid may seem like a weird thing to have in the kitchen, but it's very useful. Not only does it get used in canning and preserving quite a bit, it can also be used in cheese making, beer brewing and wine fermenting. It's also responsible for the sour part of your favorite sour gummies! It's also a great natural cleaner and disinfectant, so it can be used all over the home. I'm talking everything from laundry to toilet bowls, people. Citric acid is a miracle worker.

More Copycat DIY Snack Recipes


If you tried this recipe and loved it, be sure to rate and review it below! For more inexpensive and delicious recipe inspiration, be sure to follow me on Pinterest. You can also get all of my newest content delivered straight to your inbox by signing up for my email newsletter!

Dehydrated Apple Chips (Oven or Dehydrator)
Ingredients
- 1 tablespoon Citric Acid or sub 2 tablespoon lemon juice
- 3 C Water
- 4 Apples your favorite variety
- Seasoning of Choice e.g. cinnamon, cinnamon-cayenne, pumpkin pie spice, nutmeg, chai, chili lime (Tajin), sea salt, sea salt and rosemary...
Instructions
- Dissolve citric acid (or lemon juice) in water in a large bowl.1 tablespoon Citric Acid, 3 C Water
- Wash your apples thoroughly. Core apples if you prefer. Slice apples ⅛" thick, using either a mandoline (preferred method) or very sharp chef's knife. Be careful!4 Apples
- As you slice the apples, toss them in the water bath. The citric acid will prevent browning and brighten the flavor of the apples. They can soak for as little as 15 minutes or up to overnight in the refrigerator. Remove and pat dry with a tea towel.
- Arrange apple slices in single layers on different levels of the dehydrator. Sprinkle with your favorite spice mix, then turn the dehydrator on to 135F. Depending on how thick you cut your apples, dehydrating may take anywhere from 6-8 hours. They should be crisp when you're done.Seasoning of Choice
- Enjoy as a healthy treat anytime!
Notes
- Room Temperature: Keep your apple chips in an airtight container at room temp for up to 1 week. They’re best enjoyed within the first few days when the crunch is at its peak.
- Add a Silica Packet: To keep them crisp longer, toss a food-safe silica gel packet into the container. It absorbs excess moisture that can make your chips turn chewy.
- Freezer: For longer storage, you can freeze apple chips in a sealed freezer bag for up to 3 months. Let them come back to room temp before snacking—no need to reheat.
- Avoid the Fridge: The refrigerator is too humid, which can cause the chips to soften and lose their crunch.
- Uniform slices = even crisping. Whether you’re using a mandoline or a sharp knife, aim for consistent thickness. Thicker slices will be chewier, while thinner ones crisp up faster.
- Don’t skip the soak. A quick dip in a citric acid or lemon water bath not only prevents browning, it also helps the apples dehydrate more evenly and keeps them naturally shelf-stable for longer.
- Dry thoroughly before dehydrating. Patting the slices dry with a clean towel speeds up the process. Excess water = longer drying times and a higher chance of sogginess.
- Keep an eye on them. Every dehydrator (and oven) runs a little differently, so start checking for doneness on the earlier side. The chips should feel dry and crisp, not sticky.
- Cool completely before storing. Apple chips continue to crisp as they cool. If you stash them while they’re still warm, trapped steam can soften them back up and make them taste stale.
- Season lightly. A little goes a long way with spices and sugar since the flavor concentrates as the apples dry. You can always sprinkle on more at the halfway mark if needed.
- For extra-crisp oven chips, crack the oven door slightly with a wooden spoon handle to let steam escape. Better airflow = crunchier results.
Nutrition


Comments
No Comments