Get ready to win winter with my Easy Homemade Marshmallows recipe. Made in the traditional French fashion with egg whites and a handful of other ingredients, these fluffy, dairy-free treats will make even marshmallow haters into converts. Plus, it only takes 25 minutes of active time to make them!
As a Grocery Addict, you know I'm all about buying store-bought cheats that make it easier to get yummy food on the table. But there are some DIYs—dairy-free marshmallows included—that are echelons above their store-bought counterparts. The first time I tried one at Marché, my mind was blown.
As someone who has never cared a hoot about Peeps, I was shocked how different they are! Once you experience the sheer joy that is encapsulated in a melty, gooey, vanilla-scented homemade marshmallow, you'll see what I mean. (Bonus points if you serve it in a mug of rich hot cocoa or a spicy Mexican mocha. LIFE-CHANGING, I tell ya!)
Making marshmallows might sound like a complicated project. It might sound ridiculous to even consider it. Plus, they couldn't be all that different from what you get at grocery stores, right? Wrong! None of these things is true. Take a leap of faith with me and dedicate 25 minutes to making these homemade marshmallows. I can promise your life will be sweeter because of it.
Jump to:
Why You’ll Love Homemade Marshmallows
- The French Know What’s Up - When I worked pastry, I was taught to traditional marshmallows in the French way—using egg whites. This method yields a softer, fluffier and altogether lighter than store-bought, but with a supremely gooey consistency when melted atop a hot drink. They legit turn into marshmallow fluff! Plus, unlike popular brands, my homemade marshmallows are made with no artificial colors, artificial flavors, or dairy ingredients. That means this is a sweet treat you can share with almost anyone who has a sweet tooth—even if they have food allergies!
- Basic Tools & Ingredients - These tasty treats require a shockingly short list of ingredients, most of which I'd reckon you already have on hand. There's also no real special equipment that you need, with the exception of a candy thermometer.
- Perfect for Budget-Friendly Gifting - The winter holidays are fast approaching, which means gift-giving is about to kick into high gear. But, rather than spending a bunch of hard-earned money, why not make your own gifts for way less? Marshmallows are a great way to use up excess egg yolks (yay for no-waste cooking!), and are perfect for pairing with my homemade dark hot cocoa mix.
Ingredients & Substitutions
I followed Cronut master and French legend Dominique Ansel's recipe, using the same main ingredients but adding a touch of vanilla paste to up the flavor quotient. (This was nearly the same recipe we used at the restaurant, but in a much smaller batch.)
Here’s the ingredient list:
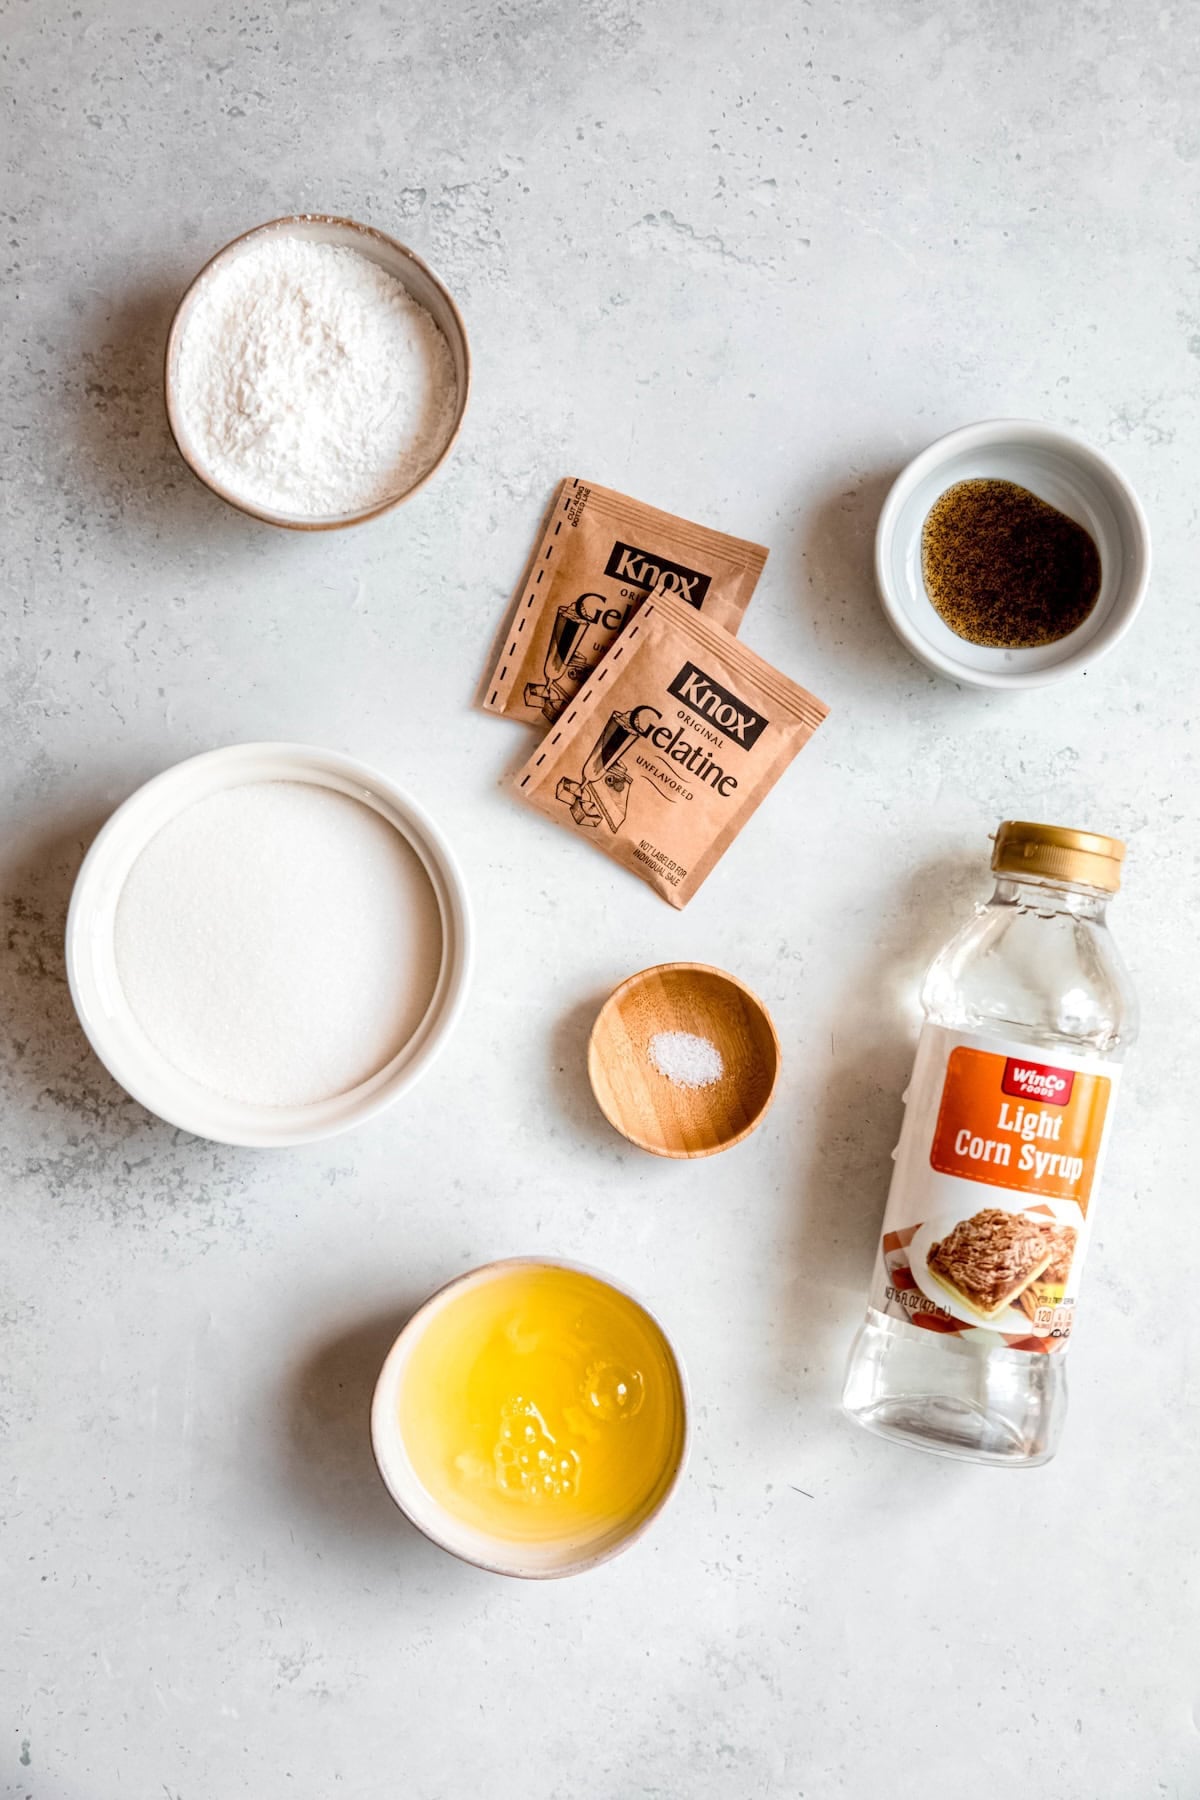
- Egg Whites - Make sure you’re using egg whites you’ve separated yourself—egg whites in a carton don’t whip the same way. It’s easiest to do it when they’re still cold from the fridge so the yolks don’t break, but then let them come to room temperature for maximum volume.
- Corn Syrup - Often used in candy-making, corn syrup helps prevent sugar crystals from making the marshmallows grainy. For my health nuts out there, note that this is different (and less processed) than HFCS. If you can’t do corn, tapioca syrup or invert sugar will work in a 1:1 ratio.
- Gelatin & Water - You can use either powdered gelatin (which is easier to find at the grocery store) or a sheet of gelatin (what we used in professional kitchens). Either way, you’ll need to bloom it in cool water first.
- Granulated Sugar - We melt the sugar down into what is essentially a pale caramel, then whip it with the egg whites. This serves multiple purposes—adding the requisite sweetness, cooking the egg whites, and providing structure to maintain the fluffy consistency of our marshmallows. Pure cane sugar or beet sugar works too!
- Vanilla Paste - I love having the pretty black vanilla bean flecks throughout, but regular vanilla extract works just as well.
- Cornstarch & Powdered Sugar - We need something to keep the marshmallows from sticking, and cornstarch is perfect for the job. I prefer a 50/50 mix of cornstarch and powdered sugar to keep it sweeter, but that’s entirely optional. Can’t do corn? Swap in potato starch in a 1:1 ratio and make sure your powdered sugar is made with a cornstarch alternative like tapioca starch.
In terms of equipment, you don’t need anything fancy. Just grab a heavy-bottomed saucepan, a whisk or fork, a candy thermometer, a measuring cup, measuring spoons and an 8 x 8 cake pan.
How to Make Homemade Marshmallows with Egg Whites
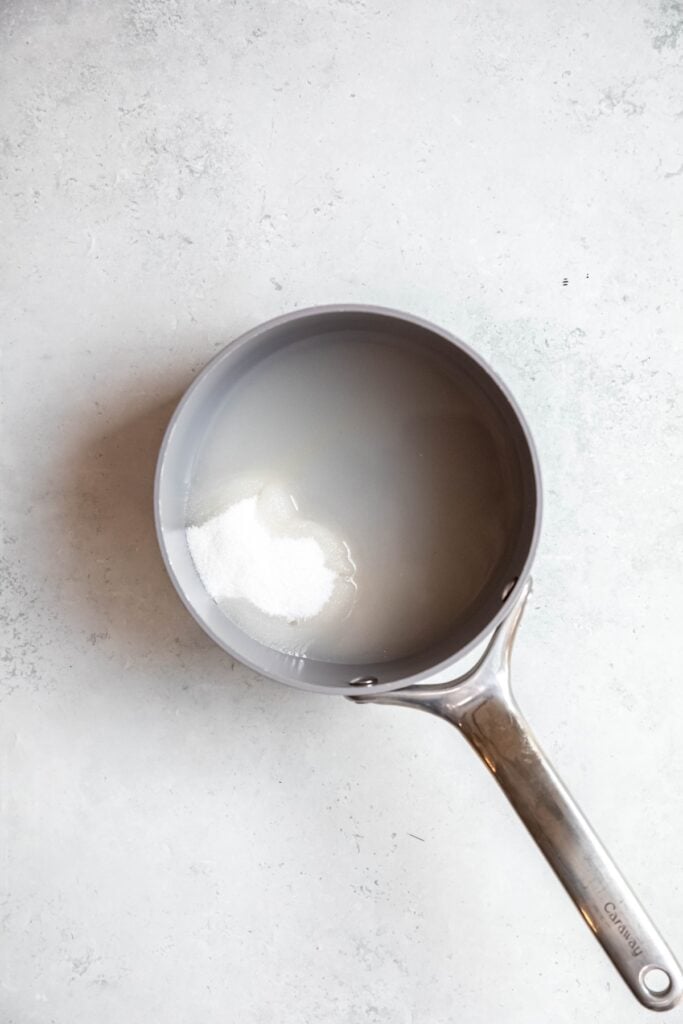
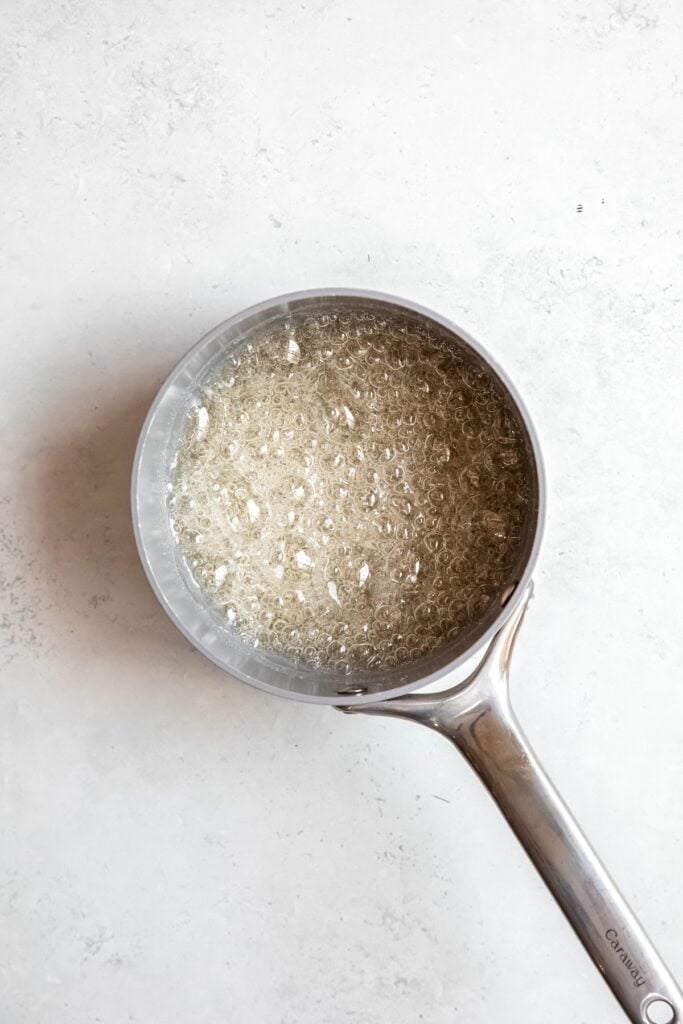
Step 1: Boil. Bring your sugar and ⅓ cup of water to a boil over medium high heat. Add your corn syrup, but don't stir! Let the mixture continue to boil until it reaches a temperature of 260ºF.
Step 2: Bloom Gelatin. In the meantime, add the other ⅓ cup of water to your gelatin and stir to get rid of any dry parts. (If you are using a gelatin sheet, soak it in a glass of cold water for about 10 minutes, then squeeze out the excess moisture before using.)
Step 3: Add Gelatin. Once the sugar mix comes to 160ºF, remove from heat and stir in the bloomed gelatin. It will bubble a bit, but don't fret. Just keep stirring.
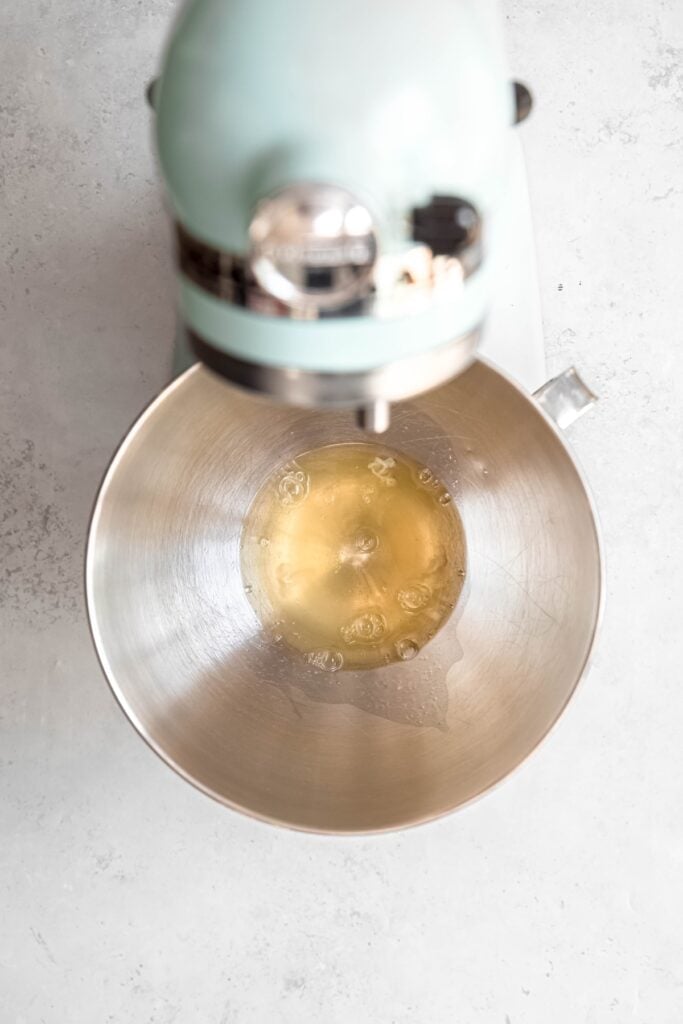
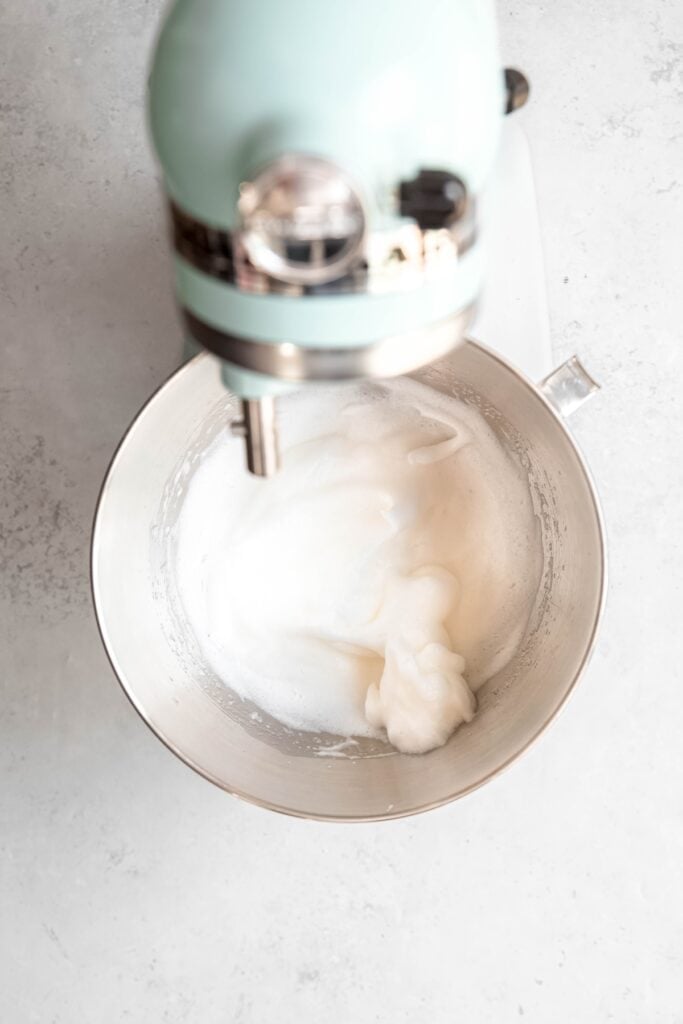
Step 4: Whip Egg Whites. In a separate mixing bowl, add your egg whites and whip to soft peaks. Make sure the bowl and beaters are immaculately clean and there are no yolks in the whites—even the least bit of fat will prevent them from creating a proper meringue.

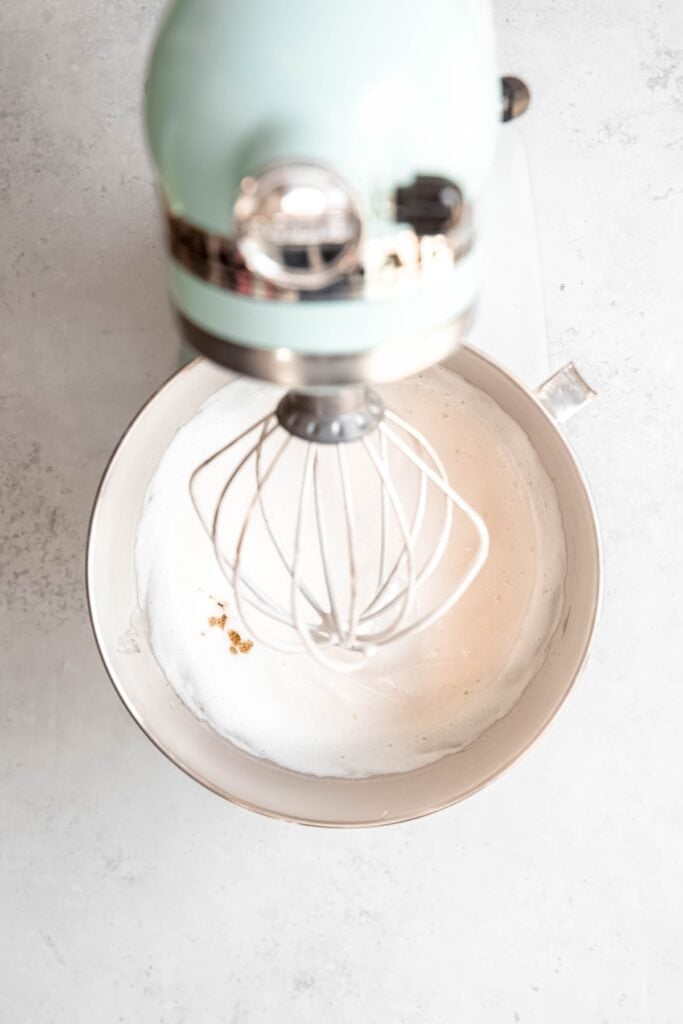
Step 5: Mix Gelatin & Egg Whites. With the mixer going, slowly pour the sugar gelatin mix into the eggs using the side of the bowl to pour it down. Keep beating until the mix becomes thick and you can see air bubbles getting trapped.
Optional: Add Flavoring. If you want to add flavoring, the last minute of beating is when to do it! I added my vanilla paste here.
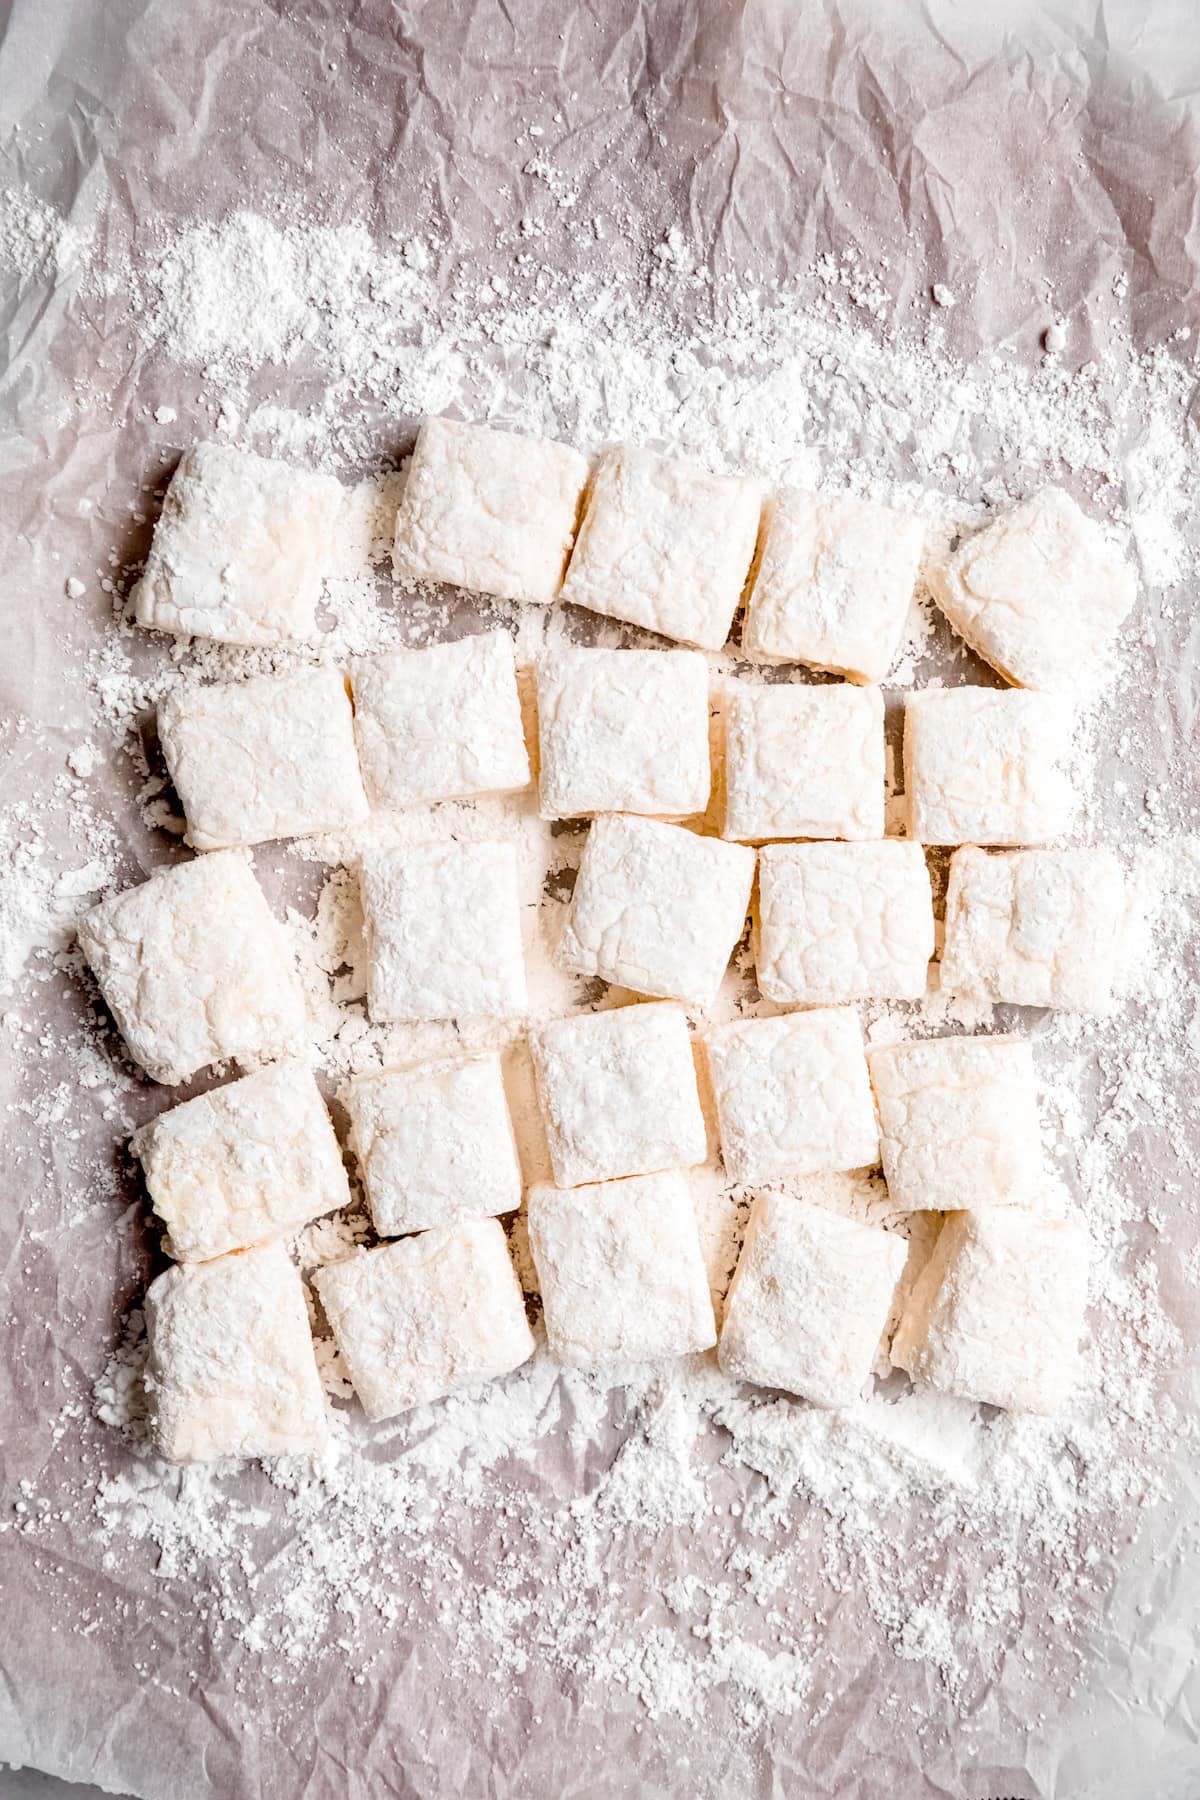
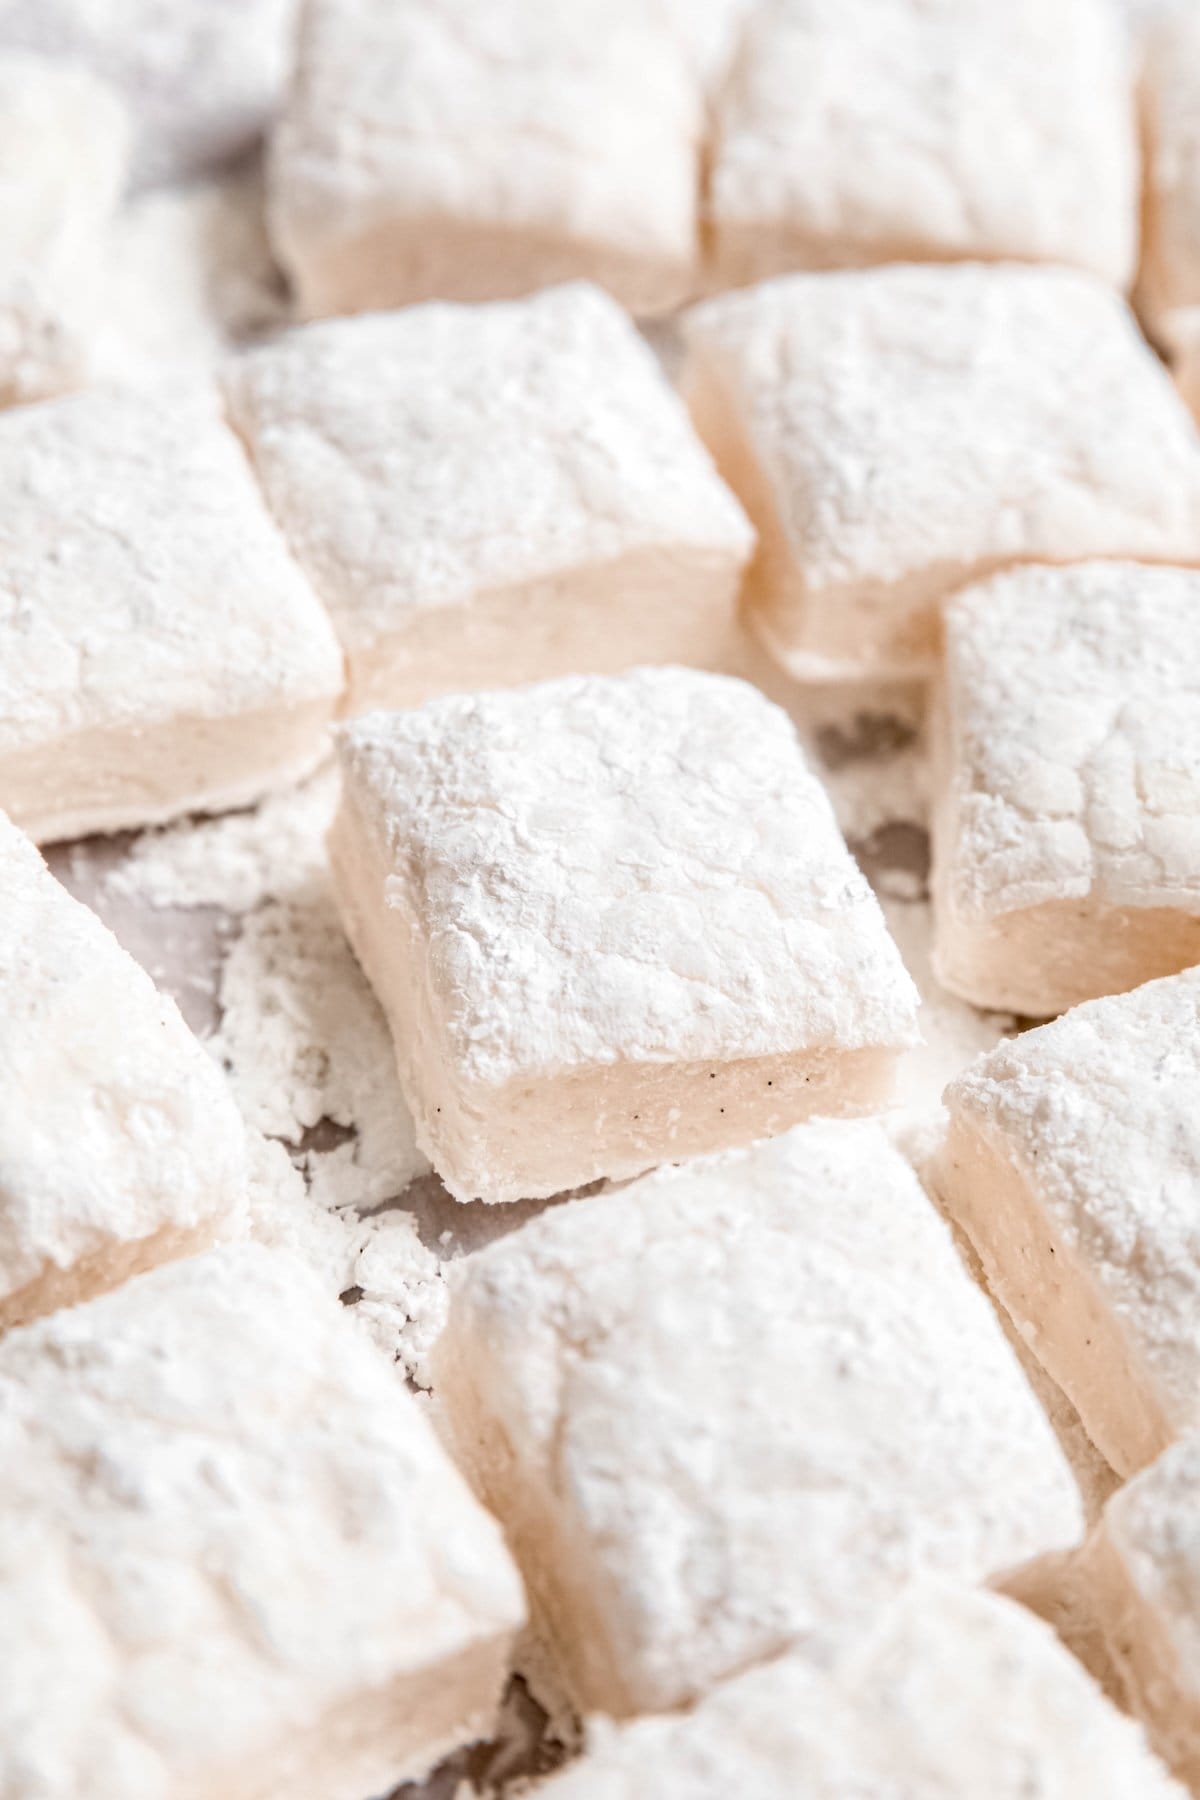
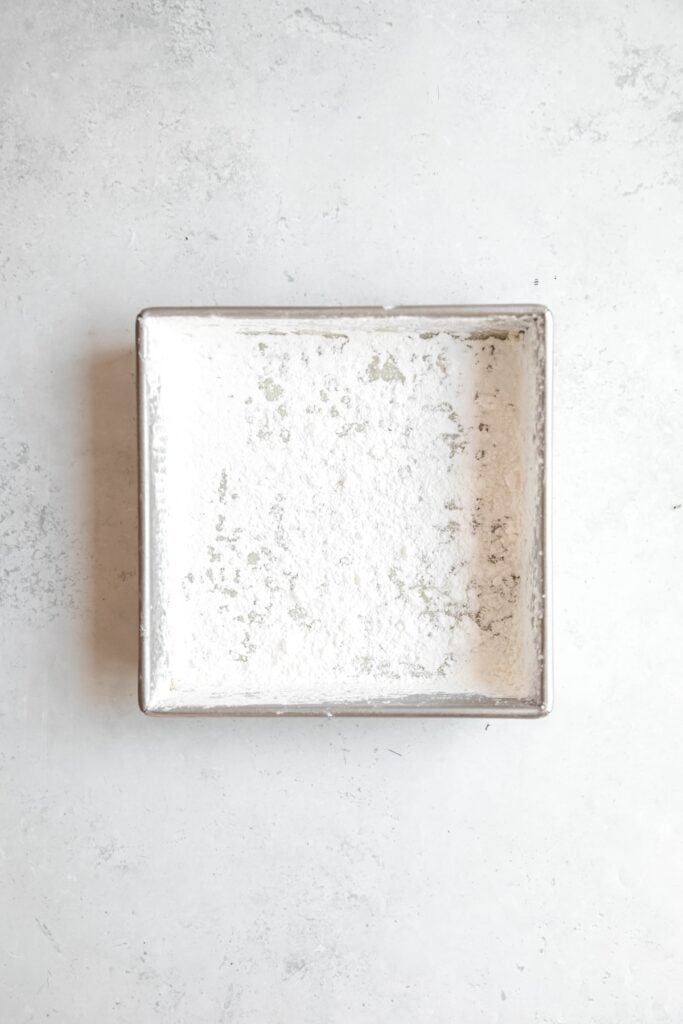
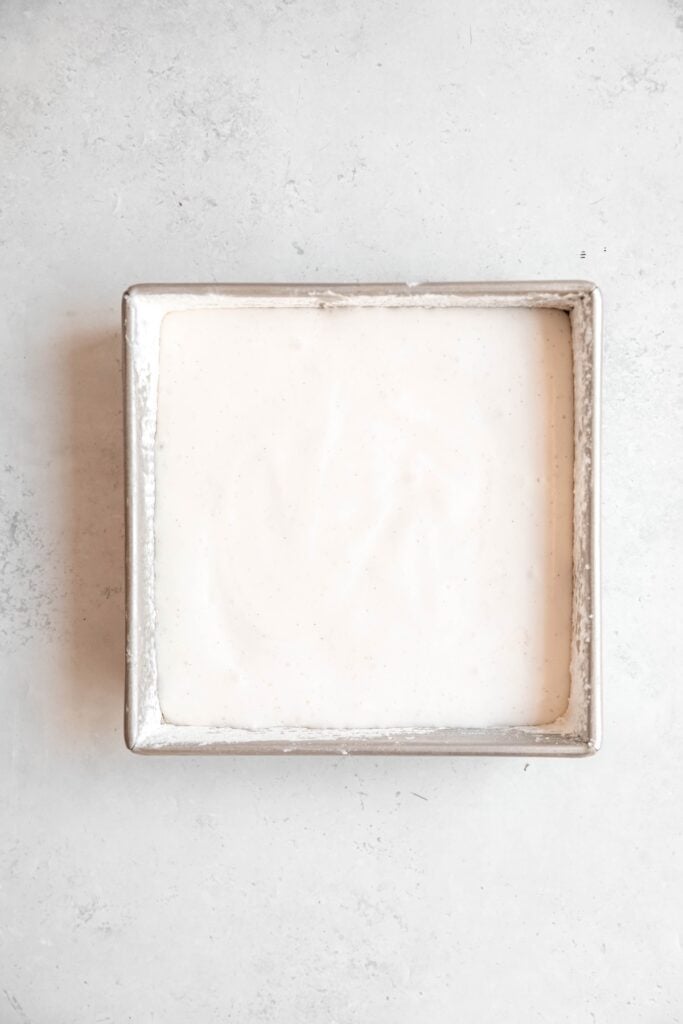
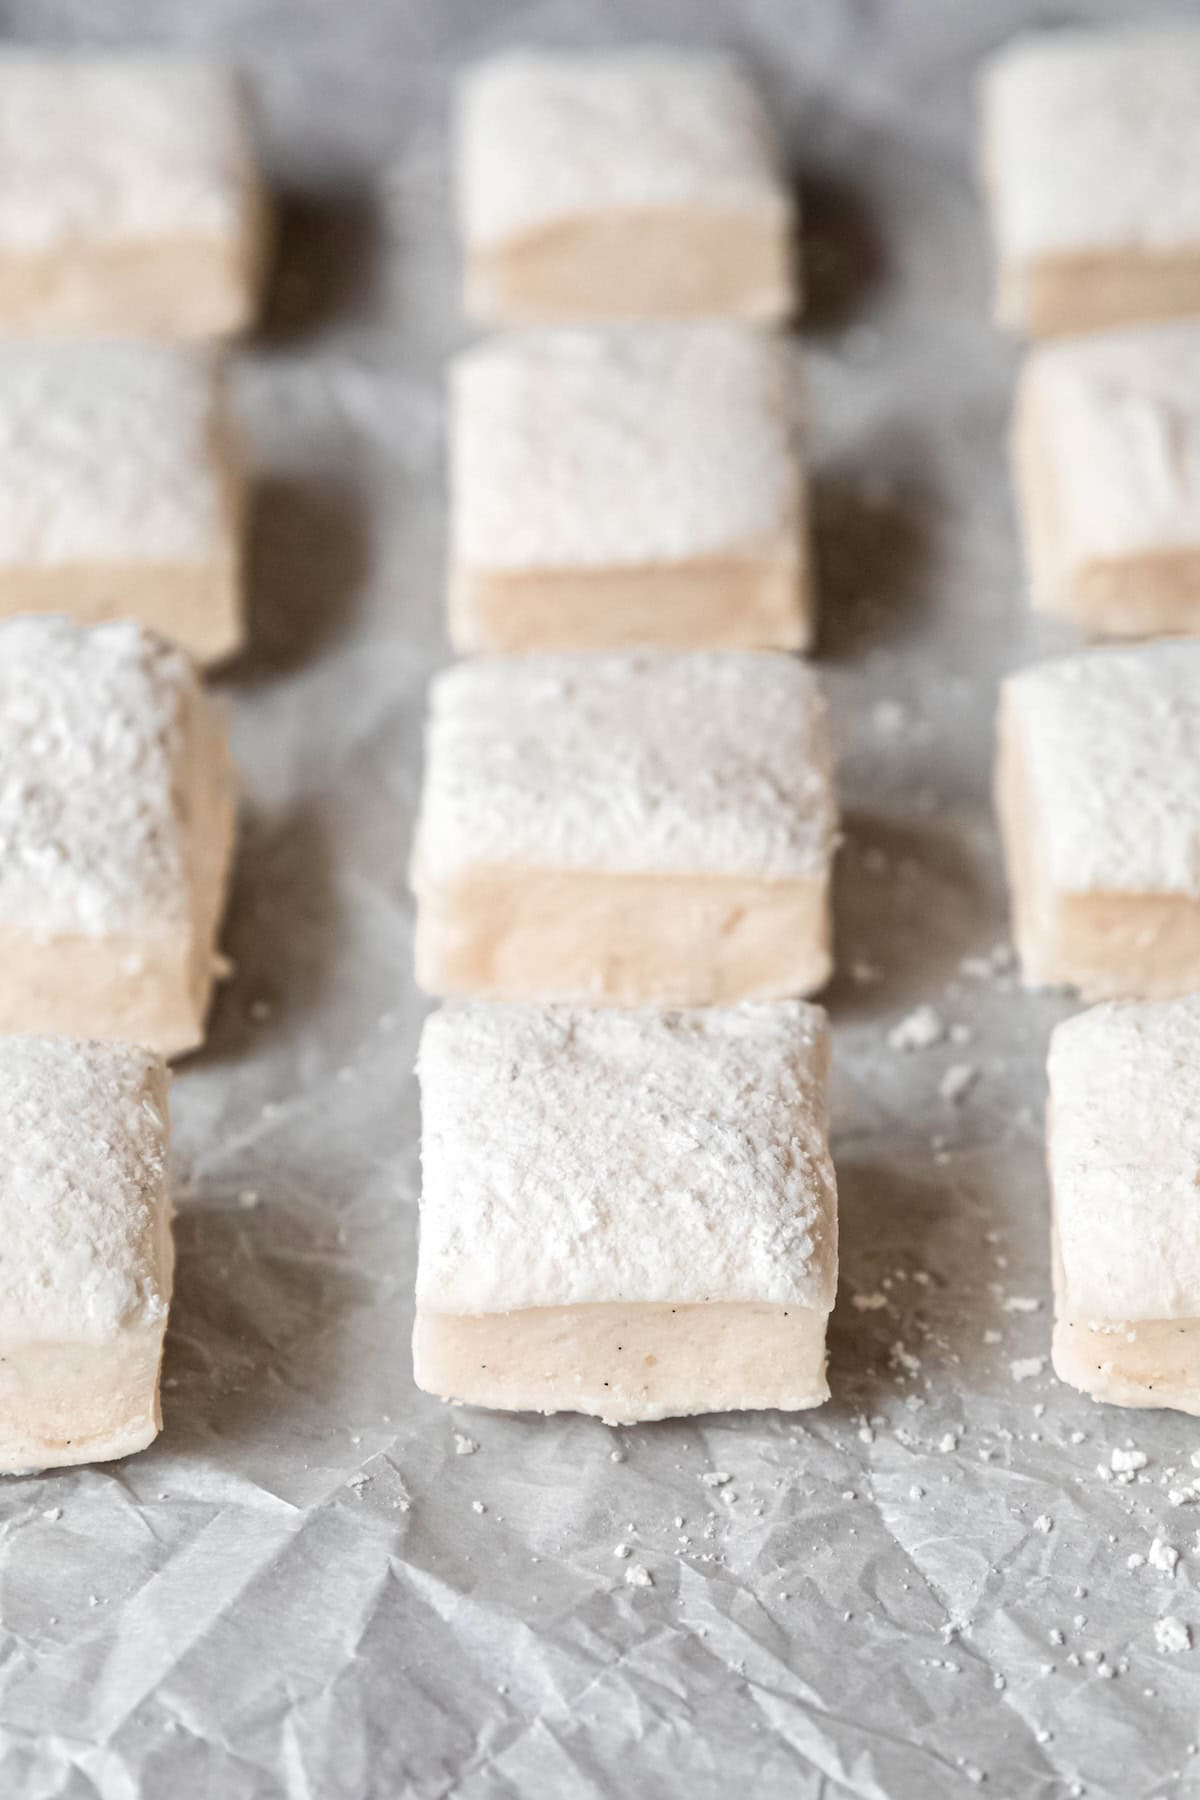
Step 6: Pour & Set. Scoop the finished marshmallow mix into a prepared 8 x 8 cake tin that you've greased with neutral oil and heavily dusted with a 50/50 mix of corn starch and powdered sugar. Rest for at least 3 hours before turning out and cutting.
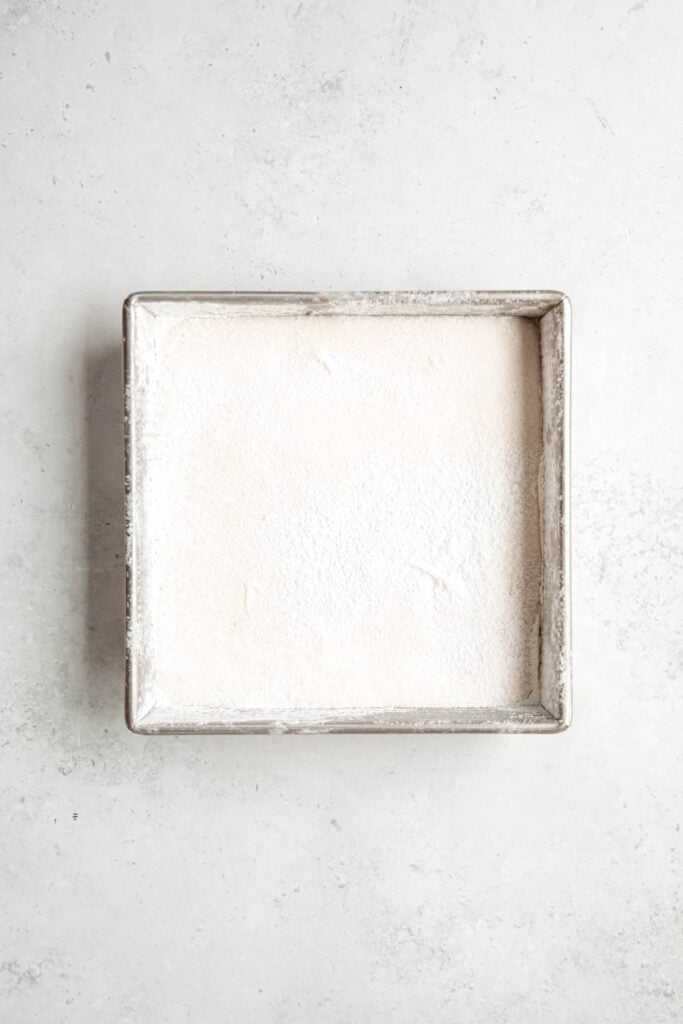
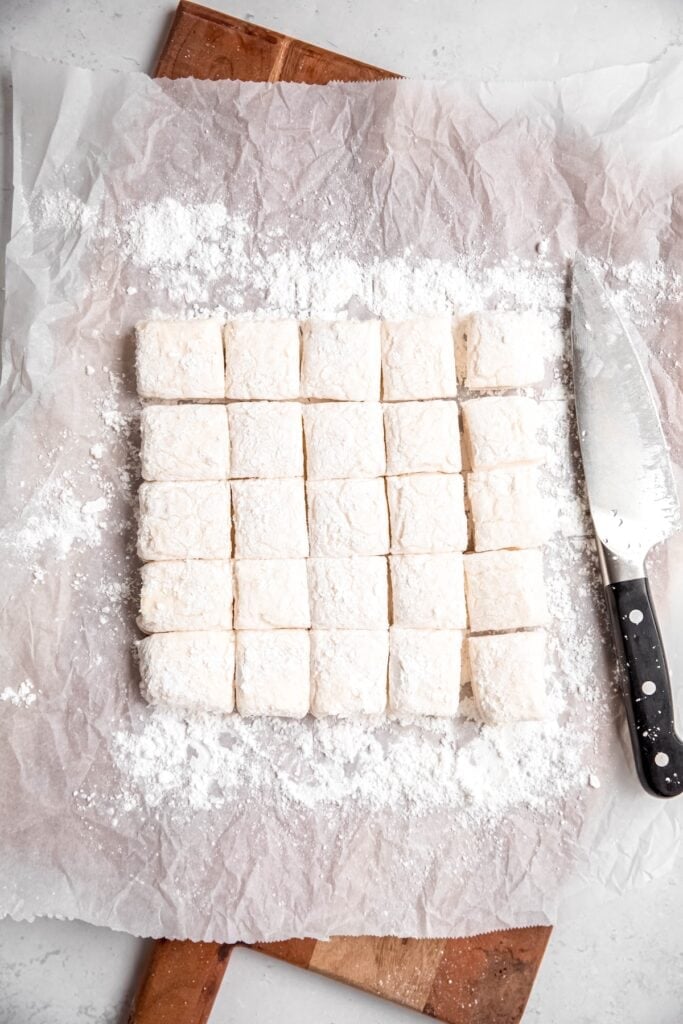
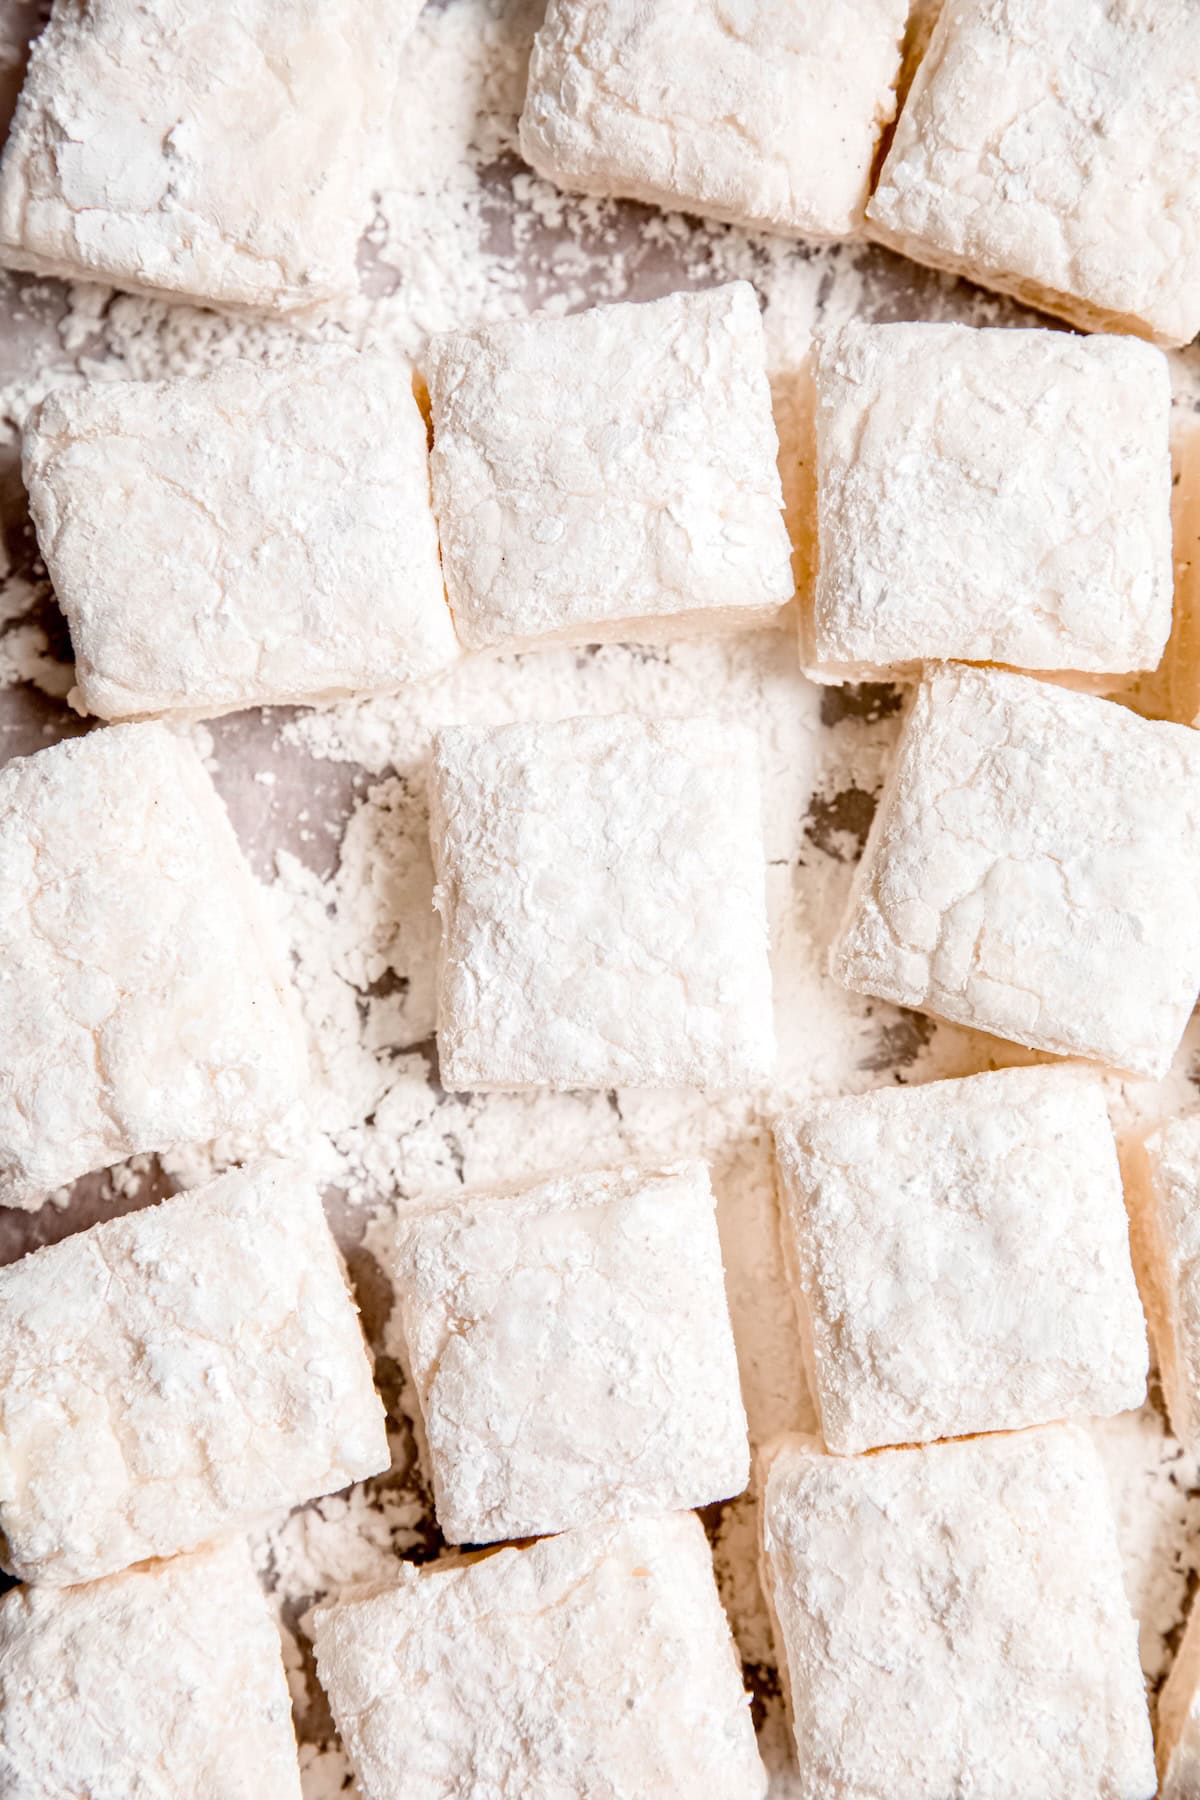
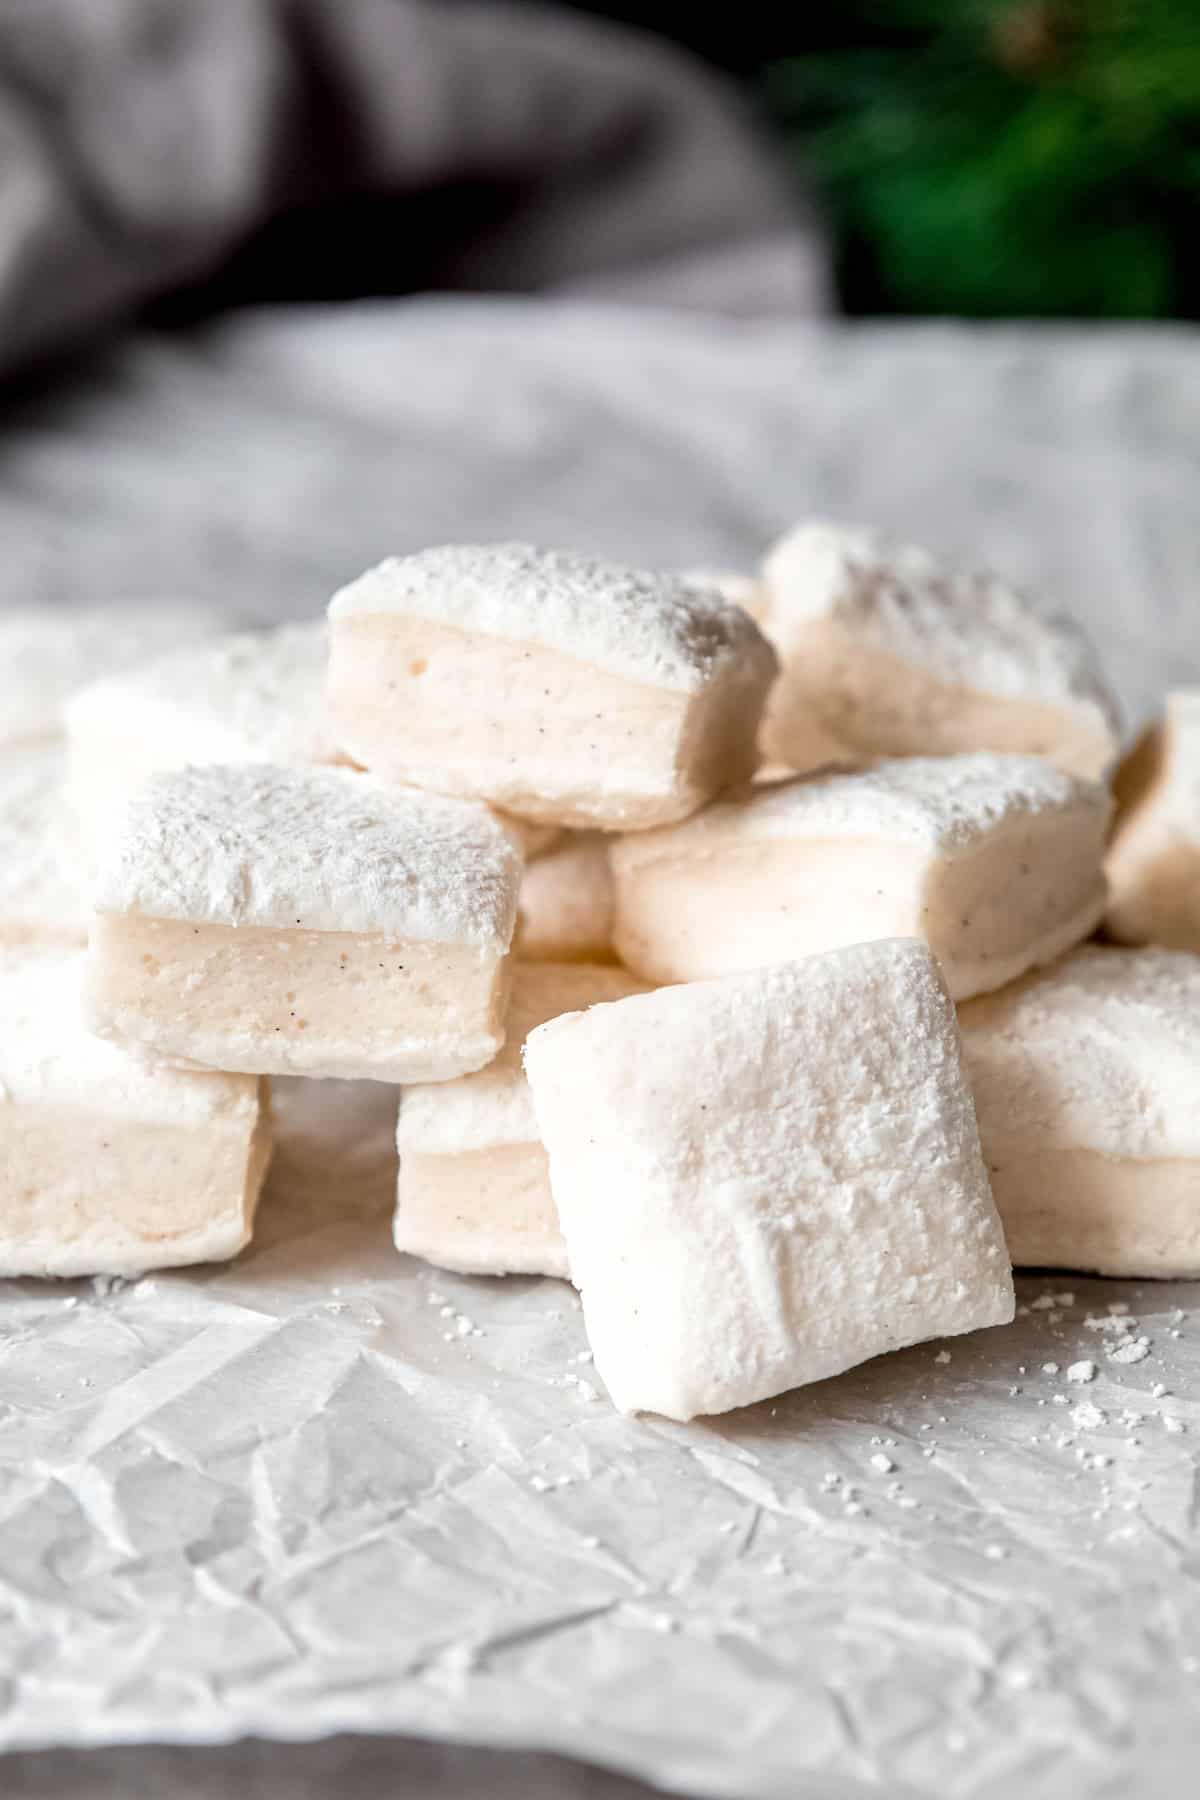
Step 7: Cut & Enjoy. Once the marshmallows are firm, sprinkle the top with more confectioner's sugar and cornstarch. Turn out onto a work surface that you've dusted with the same. Use a bench scraper to cut into squares. Toss with more powdered sugar and store in an airtight, dry container at room temperature.

Optional Variations & Dietary Adaptations
As much as I love regular marshmallows, there are plenty of ways to make these your own. Here are a few ideas:
- Different Extracts - Feel free to switch out the vanilla paste and use a few drops of any number of extracts—almond, maple, coffee, orange, or peppermint are all delicious. Just start with ½ as much as you would for vanilla, as many extracts are more potent.
- Add Color - You can easily add color by adding gel food coloring to the mix. If you go the peppermint route, lightly swirl some red food coloring through the mix to make it look like a candy cane!
- Cute Shapes - Rather than cutting them into squares, use small cookie cutters to cut them into different shapes. You’ll end up with some scraps, which are perfect for snacking as you work!
- Dipped - My friend Jess suggested that I try a famous Minnesotan treat and dip the marshmallows in thick caramel like you would use for a candy apple. I'd also venture to say dipping them in some tempered dark chocolate would also yield a delicious bite.
- More Flavor Options - Per Dominique Ansel's suggestions (this is his base recipe, after all), you can also do the following:
- Cinnamon Flavored - Add ½ teaspoon of ground cinnamon during the last minute of beating, then add 1 teaspoon cinnamon to the confectioner's sugar and cornstarch mix for tossing.
- Hazelnut Flavored - Add ¼ cup of hazelnut praline paste during the last minute of beating, then roll the marshmallows in coarsely chopped toasted hazelnuts.
- Coconut-Lime Flavored - Add 1 teaspoon pure coconut extract and 2 teaspoons of lime zest during the last minute of beating, then roll them in toasted unsweetened shredded coconut.
Expert Tips
- Prep everything first. Once your sugar syrup reaches temperature, you’ll need to move fast. Have your bloomed gelatin, whipped egg whites, and prepared pan ready to go before you start heating the sugar.
- If you're using a hand mixer, you can stop your bowl from spinning by dampening a kitchen towel and placing it on the counter in a ring shape. Set your bowl inside it like a nest. Neat, right?
- Don’t stir the sugar syrup. After adding corn syrup to the boiling sugar, resist the urge to stir. Agitation can cause the sugar to crystallize, resulting in a grainy texture.
- Use a candy thermometer. Precision matters here—too low and your marshmallows won’t set properly, too high and they’ll be dense or rubbery. Aim for exactly 260ºF. Also, make sure the thermometer isn’t touching the bottom or sides of the saucepan, which will give you a falsely high reading.
- Keep it clean. Any trace of fat (like egg yolk or oil residue) can deflate your meringue. Make sure your whisk, bowl, and utensils are squeaky clean and completely dry. That’s why I like to…
- Use the three-bowl method when separating eggs. One bowl catches the white of the egg you are currently separating, one is for putting the yolks, and one is for storing the whites as you go. This way, you won’t ruin the whole batch if an egg yolk breaks—you’ll only be out the one egg!
- Separate eggs when they’re cold, but whip them at room temp. Cold egg yolks are less likely to break, which makes separating easier. But, slightly warmer egg whites capture more air and get extra fluffy—which means your marshmallows will be extra tall and bouncy.
- Stream slow. When incorporating the sugar syrup, pour it slowly down the side of the bowl so you temper (i.e. don’t scramble) the egg whites.
- Flavor smarts. Add extracts, zest, or other flavorings at the end of whipping so they don’t interfere with the meringue structure.
- Dust generously. Marshmallows are naturally sticky! Use plenty of the cornstarch-powdered sugar mix to coat the pan, knife, and your hands when cutting.
- Let them cure. Even after cutting, leave the marshmallows uncovered for an hour or so to help them “dry” a bit. This gives them that perfect bouncy texture and prevents sticking.
- Aim for halves when you’re cutting to make it easier to make even sizes. In other words, cut down the middle of the square, then cut down the middle of the halves to make 4 neat rows. Trust me—this is way easier than trying to cut in thirds!
Serving Suggestions
Whatever your store-bought marshmallows can do, these can do much, much better. Here are some of my favorite ways to get you started:
- Toast them over the fire for some s'mores! (Or, make my indoor s'mores bars if it's too cold outside.)
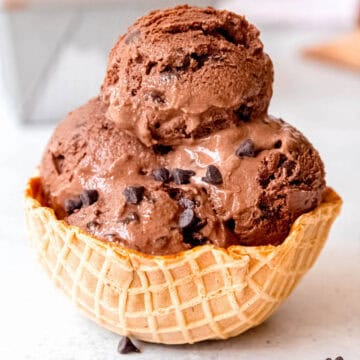
- Add them to chocolate marshmallow ice cream. (You can also toast them with a torch first for s’mores vibes.) Or, make a rocky road situation by adding them to chocolate chocolate chip ice cream with chopped nuts.
- Chop them into mini marshmallows and run them through a dehydrator to make DIY Lucky Charms marshmallows.
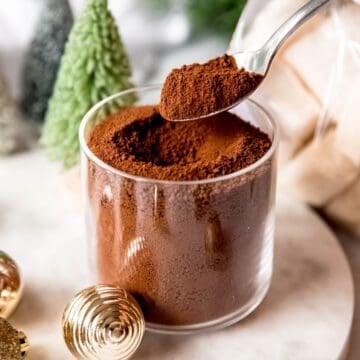
- Add them to a mug of Aztec hot chocolate or a boozy Christmas coffee. Seriously, these marshmallows are one of the best hot chocolate toppings around.
- Make a batch of Rice Krispie treats or Fruity Pebbles treats.
- Take them and dip them in chocolate or caramel, or both!
- Wrap a few up in a cellophane bag with a cute ribbon, then attach it to a small mason jar of homemade dark hot chocolate mix.

Storage Instructions
These homemade dairy-free marshmallows are relatively shelf-stable and easy to keep fresh. Here’s how to make them last as long as possible:
- Room Temperature (Best Option): Store marshmallows in an airtight container at cool room temperature (around 65–70ºF) for up to 3 weeks.
- Refrigeration: While not necessary, you can refrigerate marshmallows if your kitchen is humid. Place parchment between layers and store in an airtight container for up to 1 month. Let them come to room temperature before serving for the best texture.
- Freezing: Using the freezer to store egg white marshmallows is not recommended (unless you’re using them as a mix-in for homemade ice cream). They tend to change texture under extreme cold, plus they end up weeping and getting sticky as they defrost.
FAQs
Homemade marshmallows will keep for up to 3 weeks at a cool room temperature. You can also refrigerate them if your kitchen is hot and humid.
That’s an unequivocal yes on both counts. They are SO MUCH BETTER than store-bought, and not super difficult to make!
Yep! Just make sure your kitchen doesn’t have any issues with cross-contamination if you’re making them for a gluten-sensitive friend.
It only takes about 25 minutes of active prep time to make the marshmallow mixture, but you’ll need to let them set up for a minimum of 3 hours before slicing.
Nope. Traditional marshmallows are made from sugar, corn syrup, gelatin, and flavoring (usually vanilla), but no milk or butter. That said, always double-check the label, since some specialty or flavored varieties (like chocolate-dipped or caramel-filled) may contain dairy.
Unfortunately not always. While this is the perfect treat for dairy-free diets and is free from most common allergens, my recipe uses two animal products: egg whites and gelatin. If you're looking for dairy-free vegan mallows, you'll need aquafaba, agar agar powder and xanthan gum. The good news is I'm working on a vegan marshmallow recipe and will share it as soon as I nail it! In the meantime, you should be able to find gelatin-free marshmallows at your local grocery store.
More Easy DIY Dessert Add-Ons

Homemade Marshmallows with Egg Whites (Dairy-Free!)
Ingredients
- 1 Tbsp + 2 tsp Gelatin Powder mixed with ⅓ C Water
- 1 C Sugar mixed with ⅓ C Water
- 1 pinch Salt
- 2 tablespoon Corn Syrup
- 3 Egg Whites
- 1 teaspoon Vanilla Paste
- 50/50 Mix of Cornstarch and Powdered Sugar to Coat
Instructions
- Prepare 8x8 cake tin by spraying with a neutral non-stick spray. Completely coat the spray with cornstarch.
- Mix together gelatin and ⅓ C water until completely incorporated. Let rest several minutes to absorb.1 tablespoon + 2 teaspoon Gelatin Powder
- Bring sugar, salt and ⅓ C water to a boil in a saucepan fitted with a candy thermometer. Ensure that the thermometer tip doesn't touch the bottom of the pan.1 C Sugar, 1 pinch Salt
- Add the corn syrup to the sugar and water mixture, but don't stir it. Allow it to come to 260F without stirring. Remove from heat.Add gelatin mix to sugar syrup and whisk to incorporate. It will bubble quite a bit, but continue to whisk until it subsides and the gelatin is dissolved.2 tablespoon Corn Syrup
- Whip egg whites in a separate mixing bowl until soft peaks form. Slowly drizzle in the sugar mix using the side of the bowl while beating constantly. Continue beating on high until mixture looks thick and leaves trails.3 Egg Whites
- Add vanilla paste and beat for another minute to fully disperse.1 teaspoon Vanilla Paste
- Pour mix into prepared pan, tapping it on a counter a few times to release any air bubbles. Allow to cool for 2-3 hours.
- When the marshmallows do not feel super sticky to the touch, sprinkle them with cornstarch.
- Turn out contents of the pan onto a cutting board that has been covered with a 50/50 mix of cornstarch and powdered sugar. Cut into cubes with bench scraper and roll in the sugar/cornstarch.50/50 Mix of Cornstarch and Powdered Sugar to Coat
Notes
- Marshmallows will keep in an airtight container in the refrigerator for up to a month, or at room temperature for up to a week. Freezing is not recommended.
- You can add a few drops of gel food coloring and either swirl it through the mix at the end, or beat it in at the end.
- Feel free to swap out the vanilla paste for your choice of flavor. Add up to ½ teaspoon of your choice of extract including peppermint, maple, almond or hazelnut.
-
Per Dominique Ansel's suggestions (this is his base recipe, after all), you can also do the following:
- Cinnamon Flavored: Add ½ teaspoon of ground cinnamon during the last minute of beating, then add 1 teaspoon cinnamon to the confectioner's sugar and corn starch mix to toss them in
- Hazelnut Flavored: Add ¼ cup of hazelnut praline paste during the last minute of beating, then roll the marshmallows in coarsely chopped toasted hazelnuts
- Coconut Lime Flavored: Add 1 teaspoon pure coconut extract and 2 teaspoons of lime zest during the last minute of beating, then roll them in toasted unsweetened shredded coconut

Candace Syrowitz says
We doubled the recipe. We needed to use up eggs whites from left over creme Brulee separated eggs. These were so easy to make and DIVINE!
Ash, The Grocery Addict says
Hooray!! Thanks so much for sharing your success story 💛
Keri says
I'm not sure what I did wrong but my mixture was very stiff when I finished mixing in the gelatin to the egg whites. It had the consistency of a stiff meringue and wouldn't pour nicely into the baking dish, it was lumpy and airy. Any idea what went wrong? Did I mix it too much or not enough?
Ash, The Grocery Addict says
Hey Keri, I'm wondering if the sugar-corn syrup mixture got too hot, or maybe was added to the egg whites too quickly? It should be right at 260F, then remove it from heat. If you are certain that you pulled it at that temperature, consider testing your thermometer for accuracy. Put it in a pot of boiling water (not touching the bottom of the pan) and make sure you're reading 212F. If all that is in order, then it's possible that you overwhipped it. If that's the case, they may look a little rough, but they should still taste good when they set up!
Rose says
Can you substitute anything for corn syrup? Simple syrup?
Ash, The Grocery Addict says
Simple syrup won't work, I don't think. But you can try using another form of invert sugar like glucose syrup or perhaps honey? Let me know how it turns out if you try!
Megan says
I have always loved the idea of making my own marshmallows but I always thought it was super hard. Turns out, it's really not that difficult! Thanks for the yummy recipe!
Ash, The Grocery Addict says
Woot! I'm glad you gave it a whirl!
Gabrielle says
Hi! Are the egg whites considered cooked because of the hot sugar syrup? I'm wondering about it because of the amount of time we are leaving the marshmallows at room temperature after.
Ash, The Grocery Addict says
Hi Gabrielle, YES! The hot sugar syrup will temper/cook the eggs.
Scott says
FINALLY a good egg white marshmallow recipe! I made the Mallows vegetarian by halving the amount of gelatin and mixing it in with 100g of the sugar and making the syrup with the other half of the sugar. They taste amazing. Like squishy cubes of vanilla ice cream!
Ash, The Grocery Addict says
I'm so glad you liked them, Scott!! And thanks for sharing your fun tweaks!
Emil-Otomar Saar says
Made this with some changes and still worked out great. Agave syrup is a great replacement for corn syrup if u dont have access to corn syrup like I did. Another modification I made with these is that instead of vanilla I added a bit of Mint Liquor for a minti taste instead of vanilla. Very good recipe and if you are looking for something to change it up I recommend making some delicious mint marshmallows. 🙂
Ash, The Grocery Addict says
Thanks for sharing, Emil—I'm gonna have to try the mint option next!!
Addie says
I am a 14 year old baker who comes with the help with my mom. It was unclear if you do 160 degrees Fahrenheit or 260. Other wise very easy to understand. I was curious as if you can toast them or make s’mores with them.
Ash, The Grocery Addict says
Hi Addie! I love that you're experimenting with baking at such a young age. I'm sure you'll be a pro in no time! For these marshmallows, you're looking for 260ºF, which is considered the "hard ball" stage in candy making. Sorry for the confusion, friend! I'm updating the recipe now for clarification. Thanks for letting me know it was confusing! Also, yes, you can toast them for s'mores!
Jen says
Step 5, beat the mixture, with a paddle attachment, or with whisk attachment?
In UK Golden Syrup subs well for corn syrup.
Ash, The Grocery Addict says
Hi Jen, the whisk attachment is your best bet! It'll get the most air incorporated.
Jasminethebaker says
Marshmallows are always dairy free lol
Ash, The Grocery Addict says
Most of the time, yes! But for some reason, people search for "dairy-free marshmallows," so I wanted to make sure folks knew mine are. 🙂