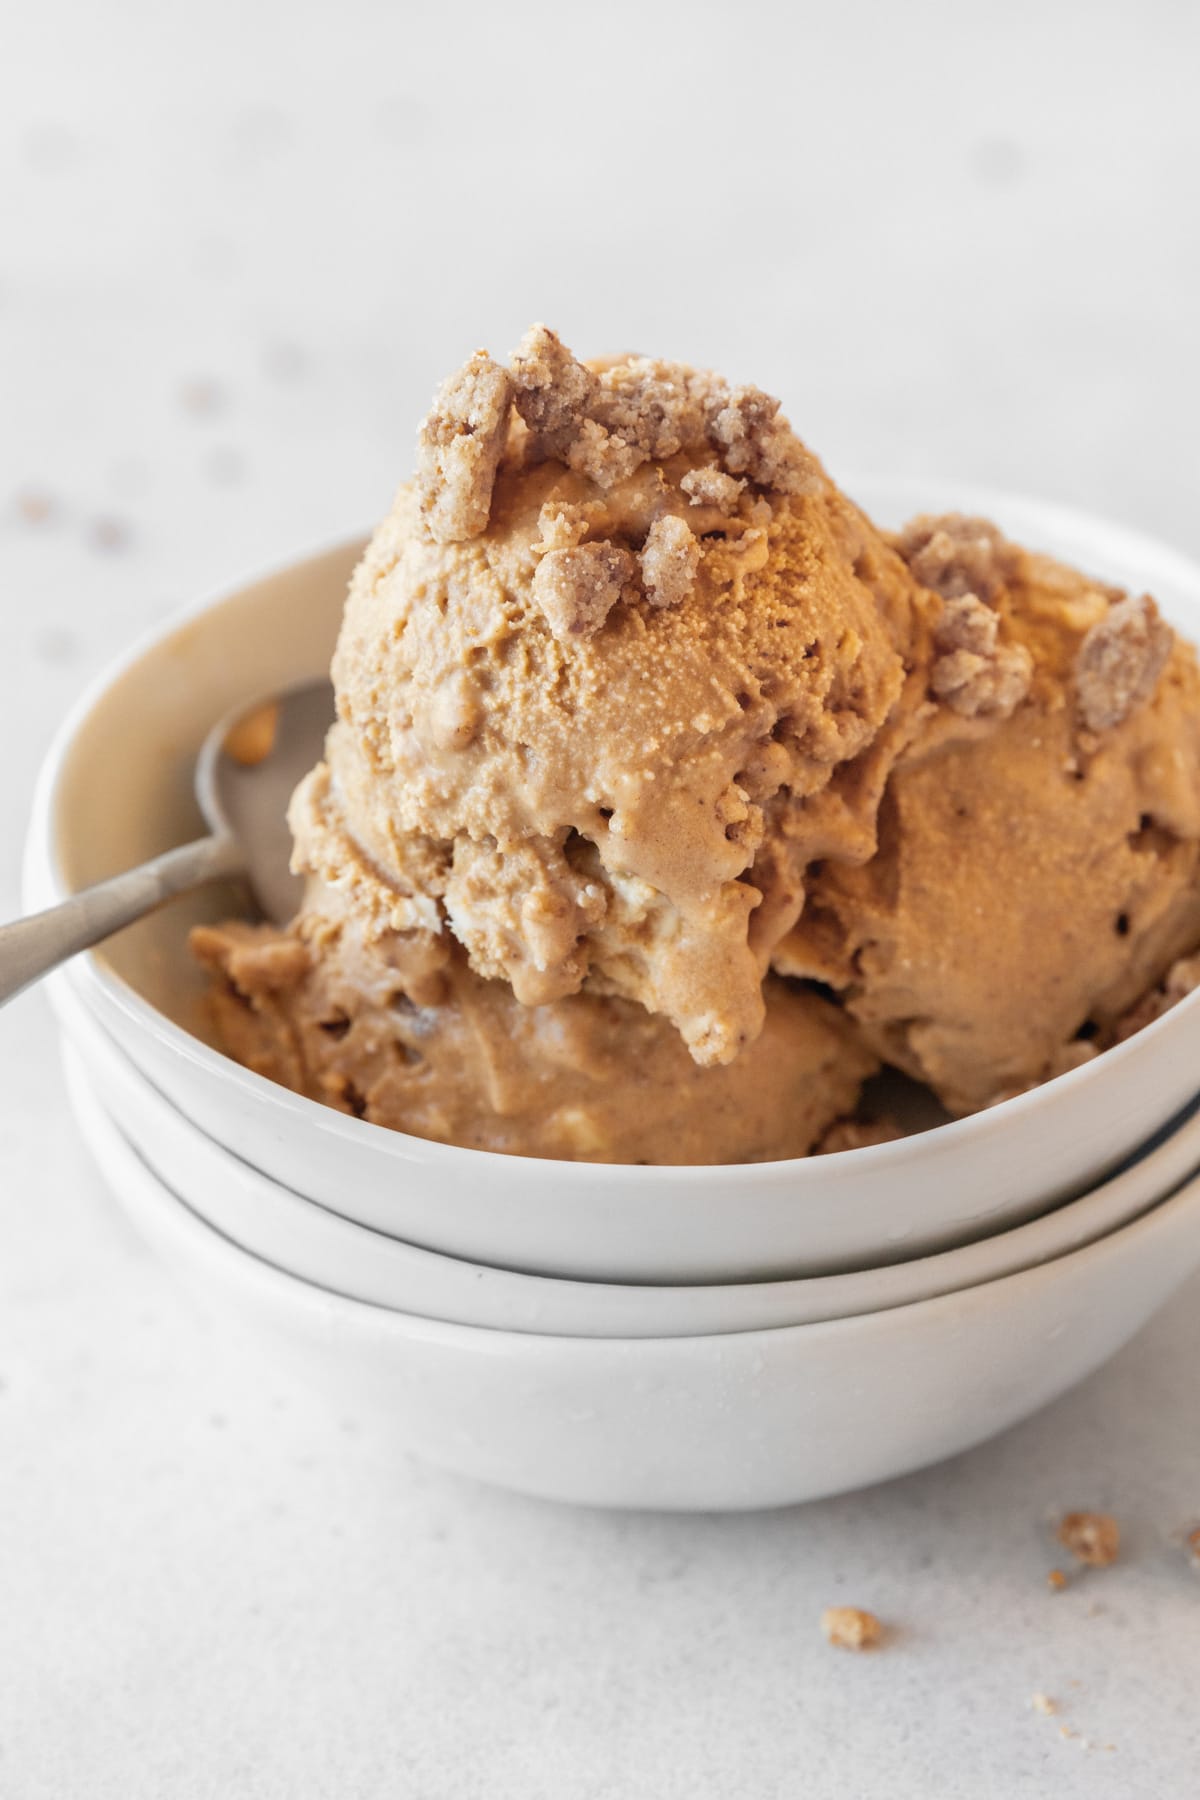
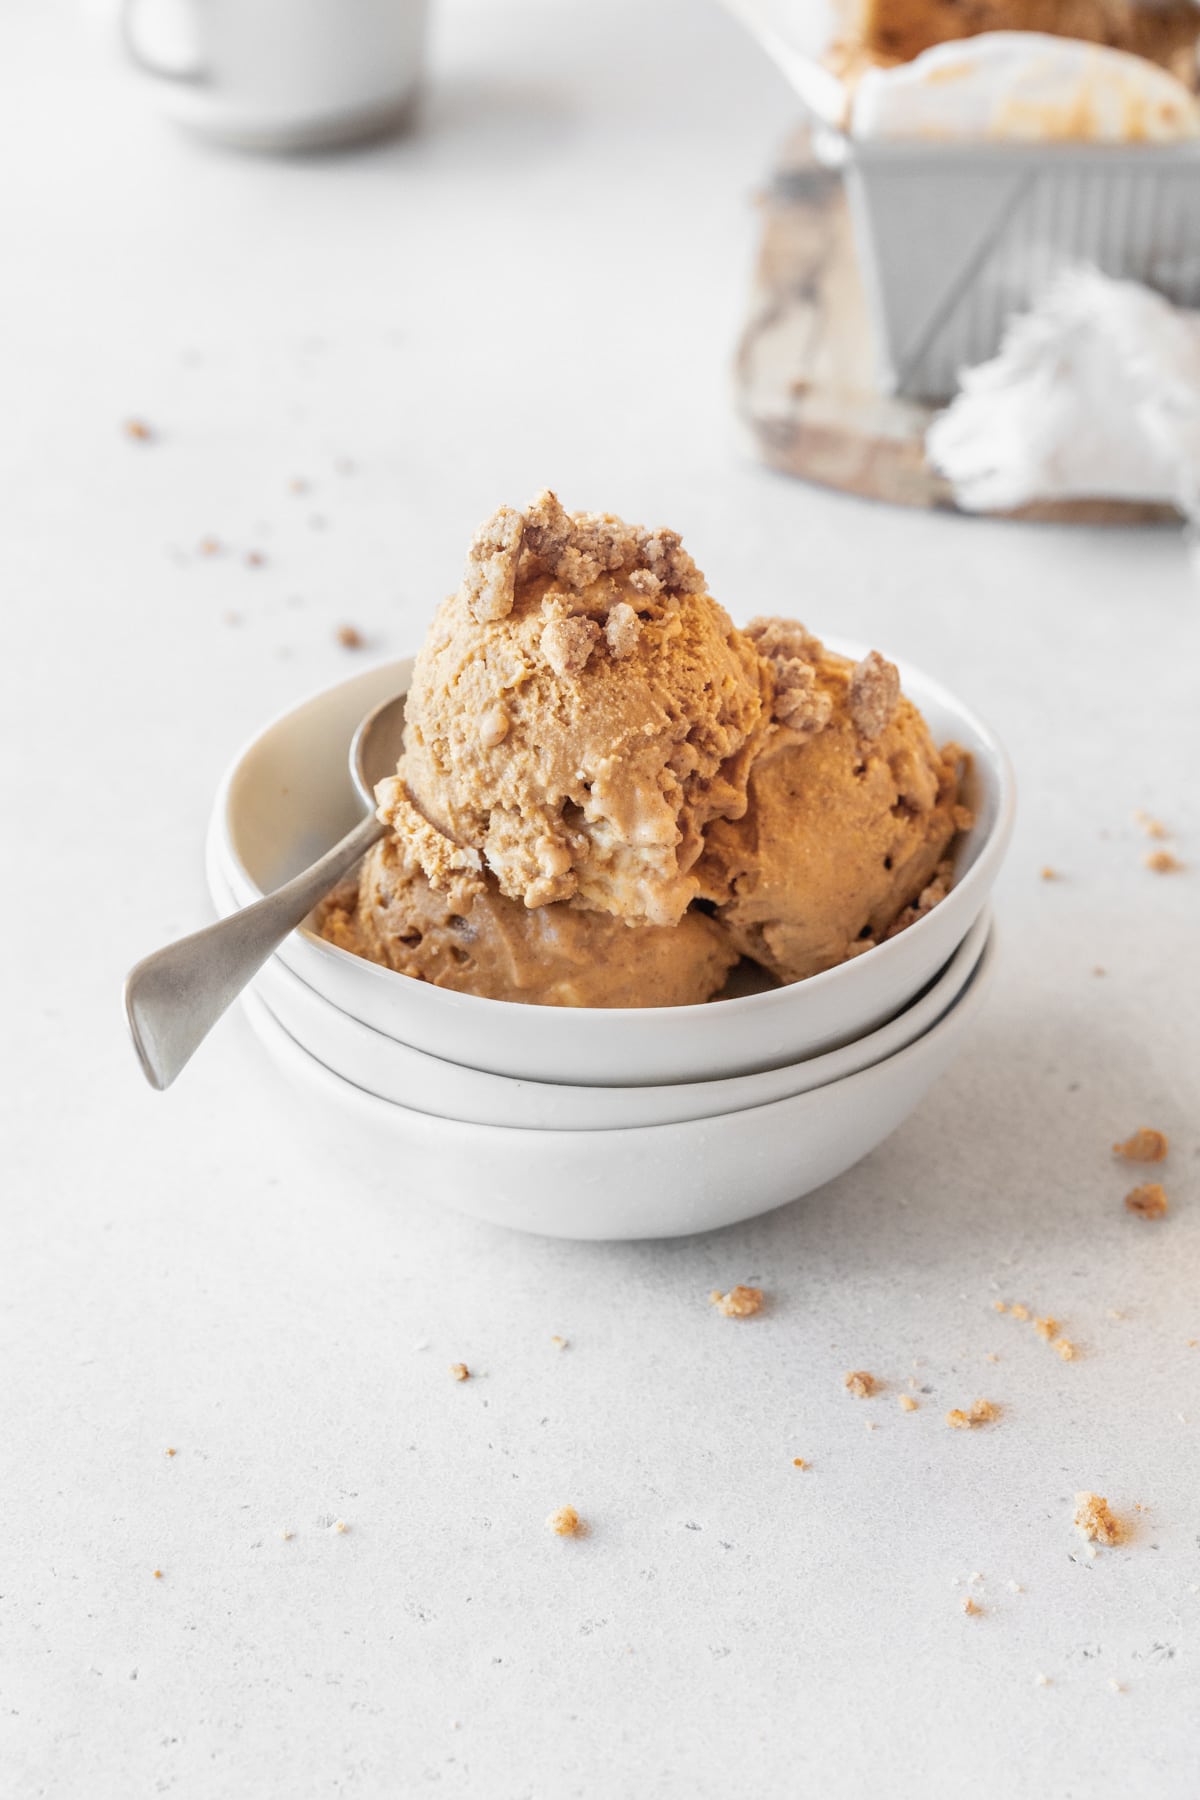
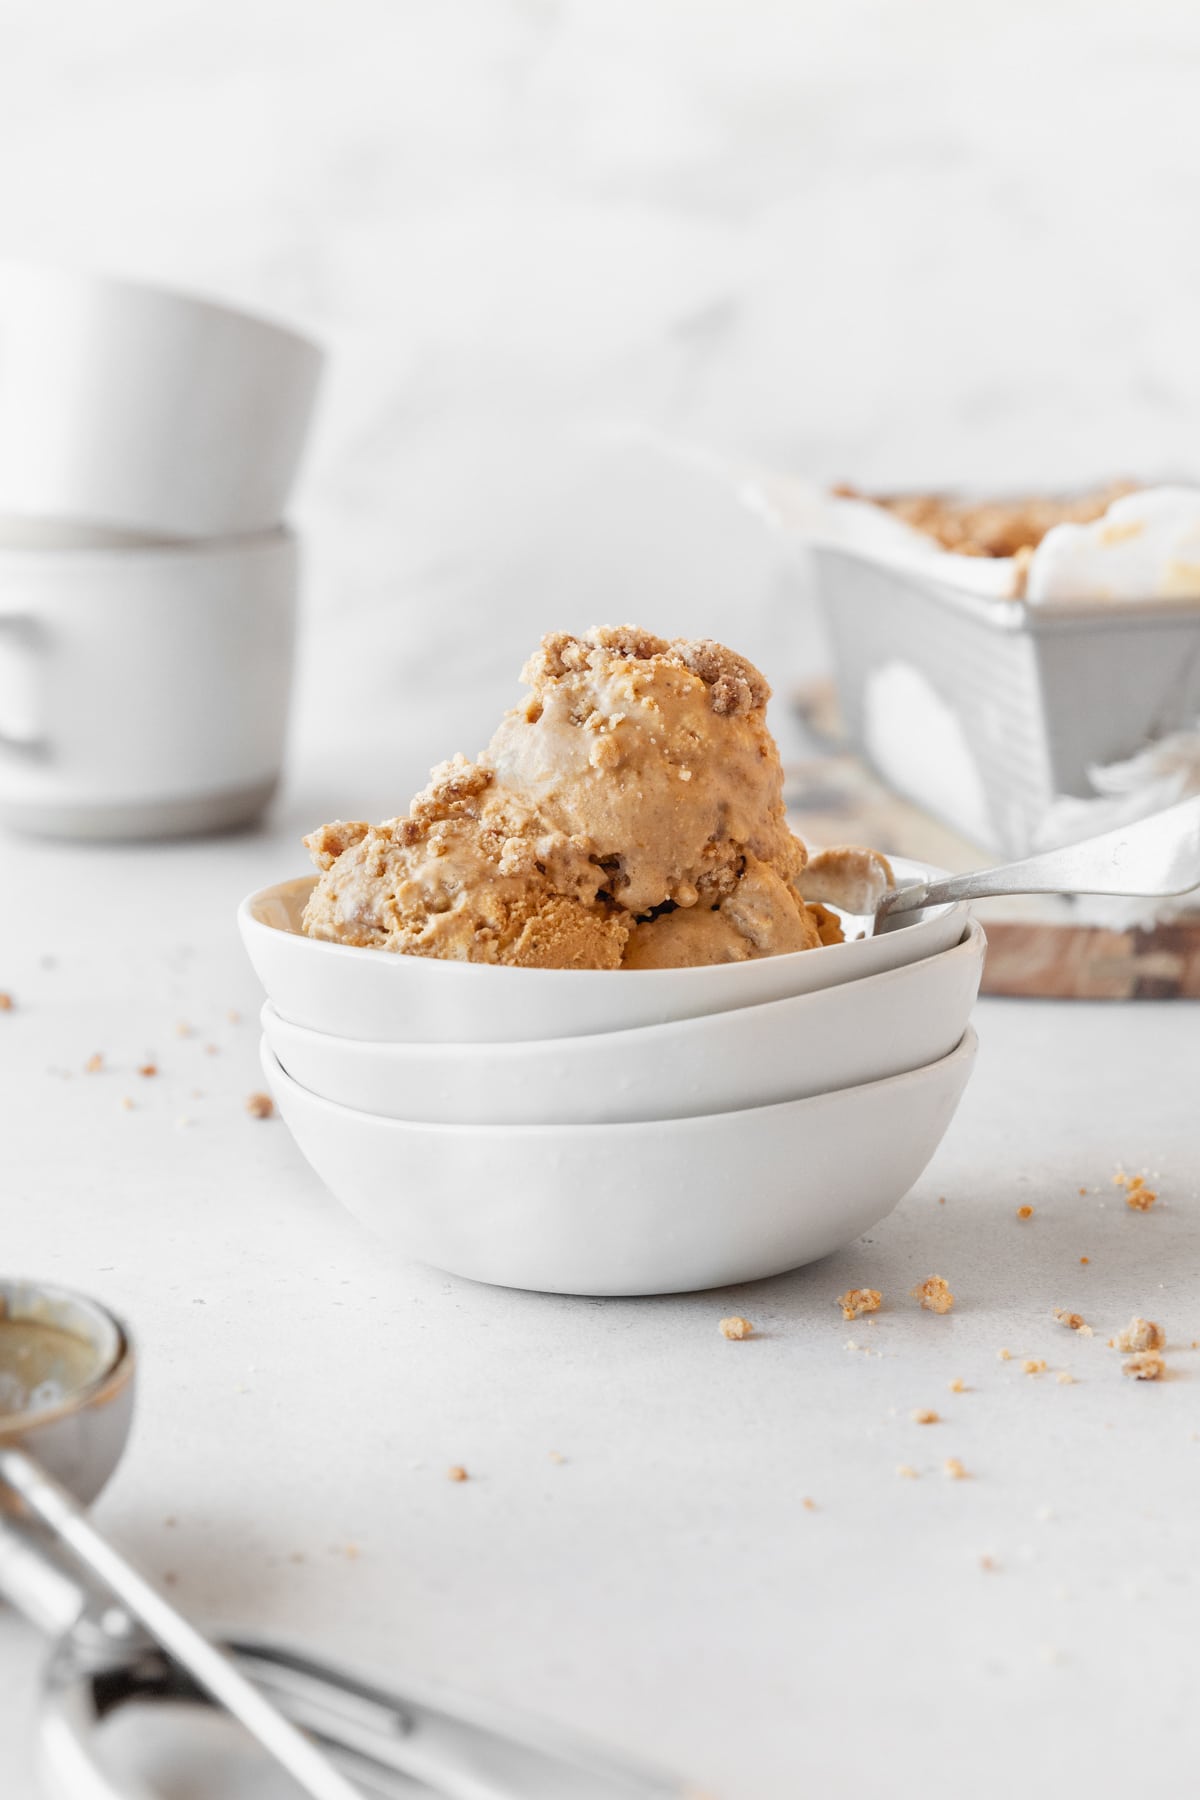
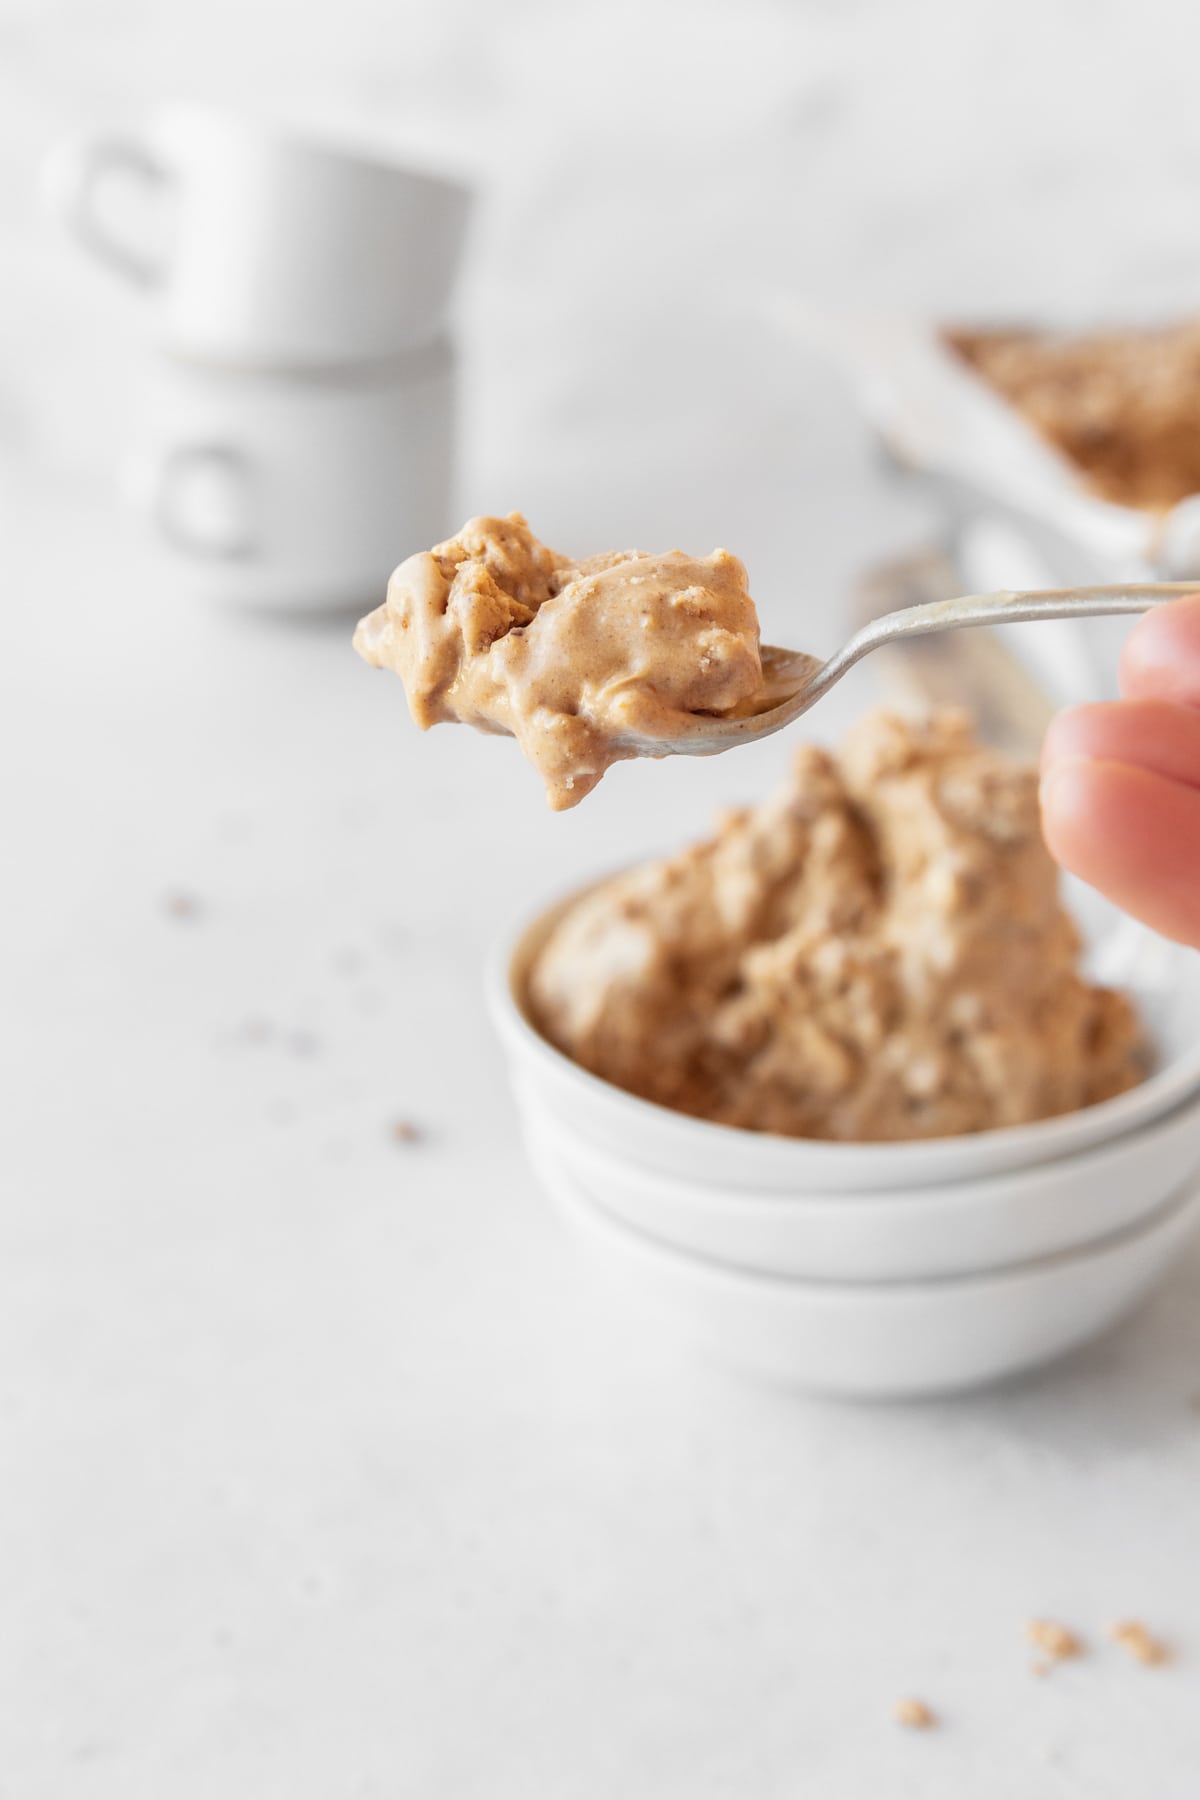
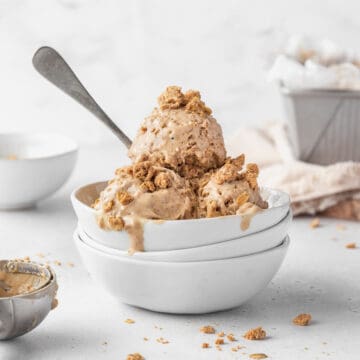
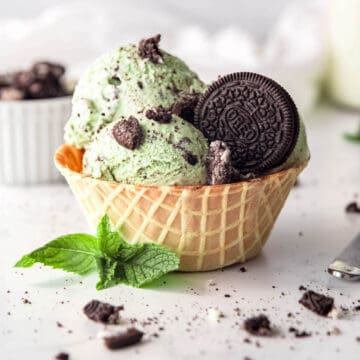
Today, I'm pumped to introduce my copycat version of Ben and Jerry’s Pumpkin Cheesecake Ice Cream. Featuring a creamy homemade pumpkin ice cream base infused with just the right amount of warm, cozy spices and a crunchy-salty-sweet graham cracker crumble swirl, this frozen treat is hard to beat.
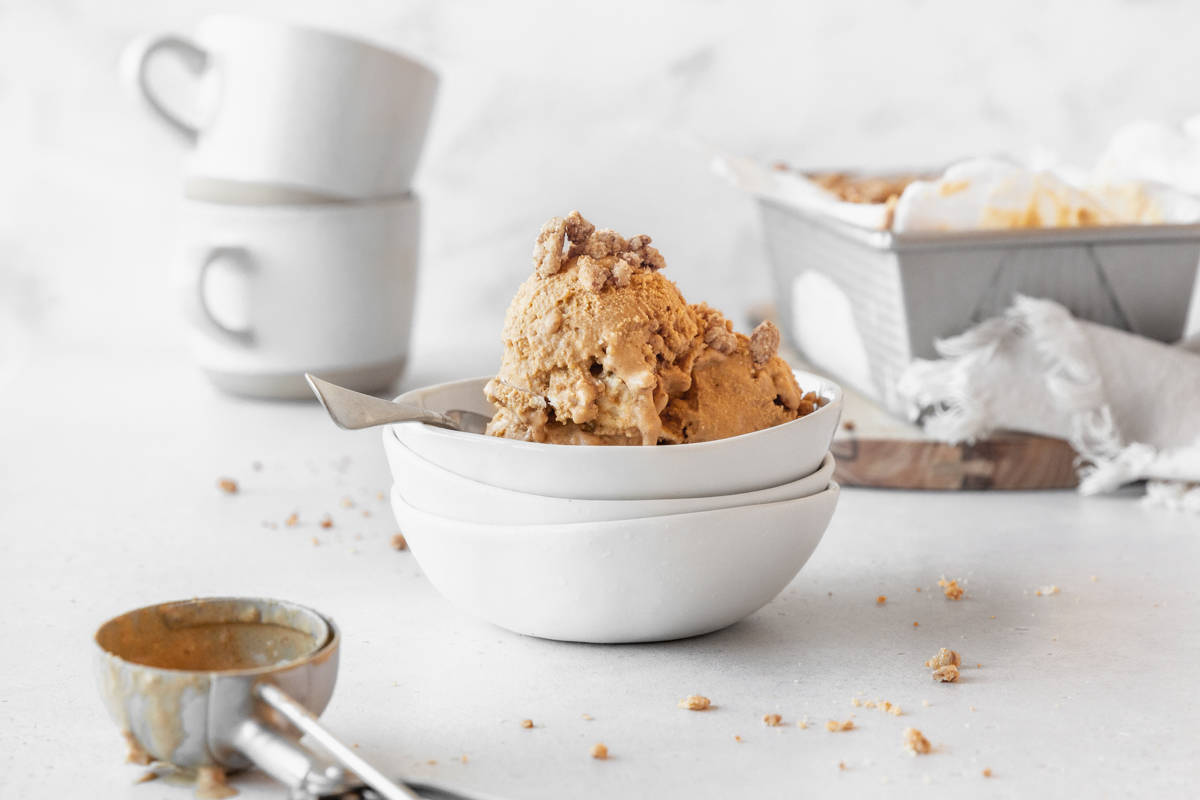
And, because I’m an unabashed overachiever, I've ALSO added a thick ripple of cheesecake, making every spoonful even more luxurious than the original Ben & Jerry's creation. Y'all — this homemade pumpkin cheesecake ice cream recipe is legit.
Jump to:
- Why You’ll Love This Pumpkin Ice Cream Recipe
- Ingredients & Substitutions
- How To Make Ben & Jerry’s Pumpkin Cheesecake Ice Cream At Home
- Optional Variations & Dietary Adaptations
- Expert Tips
- Frequently Asked Questions
- More Egg-Free Ice Cream Ideas
- Pumpkin Cheesecake Ice Cream (Ben & Jerry's Copycat)
- 💬 Reviews
Why You’ll Love This Pumpkin Ice Cream Recipe
If you, like me, don't want pumpkin season to end 'til after Christmas, I'm right there with you. Here's why this recipe is a delightful journey from the first stir to the last scoop:
- Pumpkin Lover’s Paradise: To all the PSL-loving, unapologetically basic babes out there — this ice cream is for you. It combines the rich, comforting taste of pumpkin with the luxurious texture of cheesecake, all in a frosty ice cream form. It's an all-in-one treat!
- A Thanksgiving Showstopper: Move over, pumpkin pie—there’s a new sheriff in town! This pumpkin cheesecake ice cream is the perfect way to shake up your dessert table. Plus, since it's frozen, you can make it ahead of all the holiday craziness. Thanksgiving ice cream FTW!
- Fun & Economical: Making incredible ice cream at home is surprisingly simple and cost-effective. You control the quality of the ingredients and can indulge in a luxurious dessert without the premium price tag. Plus, it’s pretty fun to have the bragging rights of making ice cream from scratch. 🤷♀️
- Customizable & Inclusive: One of the joys of homemade ice cream is the ability to tweak it to your liking. Want more spice? Go for it. Fancy a bit more cheesecake swirl? You're the boss. Need to make it gluten-free? No problem! This pumpkin spice ice cream recipe is merely a starting point for wherever your heart (or stomach) leads you.
Ingredients & Substitutions
Here’s everything you’ll need to make a pumpkin cheesecake ice cream Ben and Jerry would be proud of:
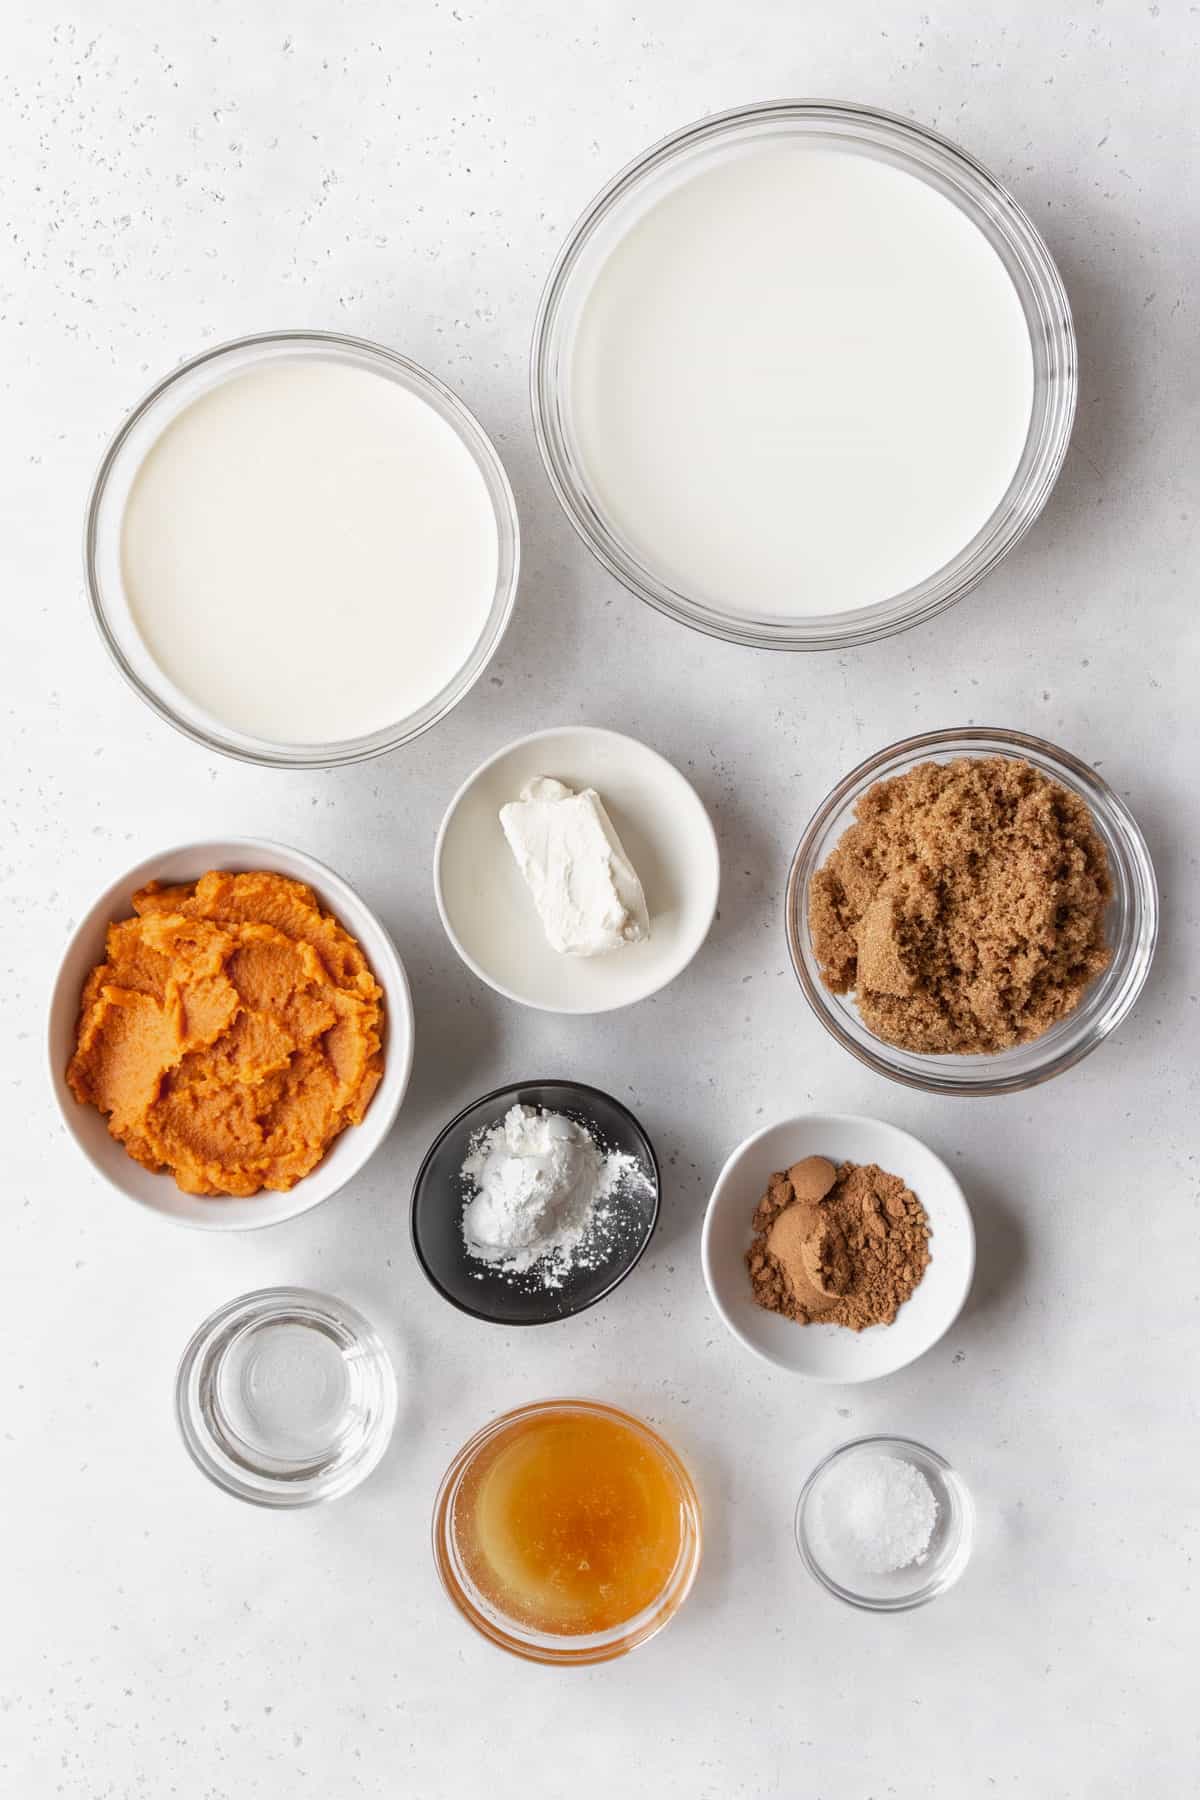
- Whole Milk - When it comes to homemade ice cream, full-fat is the way to go. If you opt to go dairy-free, I recommend using a blend of full-fat oat milk and soy milk. If possible, opt for “barista” blends, which are specially formulated to froth up (or churn) better.
- Cornstarch - Rather than fussing with separating and tempering eggs, cornstarch works to add body to the ice cream base. If you can’t do corn, an equal amount of tapioca starch can be swapped in.
- Pumpkin Purée - You’re welcome to make your own, but the store-bought kind is perfectly delicious. Just make sure you’re grabbing 100% pure pumpkin, not the canned pumpkin pie filling. Alternatively, you can swap in puréed sweet potato or butternut squash instead.
- Cream Cheese - Again, full-fat is the right choice. If you’d like to lighten things up, avoid the stabilizers and artificial ingredients in non-fat cream cheese and opt for slightly lighter Neufchatel cheese instead. You can also use mascarpone.
- Honey - For added sweetness and complexity. If possible, use a local, preferably dark variety like buckwheat honey. Maple syrup, molasses, or agave can also be used.
- Heavy Cream - I’ve actually discovered that I prefer the consistency of ice cream that has been made with powdered heavy cream rather than the refrigerated variety. While either will work and taste fantastic, the higher viscosity of refrigerated heavy cream tends to make the ice cream freeze harder than if you were to use rehydrated cream powder. Plus, the powdered stuff is cheaper!
- Brown Sugar - I prefer the more intense molasses flavor of dark brown sugar here, but light brown works well too. Alternatively, you can use muscovado sugar, grated piloncillo, or jaggery.
- Light Corn Syrup - This helps prevent an icy, crystallized consistency. Before you get up in arms, note that corn syrup is quite different from high-fructose corn syrup. You’re also welcome to use dark corn syrup for more molasses flavor, or you can use tapioca syrup or golden syrup if corn is a no-no.
- Pumpkin Pie Spice - This warming spice blend is a no-brainer for making this pumpkin pie cheesecake ice cream. You’re welcome to swap in other cozy spice blends like chai masala, haiwaj, or even Chinese 5-spice powder.
For the Graham Cracker Crust Swirl & Cheesecake Ripple, you’ll also need:
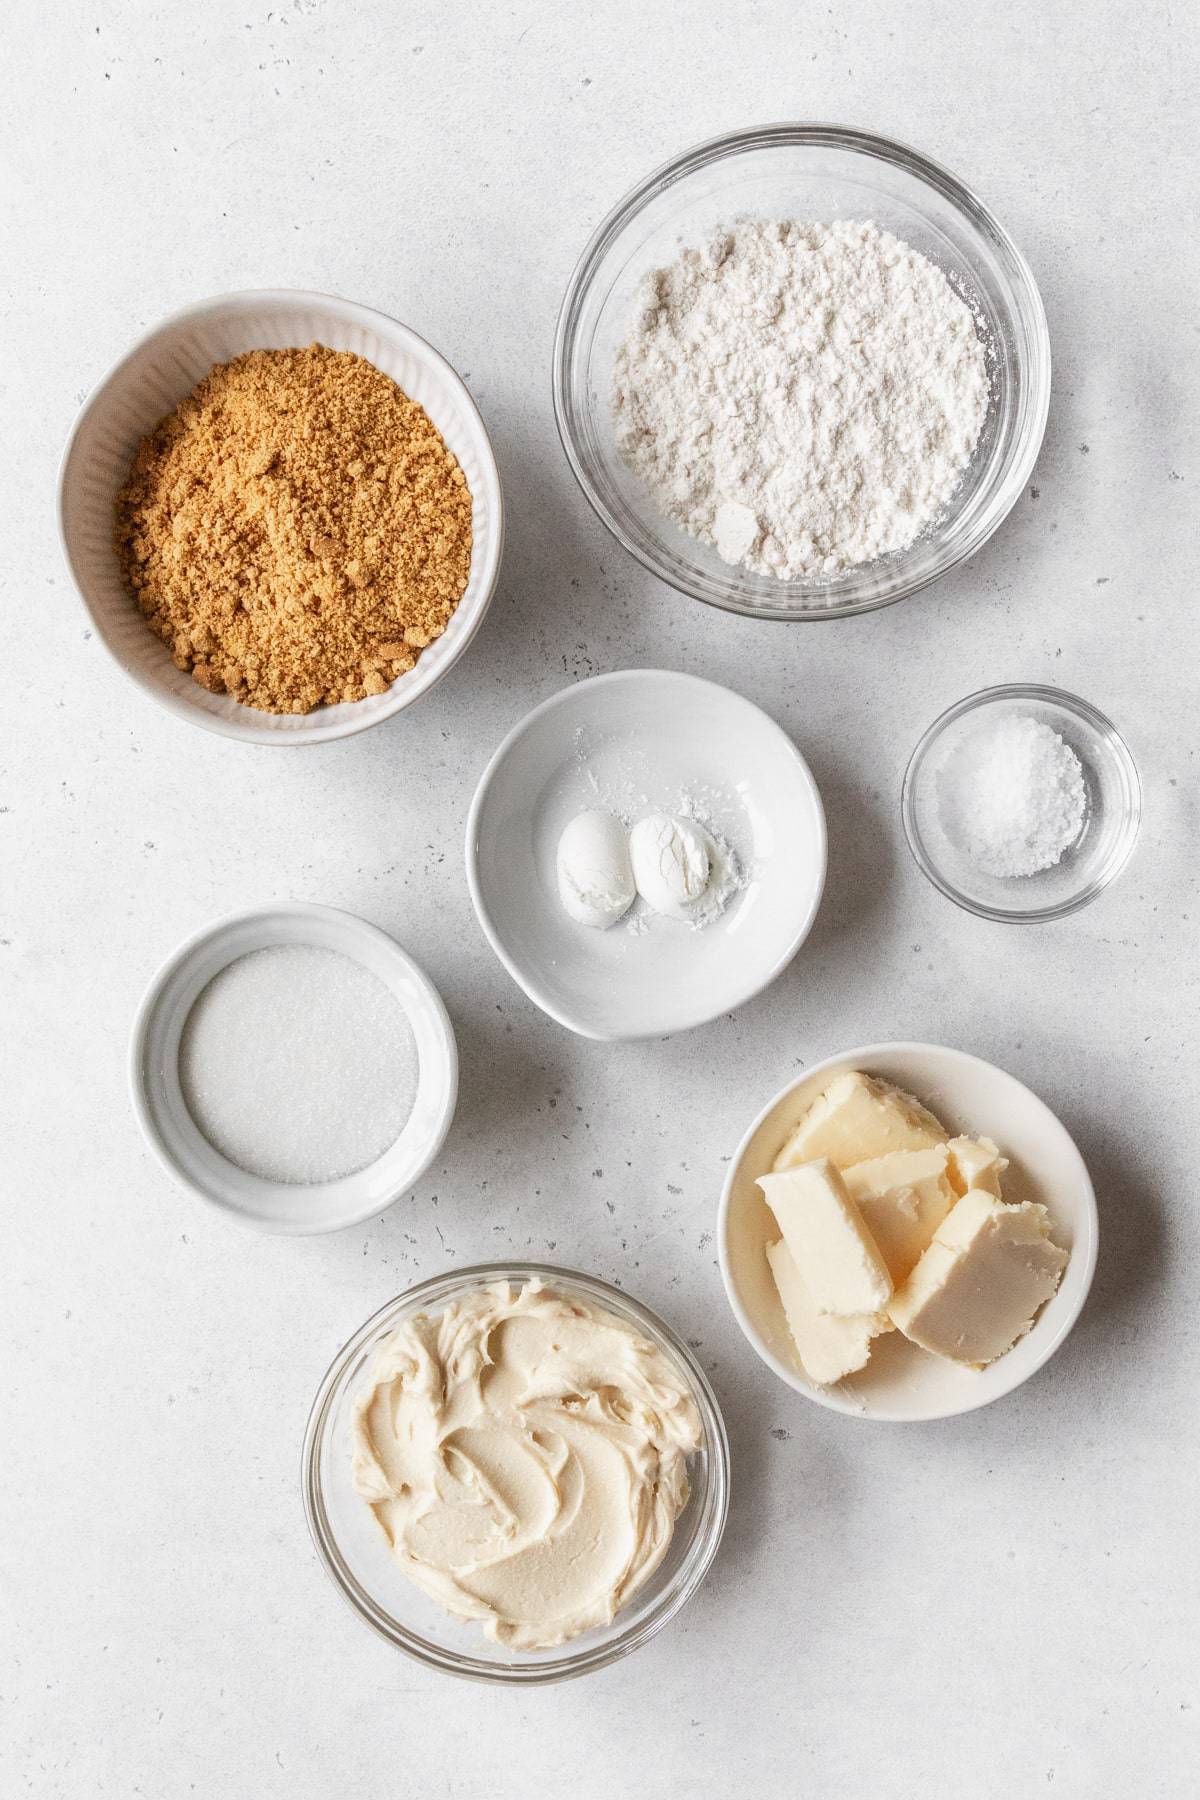
- Graham Crackers - If you’re anything like me, half the fun of eating cheesecake is the salty-sweet, crispity-crunchity graham cracker crust. I personally prefer using cinnamon-flavored grahams (especially the old-fashioned ones that come in a plastic tub at Trader Joe’s), but honey graham crackers work too. Feel free to use gluten-free if needed!
- Flour - For binding the crust ingredients together. Plain AP flour is perfect, but in a pinch you can use cake flour, bread flour, or whole wheat pastry flour instead. You’re also welcome to use a cup-for-cup all-purpose gluten-free flour blend with xanthan gum — just make sure to let the crumble mix rest for 30 minutes before baking if you do.
- Granulated Sugar - The white sugar helps to both sweeten the mix and encourages caramelization in the oven. Cane sugar is a fine substitute.
- Butter - I use salted butter for almost everything. If you opt for unsalted, adjust the seasoning to taste.
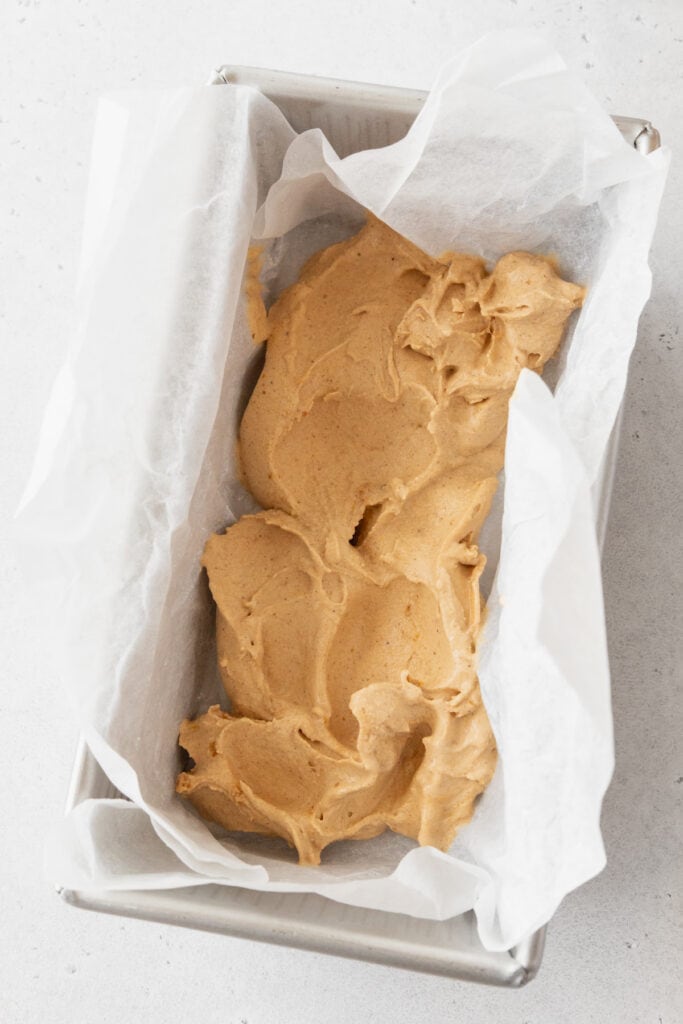
- Cream Cheese Fruit Dip - Most of what you need to make this delectable dip-meets-swirl is already listed above. The only add-ons you’ll need are powdered sugar (which you can make by blitzing granulated sugar and cornstarch together) and vanilla extract. If you don’t want to go to the trouble, you can also use 1 slice of store-bought or homemade cheesecake crumbled into bits.
How To Make Ben & Jerry’s Pumpkin Cheesecake Ice Cream At Home
To make this pumpkin spice cheesecake ice cream, there are 3 sets of steps. (Well, 4 if you count making the cheesecake dip, which I explain in another post.) They are all quite simple, but since there were so many steps to explain, breaking them up into separate tasks seemed like the best way to go.
Please note that the cheesecake dip and graham cracker swirl can be made up to a week in advance, and the ice cream base can be made up to 3 days in advance of churning & assembling.
Make Ice Cream Base
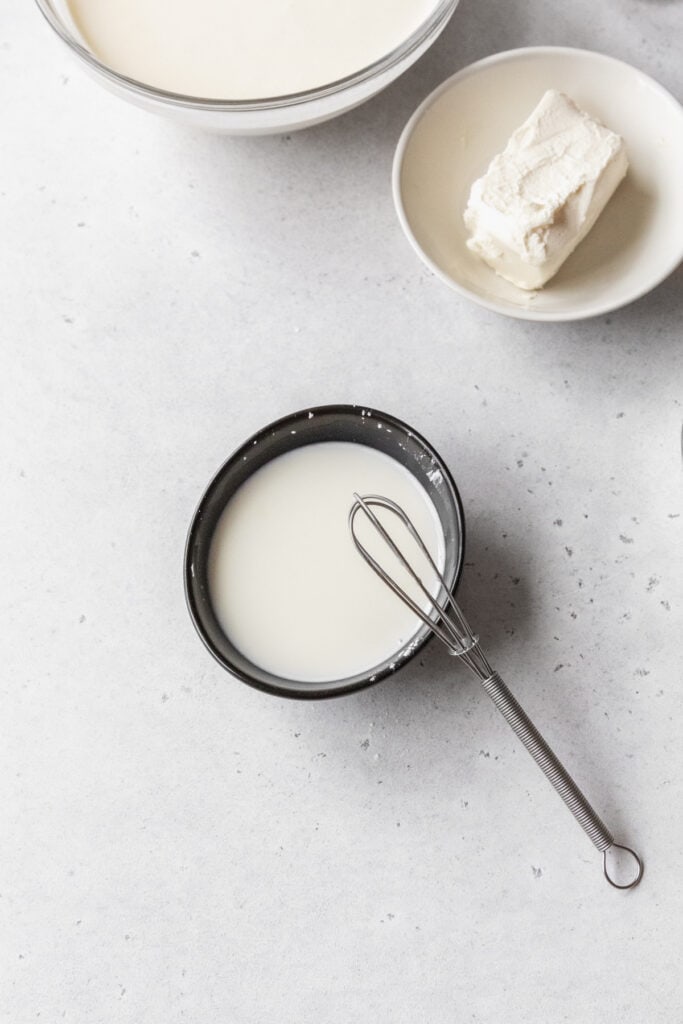
Step 1: Make a slurry with the cornstarch and about 2 tablespoons of the milk. Set aside.
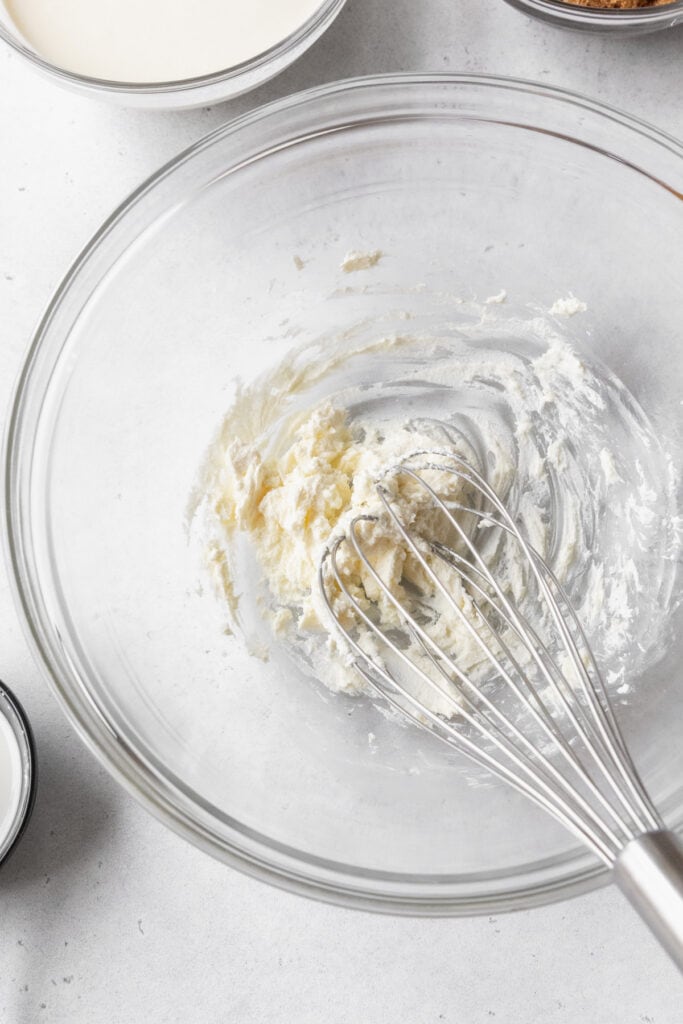
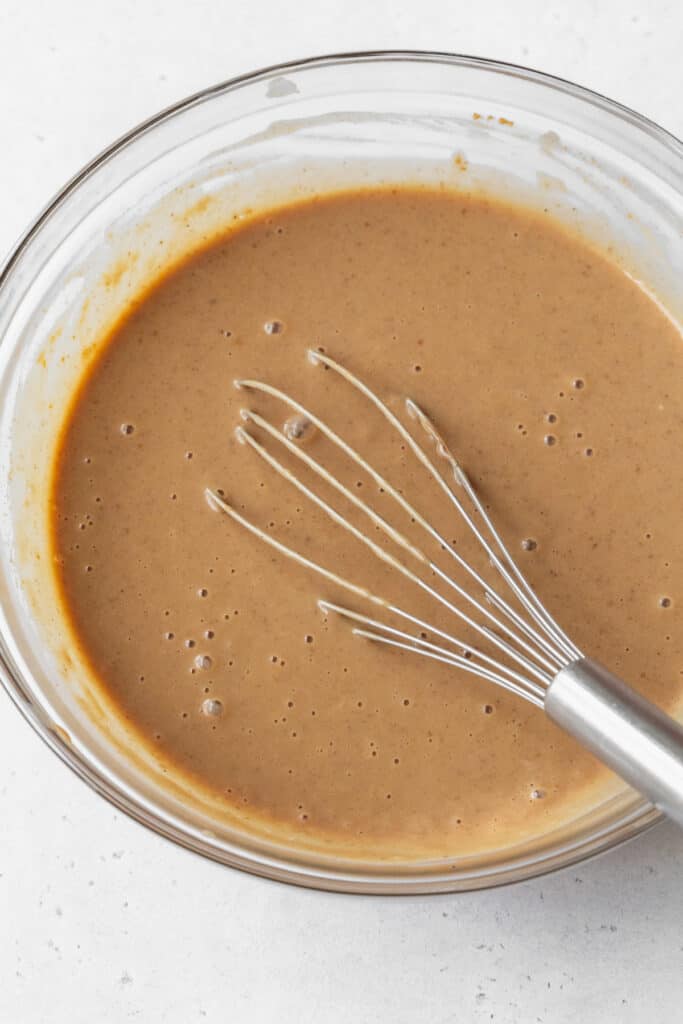
Step 2: Whisk the cream cheese and salt in a bowl until smooth.
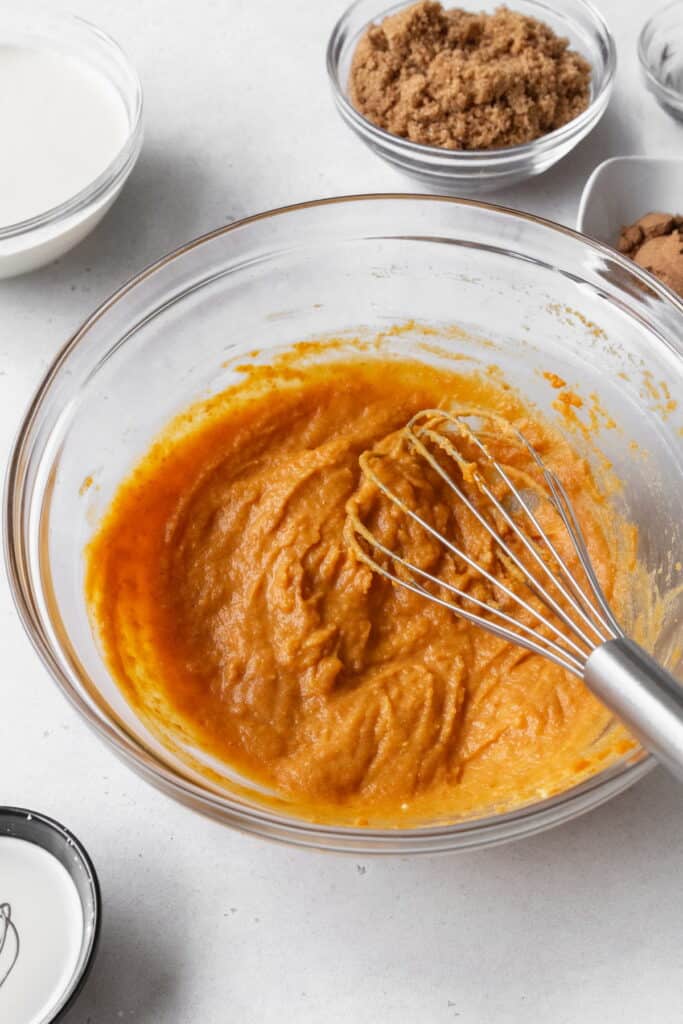
Step 3: Add the pumpkin purée and honey to the cream cheese mixture. Whisk again until smooth. Set aside.
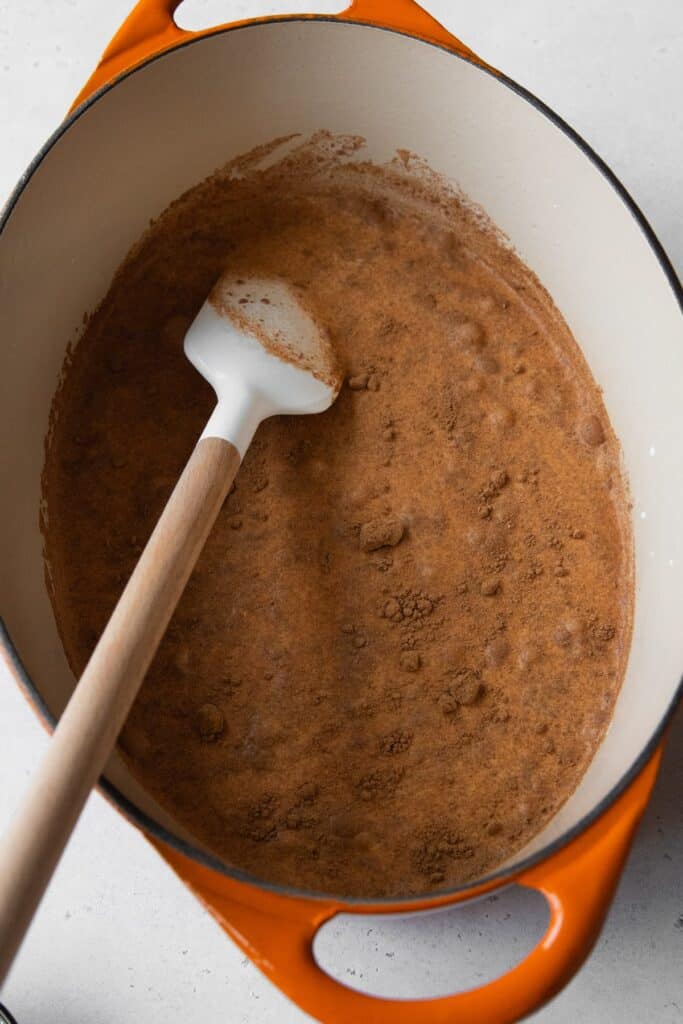
Step 4: Heat. Add the remaining milk, plus the cream, sugar, corn syrup, and pumpkin pie spice in a 4-quart or larger saucepan.*
Step 5: Boil. Bring the milk/cream mixture to a rolling boil over med-high heat. Boil for 4 minutes.
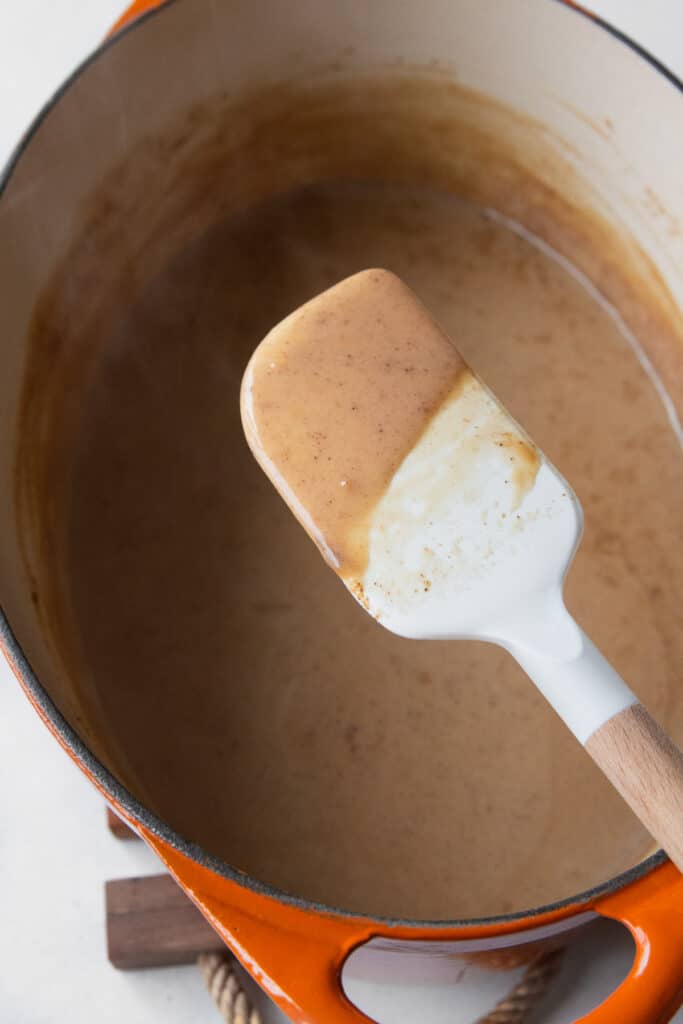
Step 6: Thicken. Remove from heat and add the cornstarch slurry. Whisk to combine, then return to heat.
Step 7: Boil again. Bring the mixture back to a boil and cook, stirring frequently, until thickened — about 1-2 minutes.
Step 8: Combine & Chill. Whisk the hot milk mixture into the pumpkin cream cheese mixture. Either chill the bowl in an ice bath, or refrigerate the mixture for about 6 hours.
Make Graham Swirl
If you make the graham crust bits ahead of time, allow them to cool to room temp before transferring them to an airtight container or a zip-top bag. If possible, add a silica packet to the container or bag to keep them crispy.
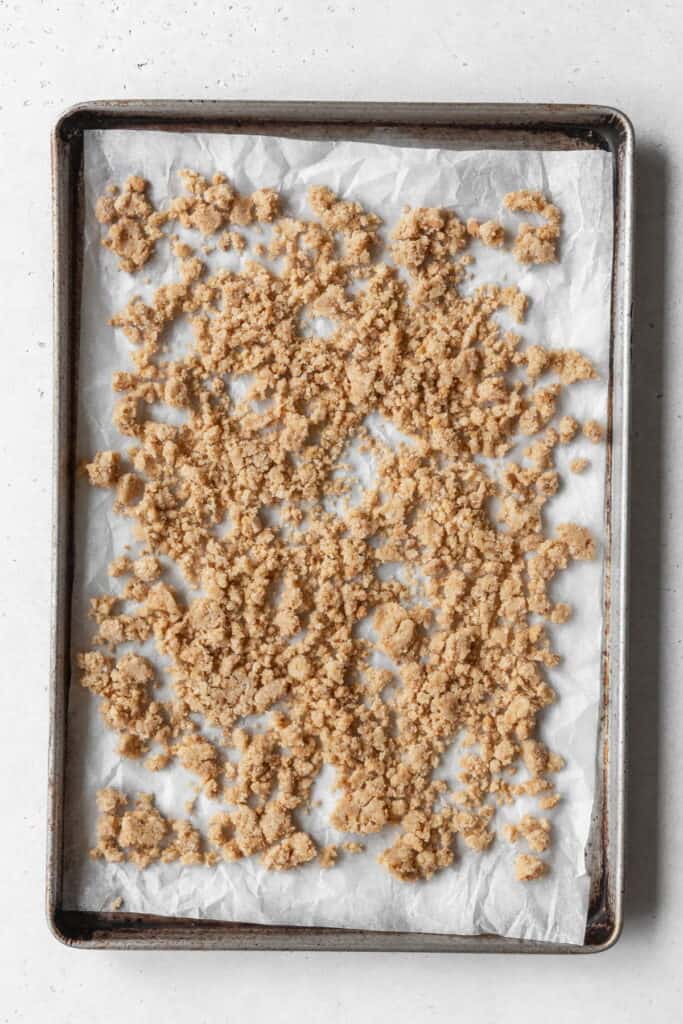
Step 1: Prep. Preheat the oven to 275F. Line a small, quarter-baking sheet with parchment. (You can use a regular-sized half baking sheet if needed, but only use the middle half to prevent burning.)
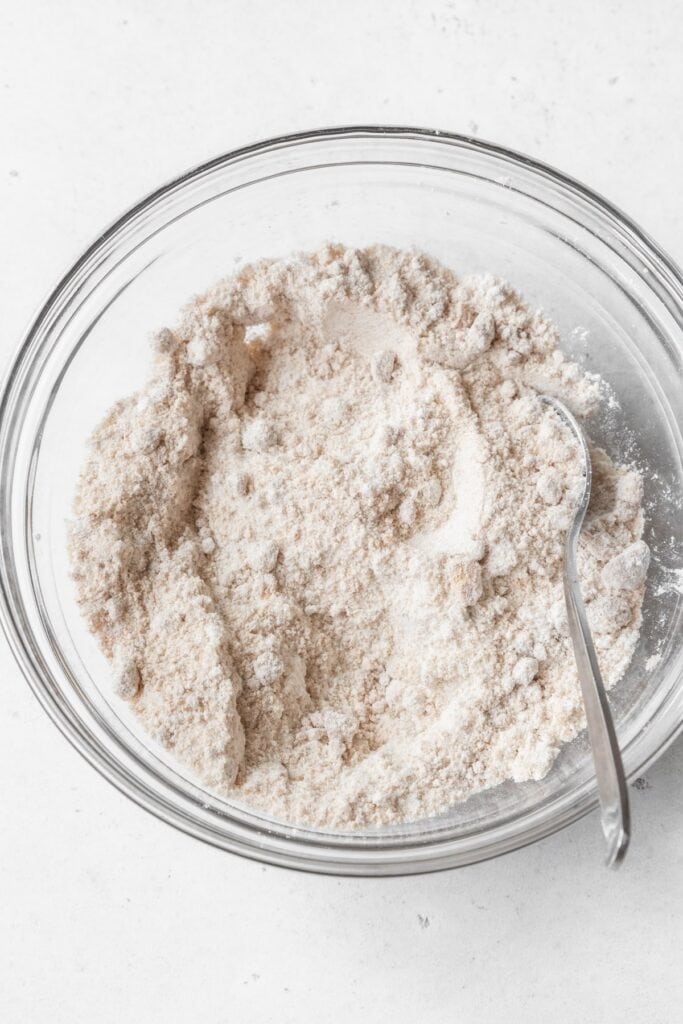
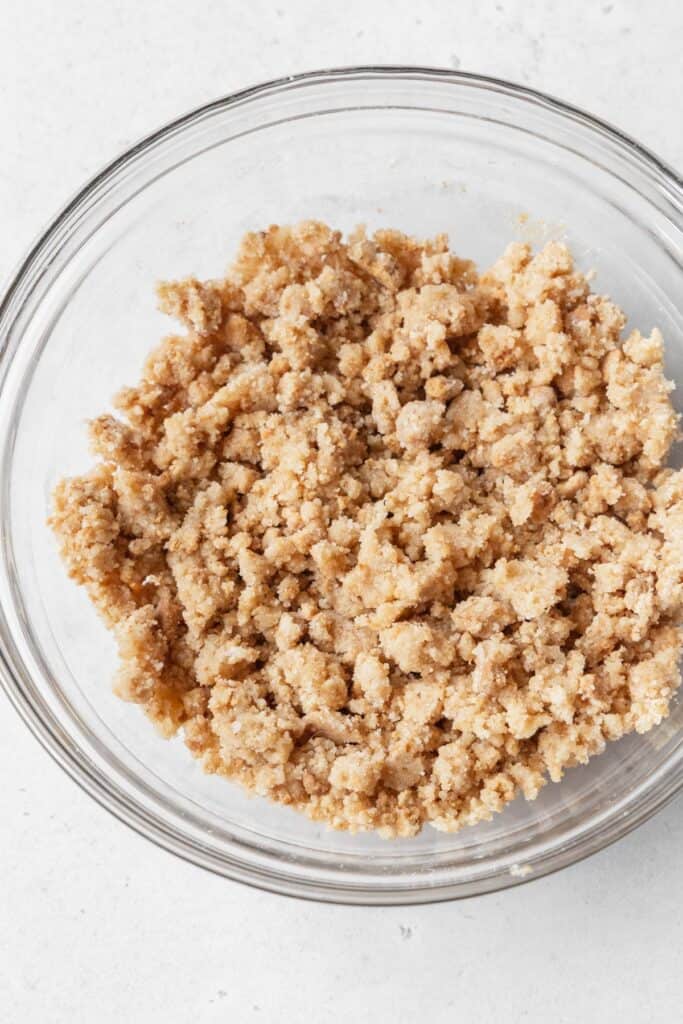
Step 2: Mix the graham crumbs, flour, cornstarch, sugar, and salt in a bowl.
Step 3: Add the melted butter and stir until all the dry ingredients are moistened and the mixture looks like wet sand.
Step 4: First Bake. Pour the crumb mixture onto the prepared baking sheet and spread it out evenly. Bake for 10 minutes.
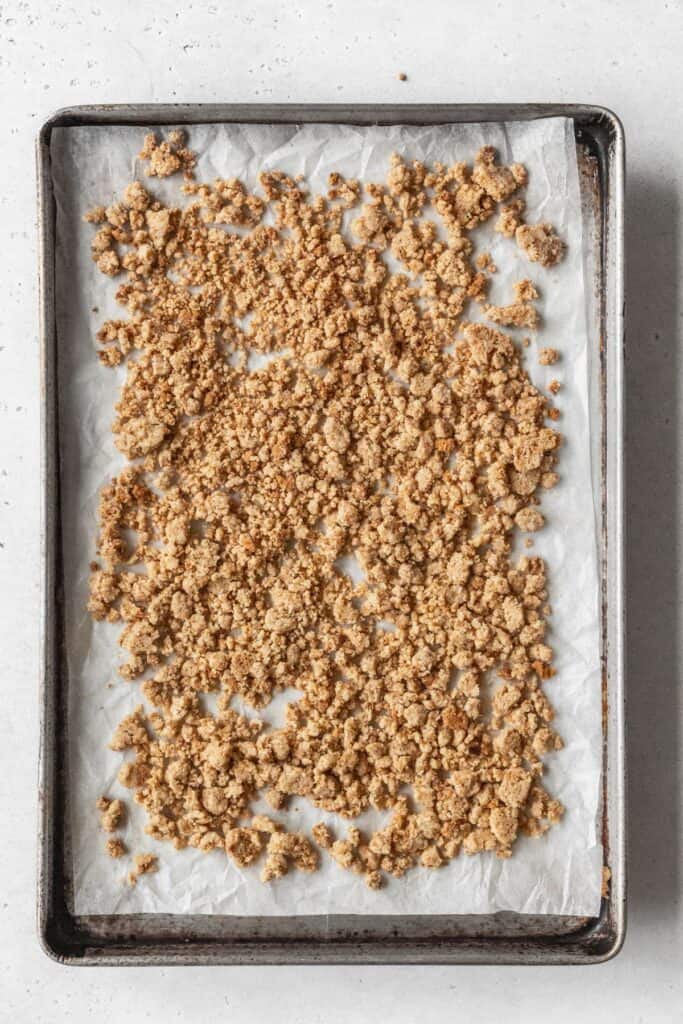
Step 5: Toss. Remove the pan from the oven and toss with a metal spatula or bench scraper. Cut the mixture into about ¼-inch pieces.
Step 6: Second Bake. Return to the oven and bake for about 10 more minutes, or until deep golden brown.
Step 7: Cool. Remove from the oven and let cool completely.
Assemble.
Step 1: Spin ice cream in an ice cream maker according to manufacturer instructions.
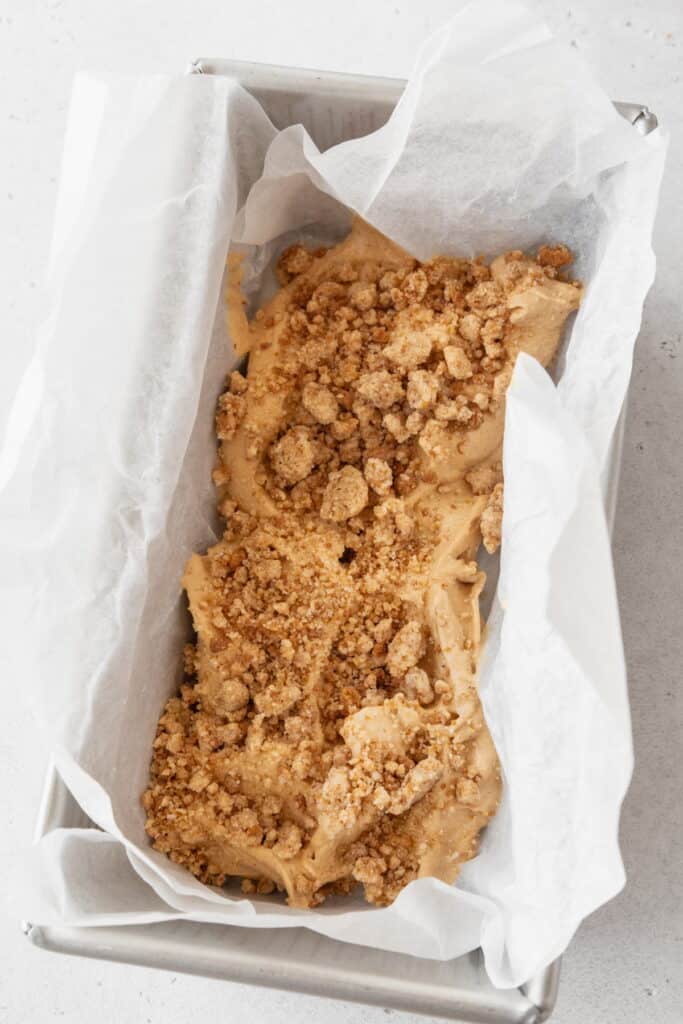
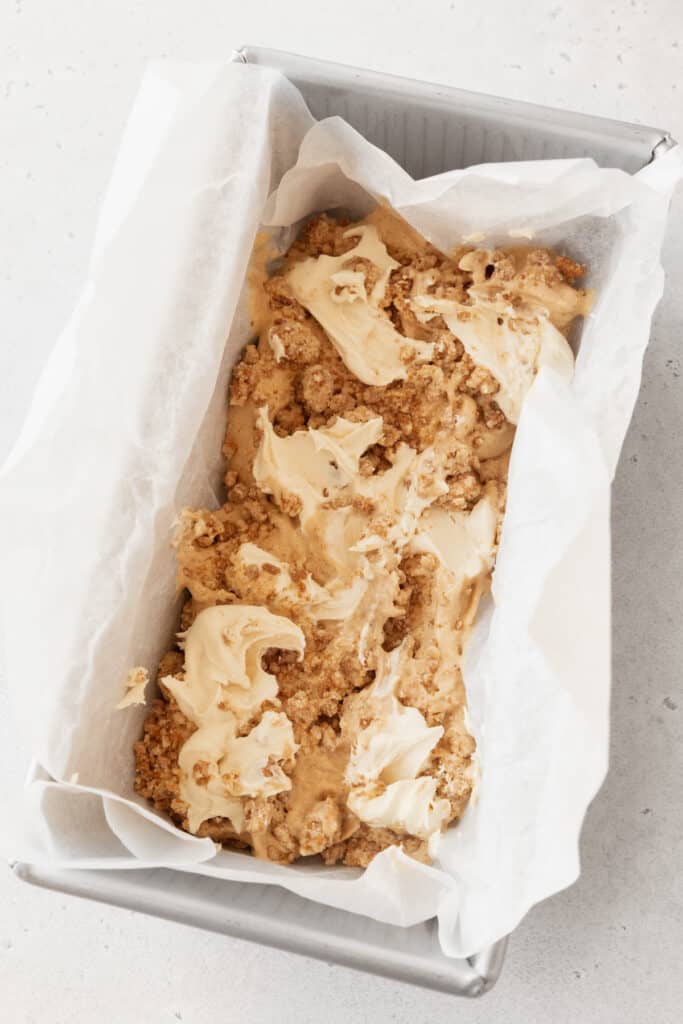
Step 2: Pack about ¼ of the ice cream mixture into your freezer-safe container.
Step 3: Top with ¼ each of the graham cracker swirl and dollop about 2 tablespoons of the cream cheese mixture in teaspoons across the top.
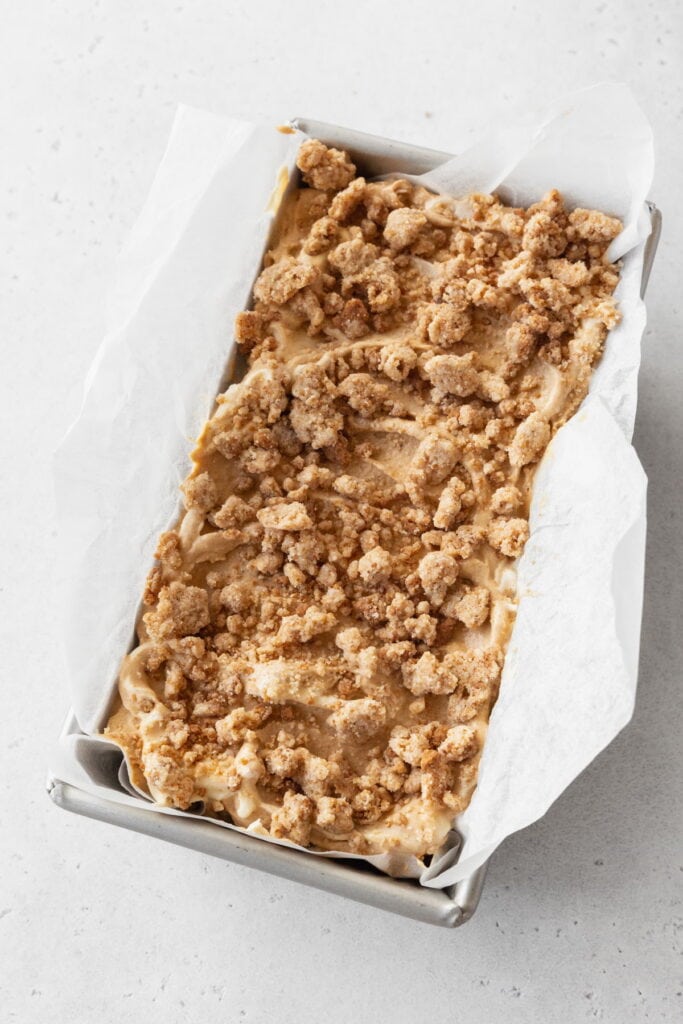
Step 4: Repeat the packing process, adding more ice cream and inclusions until you've used them all.
Step 5: Freeze the ice cream for at least 4 hours in the coldest part of your freezer.
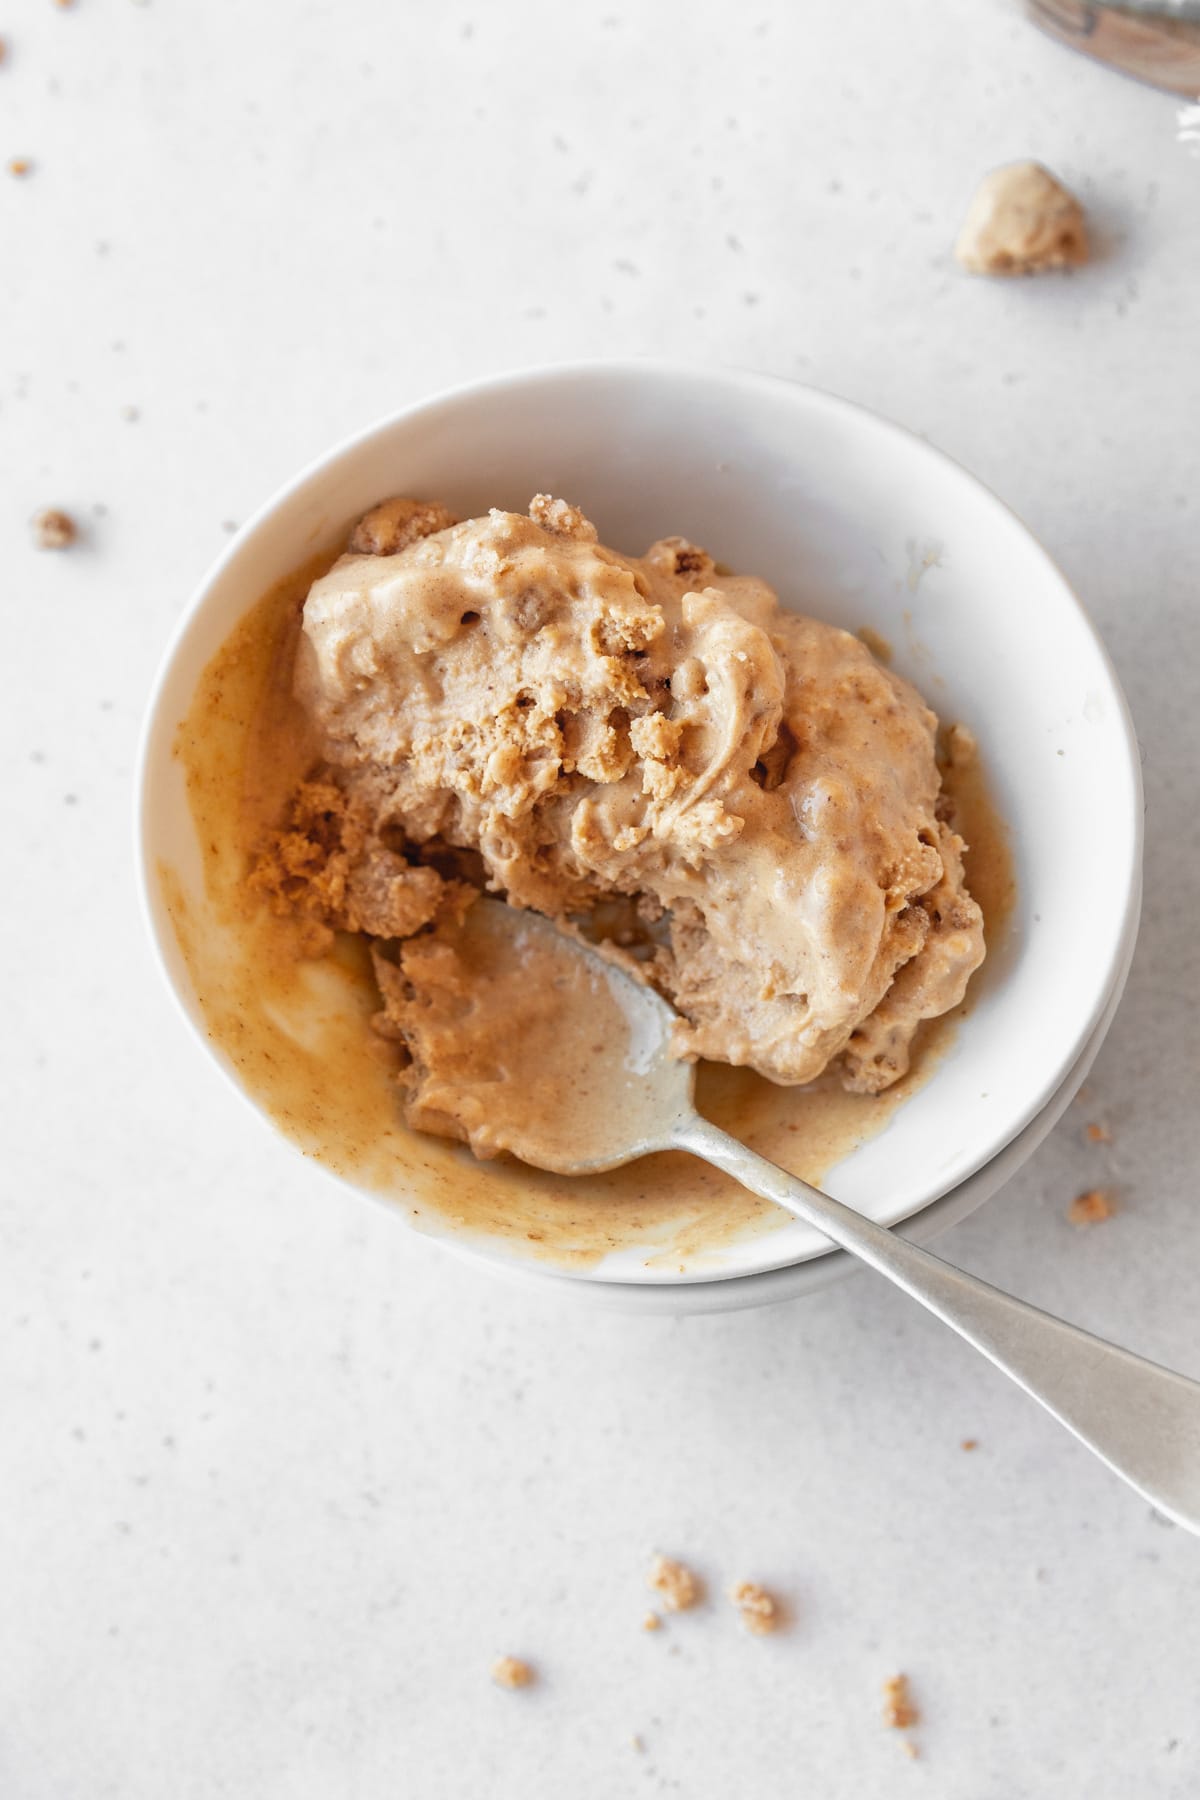
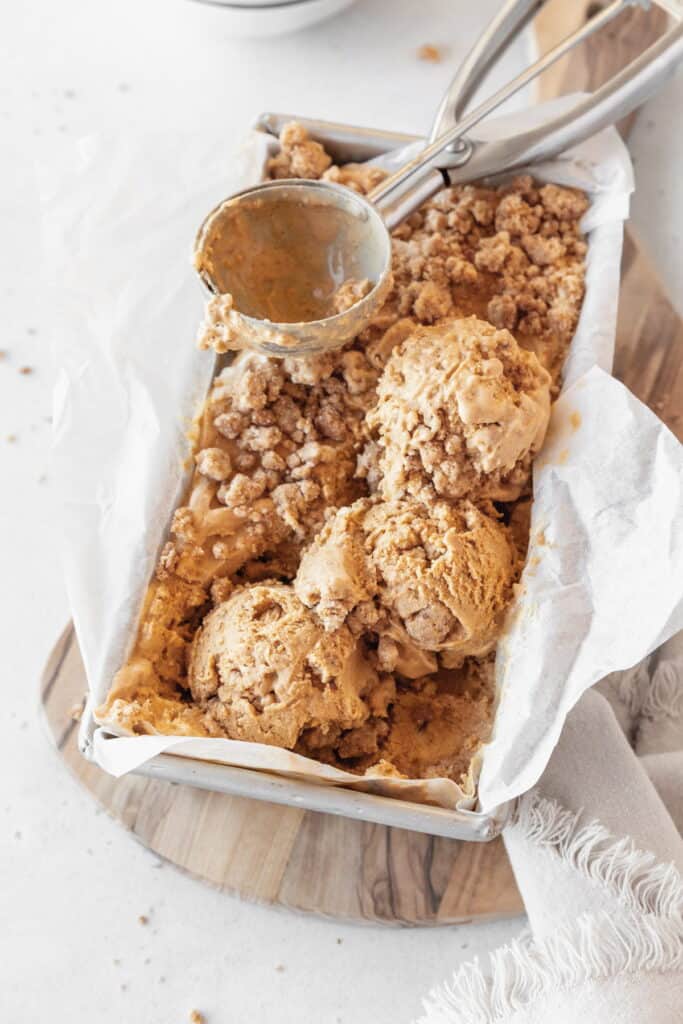
Step 6: Scoop & Enjoy!
Optional Variations & Dietary Adaptations
As much as I’m obsessed with this pumpkin cheesecake ice cream recipe, there are plenty of ways you can make it your own. Here are a few ideas to get you started:
- Gluten-Free - Use certified GF graham crackers and flour to make the graham cracker swirl. Make sure to let the mixture rehydrate and rest for 30 minutes prior to baking to avoid a grainy consistency. If you’re using the store-bought cheesecake shortcut, make sure it’s also gluten-free.
- Dairy-Free/Vegan - Swap whole milk for the full-fat plant-based milk of your choice. I suggest using a barista blend and opting for at least 50% being a higher-protein option like soy milk. Use vegan cream cheese. Trade vegan whipping cream or coconut cream in place of heavy cream. Finally, swap honey for molasses or maple and use the plant-based butter of your choice.
- Corn-Free - Both tapioca starch and tapioca syrup can be used in equal proportions to cornstarch and corn syrup.
- Sweet Potato Pie Ice Cream - For another equally delightful twist on favorite holiday desserts, use an equal amount of sweet potato purée in place of pumpkin purée. Instead of a cheesecake swirl, torch mini marshmallows with a kitchen torch (or use the broiler) and fold those in, instead. You’re welcome to either keep the graham swirl for a pie vibe, or omit it for a fun alternative to sweet potato casserole.
Expert Tips
- For perfect swirls, don’t add your mix-ins while the ice cream is churning. The trick is to pack the ice cream and inclusions in layers!
- To prevent ice crystals from forming, press a piece of parchment or plastic wrap directly on top of the ice cream before putting a lid on the container. Also, remember that homemade ice cream doesn’t have the preservatives that store-bought ice cream has, so it’s best consumed within 2 weeks of churning.
- For the perfect scoop, let your ice cream container hang out at room temperature for 5-10 minutes. Homemade ice cream tends to freeze firmer than store-bought, both on account of not using commercial equipment and not using certain emulsifiers and artificial ingredients. Giving it a few minutes to soften will yield the tastiest results!
- For the perfect scoop, continued. Not gonna like: this ice cream scoop is AMAZING. It’s a splurge, but well worth it if you make ice cream at home a lot. It’s what the pros use! The secret is the liquid in the center, which uses the heat from your hand to keep the scoop part warm, which helps to cut through the ice cream like a hot knife through butter.
- Use a bigger pot than you think you need. There’s not even 4 cups of liquid that goes into the ice cream base, which makes it look like it could easily fit in a 2-quart pot. THIS IS A VISUAL LIE. Once the milk and cream start boiling, they expand a LOT. Please, do yourself and your cooktop a favor — use a 4-quart pot or larger.
- To chill the ice cream base faster, pour the ice cream base into a gallon-sized zip-top bag, remove the excess air, zip the top, then submerge the ice cream base in an ice bath. It’ll cool enough to churn in just 20-30 minutes if you agitate it every few minutes. Since zip-top bags are sometimes prone to user error, I suggest keeping the sealed top of the bag out of the water.
Frequently Asked Questions
This recipe is modeled after Ben & Jerry’s delicious pumpkin cheesecake ice cream, but there are plenty of companies (and people!) of some version of this ice cream. Now, you get to count yourself among them! 😋
No! If you’re using pumpkin pie spice, you’re likely adding nutmeg — which is toxic to doggoes. If you want to treat your 4-legged fur baby with some pumpkin spice love, make these pumpkin peanut butter dog treats instead!
More Egg-Free Ice Cream Ideas
Pumpkin Cheesecake Ice Cream (Ben & Jerry's Copycat)
Ingredients
- 2 C Whole Milk
- 1 Tbsp + 1 tsp Cornstarch or Tapioca Starch
- ¾ C Pumpkin Purée
- 1 ½ oz Cream Cheese room temp
- 1 tsp Kosher Salt
- ¼ C Honey
- 1 ¼ C Heavy Cream or powdered heavy cream, vegan whipping cream
- ⅔ C Brown Sugar
- 2 tablespoon Light Corn Syrup
- 1 tablespoon Pumpkin Pie Spice
Graham Crust Swirl
- ½ C Graham Crackers about a half sleeve, finely ground. Gluten-free works!
- 6 tablespoon Flour or AP gluten-free flour blend.
- 1 teaspoon Cornstarch or Tapioca Starch, Potato Starch, Arrowroot Powder
- ¼ C Sugar
- 1 teaspoon Kosher Salt
- 4 tablespoon Butter
Cream Cheese Swirl
- ½ C Cream Cheese Fruit Dip or use 1 slice of store-bought cheesecake crumbled into bits
Instructions
Ice Cream Base
- Make a slurry with the cornstarch and about 2 tablespoons of the milk. Set aside.
- Whisk the cream cheese and salt in a bowl until smooth.
- Add the pumpkin purée and honey to the cream cheese mixture. Whisk again until smooth. Set aside.
- Add the remaining milk, plus the cream, sugar, corn syrup, and pumpkin pie spice in a 4-quart or larger saucepan.*
- Bring to a rolling boil over med-high heat. Boil for 4 minutes.
- Remove from heat and add the cornstarch slurry. Whisk to combine, then return to heat.
- Bring the mixture back to a boil and cook, stirring frequently, until thickened — about 1-2 minutes.
- Whisk the hot milk mixture into the pumpkin cream cheese mixture. Either chill the bowl in an ice bath, or refrigerate the mixture for about 6 hours.
Graham Swirl
- While the ice cream base chills, make the gravel. Preheat the oven to 275F. Line a small, quarter-baking sheet with parchment. (you can use a regular-sized baking sheet if needed, but only use the middle half.)
- Mix the graham crumbs, flour, cornstarch, sugar, and salt in a bowl.
- Add the melted butter and stir until all the dry ingredients are moistened and the mixture looks like wet sand.
- Pour the crumb mixture onto the prepared baking sheet and spread it out evenly.
- Bake for 10 minutes.
- Remove the pan from the oven and toss with a metal spatula. Cut the mixture into about ¼-inch pieces.
- Return to the oven and bake for about 10 more minutes, or until deep golden brown.
- Remove from the oven and let cool completely.
Assemble.
- Spin ice cream according to manufacturer instructions.
- Pack about ¼ of the mixture into your freezer-safe container. Top with ¼ each of the graham cracker swirl and dollop about 2 tablespoons of the cream cheese mixture in teaspoons across the top.
- Repeat the packing process, adding more ice cream and inclusions until you've used them all.
- Freeze the ice cream for at least 4 hours in the coldest part of your freezer.
- Scoop and enjoy!
Notes
- For perfect swirls, don’t add your mix-ins while the ice cream is churning. The trick is to pack the ice cream and inclusions in layers!
- To prevent ice crystals from forming, press a piece of parchment or plastic wrap directly on top of the ice cream before putting a lid on the container. Also, remember that homemade ice cream doesn’t have the preservatives that store-bought ice cream has, so it’s best consumed within 2 weeks of churning.
- For the perfect scoop, let your ice cream container hang out at room temperature for 5-10 minutes.
- For the perfect scoop, continued. Not gonna like: this ice cream scoop is AMAZING. It’s definitely a splurge, but well worth it if you make ice cream at home a lot.
- Use a bigger pot than you think you need. There’s not even 4 cups of liquid that goes into the ice cream base, which makes it look like it could easily fit in a 2-quart pot. THIS IS A VISUAL LIE. Once the milk and cream start boiling, they expand a LOT. Please, do yourself and your cooktop a favor — use a 4-quart pot or larger.
- To chill the ice cream base faster, pour the ice cream base into a gallon-sized zip-top bag, remove the excess air, zip the top, then submerge the ice cream base in an ice bath. It’ll cool enough to churn in just 20-30 minutes if you agitate it every few minutes. Since zip-top bags are sometimes prone to user error, I suggest keeping the sealed top of the bag out of the water.
- Gluten-Free - Use certified GF graham crackers and flour to make the graham cracker swirl. Make sure to let the mixture rehydrate and rest for 30 minutes prior to baking to avoid a grainy consistency. If you’re using the store-bought cheesecake shortcut, make sure it’s also gluten-free.
- Dairy-Free/Vegan - Swap whole milk for the full-fat plant-based milk of your choice. I suggest using a barista blend and opting for at least 50% being a higher-protein option like soy milk. Use vegan whipping cream or coconut cream in place of heavy cream and vegan cream cheese. Finally, swap honey for molasses or maple and use the plant-based butter of your choice.
- Corn-Free - Both tapioca starch and tapioca syrup can be used in equal proportions to cornstarch and corn syrup, respectively.
- Sweet Potato Pie Ice Cream - For another equally delightful twist on favorite holiday desserts, use sweet potato purée in place of pumpkin purée. Instead of a cheesecake swirl, torch mini marshmallows with a kitchen torch (or use the broiler) and fold those in, instead. You’re welcome to either keep the graham swirl for a pie vibe, or omit it for a fun alternative to sweet potato casserole.

Comments
No Comments